25+ Kumihimo Jewelry Patterns and Tutorials
Learn how fun kumihimo braiding is with these fantastic kumihimo patterns!

Kumihimo braiding is taking the jewelry-making world by storm! Hailing from Japan, kumihimo is a braiding technique that is done by knotting cords together to create a chunky, textured weave. This collection of 25+ Kumihimo Jewelry Patterns and Tutorials will teach you everything you need to know to start braiding your own beautiful kumihimo jewelry!
Have you tried kumihimo braiding yet? If you've yet to learn how to kumihimo braid and are looking to see what all the fuss is about, you've come to the right place. It seems that suddenly everyone has been bitten by the kumihimo braiding bug, and no one can get enough new kumihimo patterns and projects to try.
From 8-cord to 12-cord kumihimo patterns, from beaded and embellished kumihimo to simple cord kumihimo, from round kumihimo braiding to flat kumihimo braiding, this collection of kumihimo patterns and tutorials covers it all. You'll find fabulous kumihimo patterns for bracelets as well as necklaces and designs to suit any style. Plus, if you're completely new to kumihimo braiding and need to cover the basics first, this collection includes beginner tips and tricks, design ideas, finishing techniques, and more.
Whether you are getting started with your first kumihimo bracelet, or looking for more advanced patterns, you will find the DIY jewelry project you are looking for. This is the most comprehensive collection of kumihimo patterns and tutorials on the Web, so by the time you complete these projects, you'll be a kumihimo pro!
Join our jewelry making family! Sign up for our free eNewsletters today!
Table of Contents
What is Kumihimo?

Kumihimo is a Japanese braiding technique that is used to make long decorative strands. Literally translated, it means “gathered threads”. This technique is used to gather together cords into stunning, intricate braiding designs.
Ancient samurai warriors used to decorate and hold their armor together using kumihimo cords. The obi, the belt of a kimono, was bound by an obijime. This was a cord of kumihimo! Today, kumihimo braiding is used worldwide in jewelry making, particularly necklaces and bracelets.
In the modern era, kumihimo braids are made by attaching threads of different colors to different points around a kumihimo disk. Originally, kumihimo patterns were made entirely by hand! These braids were strong, but most likely not as intricate looking as patterns we see today. You can add beads and charms to make kumihimo patterns more detailed and unique.

Simple yet intricate, braided patterns are a classic fashion motif for a reason, and there are so many ways to work this weave into your accessories. Embrace the braid with these 40+ Braided Jewelry Patterns: How to Kumihimo, Fishtail Braid, Box Braid and More
Beginner Kumihimo Tips and Tutorials
If you read the title of this article and thought, "kumi-what-o?", then you should start here with these beginner kumihimo tutorials. These helpful jewelry hints and tips will serve as a jewelry crash course to get you started on the right foot. Plus, these tips and tricks are some great refreshers for you before you go jumping into one of the more complex patterns. Kumihimo 101 is now in session! You'll see that learning how to kumihimo is fun once you get the hang of it!
How to Finish a Kumihimo Bracelet
Once you've mastered the basics of kumihimo bracelet, you'll need to learn how to finish a kumihimo bracelet.
Kumihimo Tips and Tricks for Beginners
Learn the best tips and tricks that all kumihimo beginners should know.
How to Create Different Color Patterns with 8-Strand Kumihimo Braiding
One of the best parts of kumihimo braiding is choosing a fun color scheme!
Want more fun braiding and knotted jewelry patterns? Take a peek at these awesome friendship bracelets that you are going to fall in love with!21+ Macrame Friendship Bracelets
How to Start a Kumihimo Project

1. Start off by cutting your thread. Your 8 threads should be 4x your desired finished length plus a few inches. It's always better to have some extra thread you can cut later than to run out!
2. Line up the threads and tie the ends of all of them into one big knot. Put the knot through the center of your kumihimo disk and hold the knot in place as you attach the threads into the slots.
3. It helps to have two different color threads. Let’s say that four strands are red and four strands are blue. Take 2 red strands and put them in the slots next to the dot at the top of the circle.
4. With the other 2 red threads, line them up directly across/180 degrees from the dot at the top of the disk. Put them in the slots at the bottom of the disk.
5. Take the 2 blue strands that are closest to the right side of the disk. Line them up to the dot that is at the 3 o’clock mark of the disk. This should be equally distant from the red strands at the top and bottom. Put them in the slots.
6. Taking the last 2 blue strands, line them up to the dot that is directly opposite of the other two blue strands. This should be at the 9 o’clock mark of the disk, and equally distant from the red strands at the top and bottom of the disk. Put them in the slots.
7. Tighten the cords and readjust the knot at the back to make sure it’s at the center of the disk. Attaching some sort of weight to the knot will keep it in place. Now you're ready to begin kumihimo braiding!
Basic Cord Kumihimo Patterns
Once you've covered the basics and your kumihimo disk is ready to go, start here with some simple cord kumihimo patterns. Before you delve into working with beads and embellishment, get the hang of basic braiding with these simple cord projects. If you want to learn how to kumihimo, these patterns will help you practice. You'll find a variety of kumihimo braiding patterns here, including both flat and round kumihimo, 8-strand and 12-strand kumihimo, and dual-color and multi-color designs.
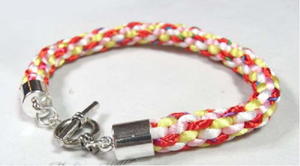
8-Cord Kumihimo Bracelet Tutorial
All you need to create a beautiful 8-cord Kumihimo braid is a Kumihimo disk, eight strands of rattail cord, and this pattern!
Ready to test out the Kumihimo braiding technique? This pattern is a great place for beginners to start!
This interesting variation on the basic Kumihimo braid is created with a square braiding disk.
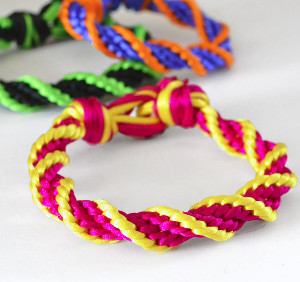
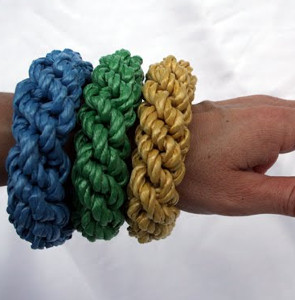
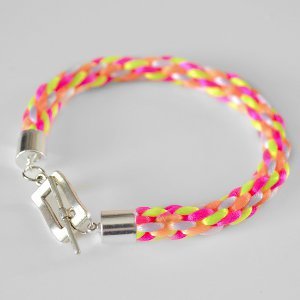
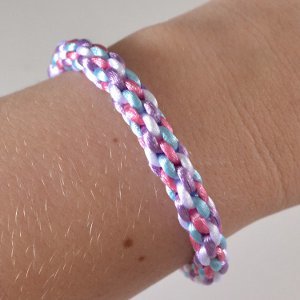
Kumihimo 12-Strand Spiral Bracelet
Are eight strands of cord not enough? Bigger is better with the 12-strand Kumihimo spiral.
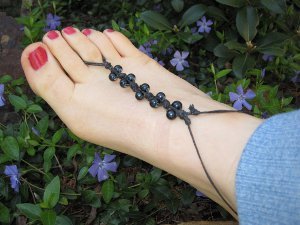
By adding beads, you can turn a simple Kumihimo braid into an elegant piece of jewelry.
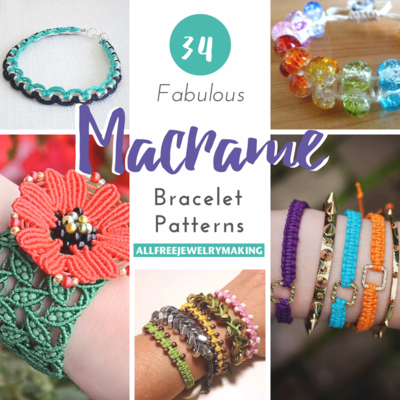
Do you like these braided DIY jewelry projects? If you do, you should check out this collection that has more fabulous and beautiful braiding projects!34 Fabulous Macrame Bracelet Patterns
Beaded and Embellished Kumihimo Patterns
So you've mastered all the basics and are ready to try your hand at embellished kumihimo braiding? This list of beaded kumihimo patterns should help to satiate your kumihimo cravings. Try adding beads into your kumihimo braiding, incorporating metal disks, or even braiding right over chunky wood beads for a totally unique effect! These kumihimo patterns with beads are a fabulous way to expand your skills and create unique DIY jewelry pieces.
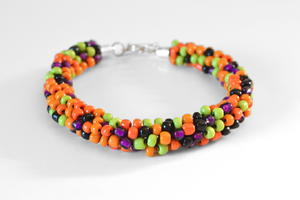
Boho Mixed Bead Kumihimo Bracelet
The assortment of mixed beads in this kumihimo bracelet pattern creates a boho-chic design any fashionista would love to wear.

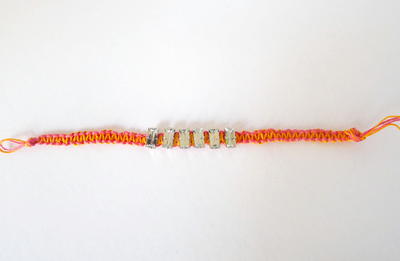
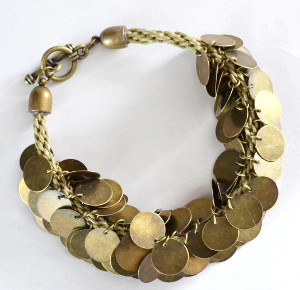
Beaded and Bejeweled Kumihimo Bracelet
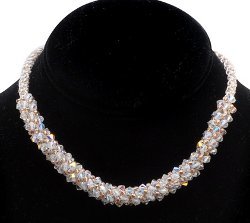
Kumihimo doesn't have to be casual! Use seed beads to upgrade a basic Kumihimo braid.
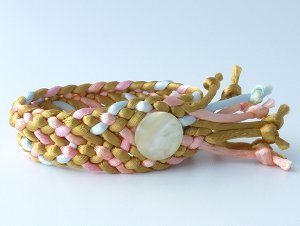
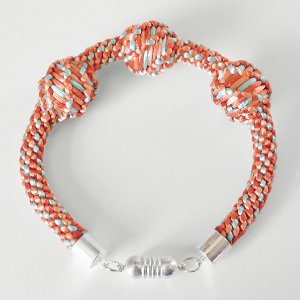
Tie a beaded Kumihimo braid into a knot to add a chic twist on the classic technique.
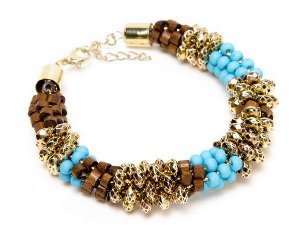
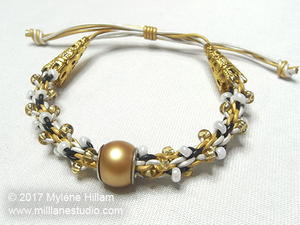
Get ready to dance the night away! Golden coin beads add an exotic flair to this bracelet.
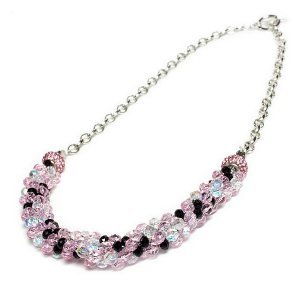
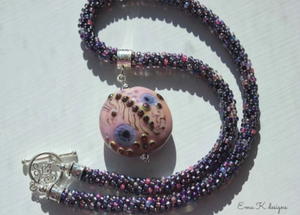
Briella Pink Kumihimo Necklace
Kumihimo isn't just for bracelets! Use a beaded Kumihimo braid and chain to create an unexpected and elegant necklace.
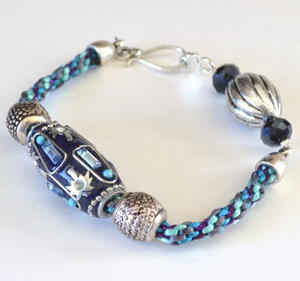
How to Kumihimo Braid Over Big Beads
Learn how to incorporate chunky beads into your Kumihimo braids for a fresh take on the traditional Kumihimo technique.
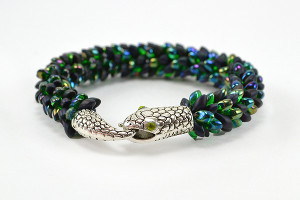
Sleek Magatama seed beads and slithery snake-inspired findings create a seriously stylish bracelet.
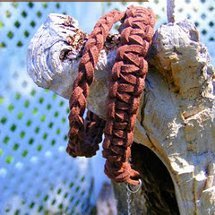
Beaded Leather Kumihimo Bracelet with Sliding Knot
Learn how to make a braid look very classy just by swapping in leather cord for rattail and adding beads.
Advanced Kumihimo Braiding Patterns
Now that you've practiced this beautiful braiding technique, you can move on to the intermediate and advanced kumihimo bracelets and necklaces! These are top of the line jewelry patterns that you will fall in love with. They look as if not more stunning than expensive pieces at department stores, with the added bonus of being more affordable! These kumihimo patterns are perfect for any special occasion and especially as unique DIY gifts.

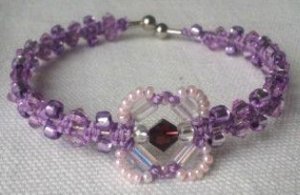
Wedded Bliss Beaded Kumihimo Necklace
You don't need to be a bride to appreciate this swoon-worthy necklace.

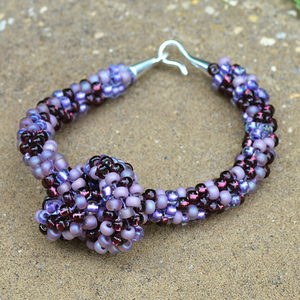
Perpetual Purple Kumihimo Necklace Tutorial
Purple lovers rejoice! No one will believe you made this perfectly purple necklace yourself.
How to Finish a Kumihimo Braid

The most basic and popular way to finish a Kumihimo project is to bind it with a piece of thread or cord and to glue it.
1. Make sure you have at least half an inch of kumihimo braid at the end, without any beading.
2. Cut a piece of thread or cord about 6 inches long.
3. Wrap it tightly around the braid end without beads several times and secure with a square knot.
4. Cover this knot with a few drops of glue to make it extra secure.
5. After the glue dries, trim the excess cord off the end to make sure it can fit inside your end cap, end cone, or magnetic clasp.
6. Attach an end cap, end cone, or magnetic clasp to the end of the braid to finish!
Find more kumihimo patterns, plus fabulous macrame and hemp jewelry patterns, in this ultimate collection filled with over 100 more projects!
What questions do you have about kumihimo?
Your Recently Viewed Projects
Thanks for your comment. Don't forget to share!
mulberrygalprinces s
Jun 18, 2017
Holy smoke yet another new technique I wish to learn. I see these all over, in magazines, fashion shows, models wearing them and I wondered what they were and how to make them. Now you have answered both questions. Now to see if I can learn to do it. I am pretty good at picking up on ideas and instructions so why not give it a try? Thank you.
Report Inappropriate Comment
Are you sure you would like to report this comment? It will be flagged for our moderators to take action.
Thank you for taking the time to improve the content on our site.