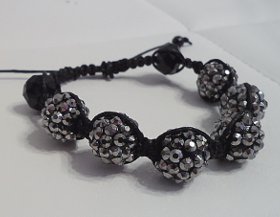
Blue Iris Kumihimo Bracelet
Make a stunning DIY beaded kumihimo bracelet!

If you are looking for a beautiful DIY bracelet to make next, then this midnight Blue Iris Kumihimo Bracelet is perfect for you. With easy-to-follow instructions, this DIY jewelry tutorial teaches you how to make a bracelet by kumihimo braiding. Kumihimo patterns are elegant, intricate, and produce stunning jewelry pieces. If you want a bracelet that sparkles and shines with style, then this bracelet is for you. You will never want to take this chic and cool metallic bracelet off your wrists once you have made it.
Project TypeMake a Project
Bead TypeMiscellaneous
Time to CompleteIn an evening
Bead Project TypeBracelet

Materials List
- Round Nose Pliers
- Needle Nose Pliers
- Wire Cutters
- Metallic Blue Cord (x1)
- Kumihimo Bobbins (x1)
- Metallic Blue Rondelles (x1)
- Kumihimo Round Disc (x1)
- Silver Kumihimo Findings Pack (x1)
- Kumihimo Beading Needle (x1)
- E6000® Glue (x1)
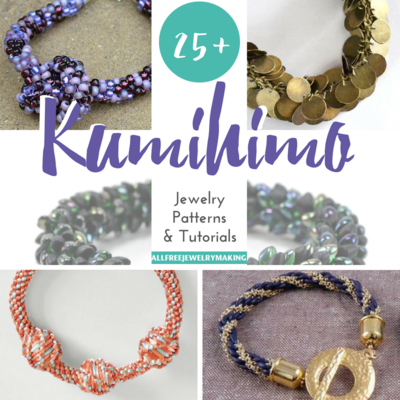
Want more kumihimo? Take a look at this comprehensive collection of kumihimo projects. From 8-cord kumihimo patterns to 12-cord kumihimo patterns, from beaded and embellished kumihimo to simple cord kumihimo, from round kumihimo braiding to flat kumihimo braiding, this collection of kumihimo patterns and tutorials covers it all.
Blue Iris Kumihimo Bracelet
Prima Bead Bracelet Instructions
-
Cut (4) 50” lengths of blue metallic cord.
-
Bring the cord ends together and fold in half. Bring the fold down through the center of the round disc.
-
Cut a scrap piece of cord (4+ inches) and tie it onto the center fold from step 2.
-
Align the cords as explained in the “Beaded Kumihimo” instruction booklet that came with the round disc
-
Using the big eye beading needle, thread (30) metallic beads onto each strand. This makes an 8” bracelet with cord ends. Use less or more beads on each of the eight cords to decrease or increase the overall length.
-
Wind each of the eight cords (with beads) onto a bobbin and close.
-
Follow the beaded instructions that came with the disc. Braid the cord 1/2” before adding the beads. This section will be inserted into the clasp.
-
Braid a 1/4” tail after all of the beads have been braided in. Remove the cords from the bobbins and from the disc and tie them into a tight single knot. Remove the scrap cord from the other end.
-
Trim the excess cord. Next apply glue to the ends of the cords and slide the cord ends on. Allow the glue to dry according to manufacturer instructions (2+ hours).
Your Recently Viewed Projects
Thanks for your comment. Don't forget to share!
Marilyn B
Feb 11, 2017
This is a beautiful bracelet. Had anyone made this? I am wondering if the cord ends could be sealed with a flame like paracord, in addition to or instead of the glue? I think this is such a pretty look, thanks to giving such great instructions! I would love to make this in other colors or even with accent and blending color for some contrast!
carrma57 9641635
Oct 20, 2021
The glue is used to glue the unbeaded ends into the end caps. I make and sell kumihimo jewellery, you can't melt the cord into the end caps.
The Designing Peng uin
Sep 13, 2016
Vivid colour and a new skill make a great mix. I like chunky bracelets, wear them all the time and this one, when I finish it, will go beautifully with a couple of favourite blue outfits -- then to make one to wear with an olive green shirt and pants -- and that grey silk skirt and and and.... teaching me a new skill can be dangerous lol but thank you
Report Inappropriate Comment
Are you sure you would like to report this comment? It will be flagged for our moderators to take action.
Thank you for taking the time to improve the content on our site.