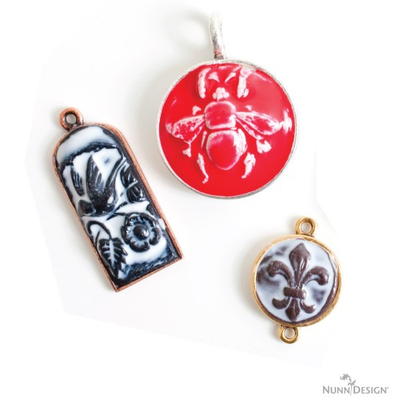
How to Make Sculpted Relief Clay Pendants

Learn How to Make Sculpted Relief Clay Pendants with this step-by-step tutorial from Nunn Design! Whether you're new to resin jewelry or a seasoned expert, these instructions will help you create gorgeous DIY jewelry that reflects your unique tastes and personality. These DIY pendants are easy to customize and make great gift ideas, so if you have a bridal shower, holiday, or birthday party coming up, check out this tutorial to learn a fun new technique for making homemade jewelry.
Project TypeLearn a Technique
Time to CompleteWeekend project

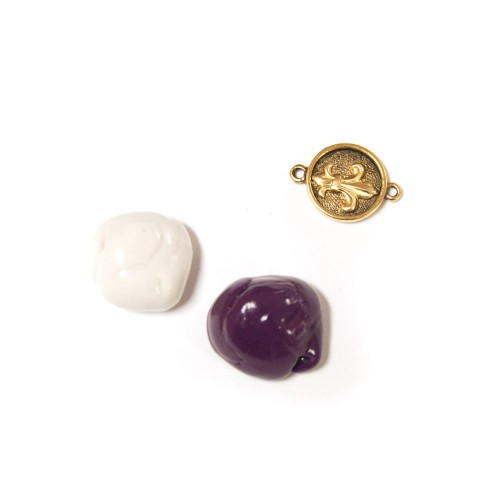
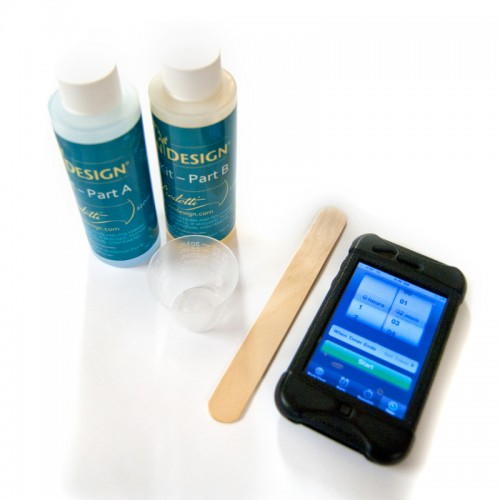
Materials List
- Easy Mold Silicone Putty
- Crystal Clay in Brown, Black or White
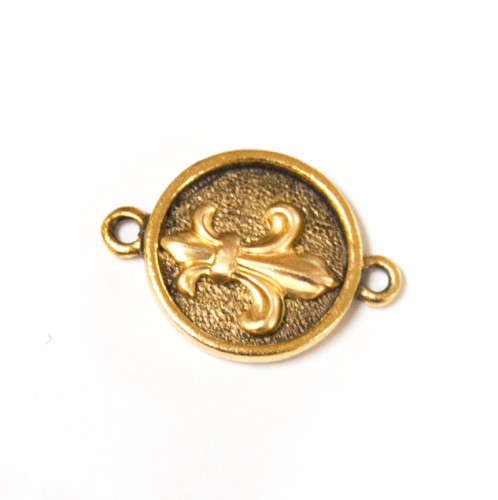
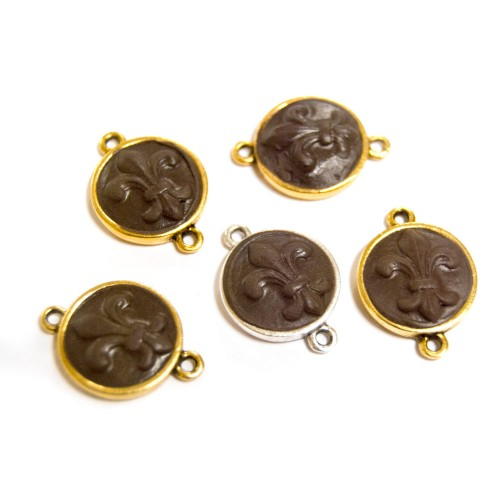
- Nunn Design Brass Stampings
- Nunn Design Bezels-Patera
- Craftin’ Cast Colorant
- Nunn Design Resin
- Wet-wipes
- Toothpicks
Making the Mold
-
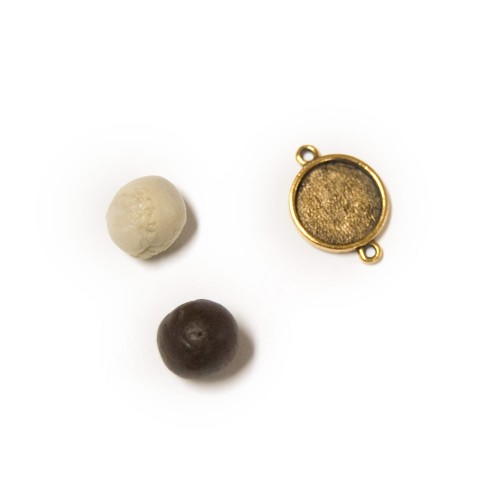
Prepare silicone putty. Pinch off two equal sized balls of Part A and B of the Silicone Putty. Be sure that the balls are large enough and will allow you to make an impression to fit your bezel.
-
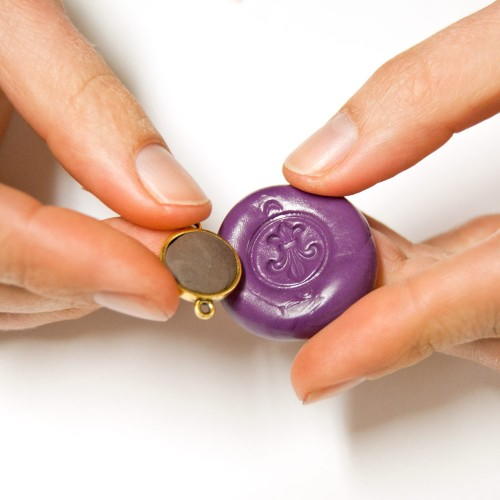
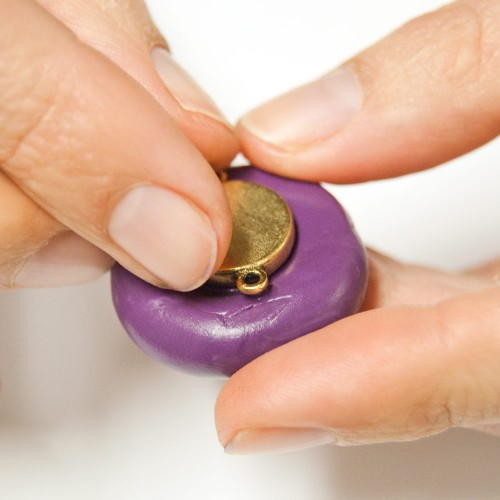
Choose brass stampings. Make sure that your Nunn Design Brass Stampings fit into the Nunn Design Bezel. If it doesn’t, that is fine, you will just want to decide how the image will be cropped to fit.
-
Mix the silicone putty. The Easy Mold Silicone Putty has a 3-minute working time before it begins to harden and not take the impression. Knead both part A and part B together until the putty is blended completely and has a uniform color. Tip: Getting the knack for mixing just the right amount will take some practice. You might mix too much or too little putty the first time.
-
Roll the fully mixed Silicone Putty into a round ball and flatten slightly. Keep in mind the size of the bezel that you will be working with. You will want your flattened ball to be larger in size than the outside rim of the bezel. Make sure the putty is smooth and not wrinkled.
-
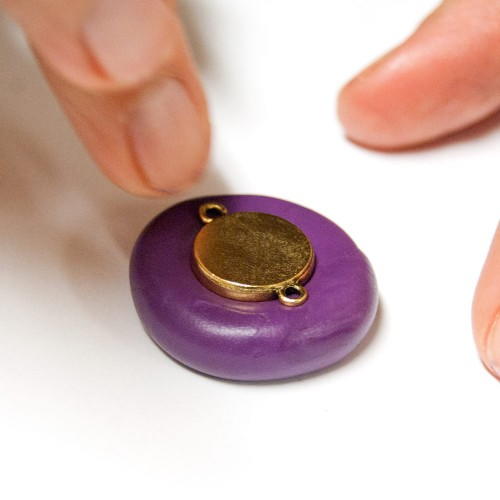
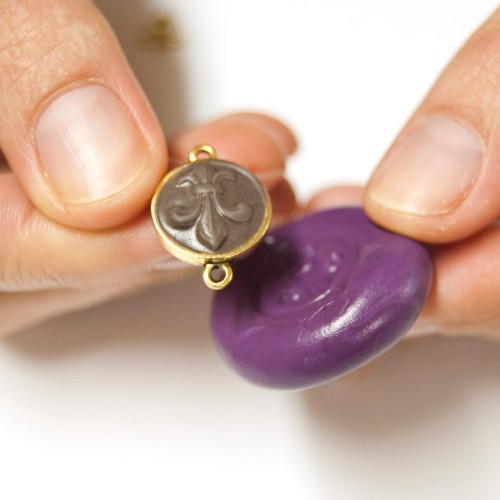
Press your bezel into the silicone putty to create an impression mark. This impression mark will help you see where to position your embellishment so it is centered (or off-center if that is the look you want).
-
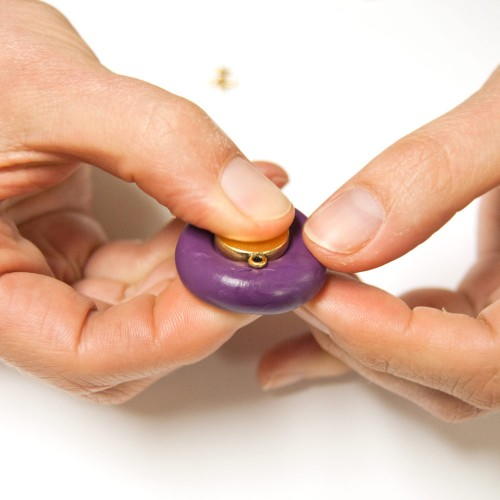
Repress bezel for registration. When you pushed in your embellishment, your first registration will push out and no longer be true. Using your bail area as the registration, repress your bezel into the clay. Let the Silicone Putty set for 25 minutes before removing the embellishment.

Creating the Sculpted Relief
-
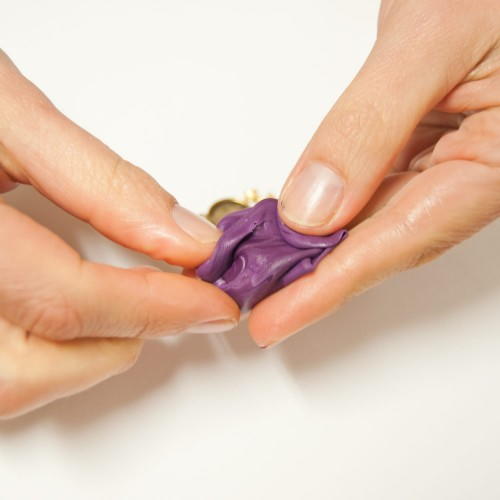
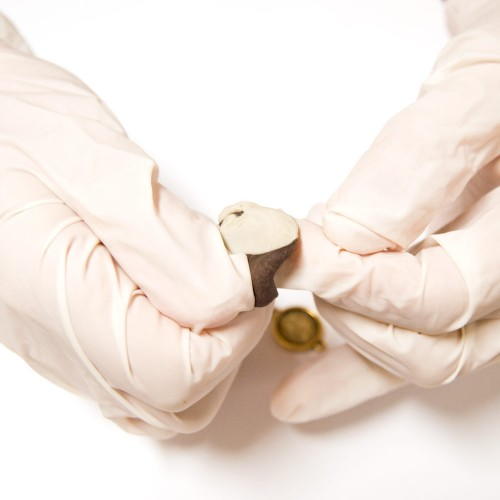
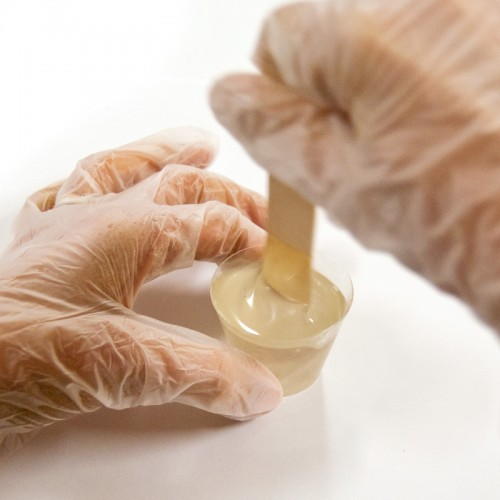
Mix the epoxy clay. Follow the manufacturer’s instructions for the handling and mixing of the Crystal Clay. While wearing gloves, pinch of two equal sized balls of Part A and Part B and blend together fully until the clay is no longer marbled and uniformed in color. You have approximately 90-120 minutes of working time before the clay starts to harden, so take your time.
-
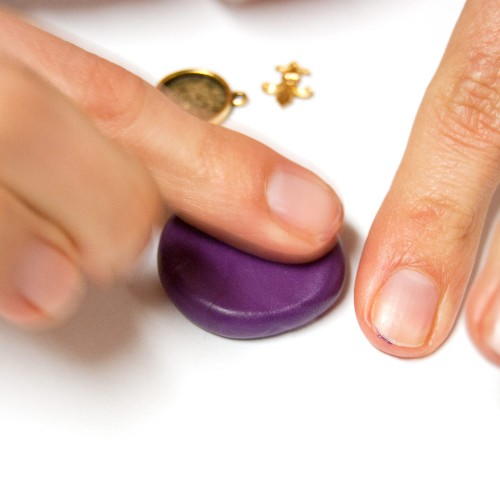
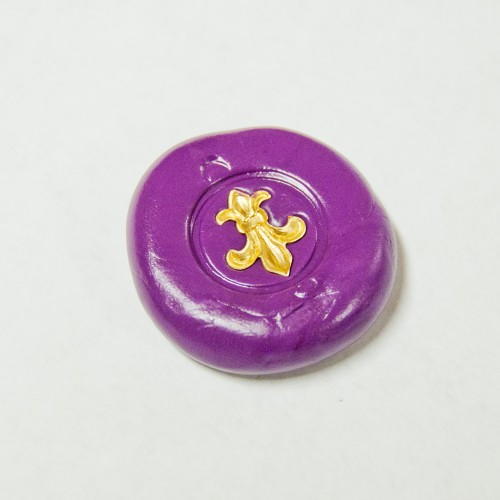
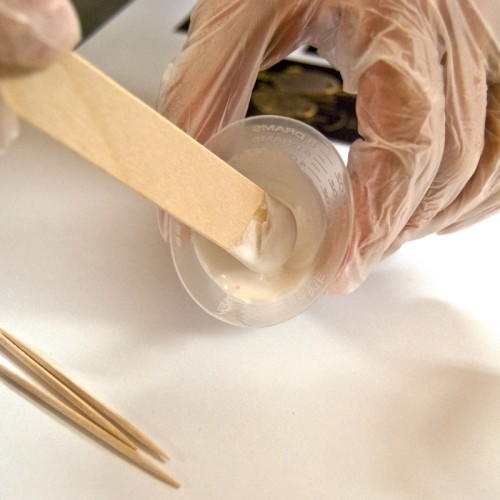
Once your clay is thoroughly mixed, roll it into a smooth round ball. I like it to be smooth because it prevents from having creases once the impression is made. Press the ball into the bezel and create an even coverage by patting down the clay with your fingers. If you put too much in, the clay will squish out onto the sides and you will have a little clean up to do. If you don’t put in enough, you might not get a good impression. Regardless, both are easy things to fix, so it might take a little experimenting to get it just right.
-
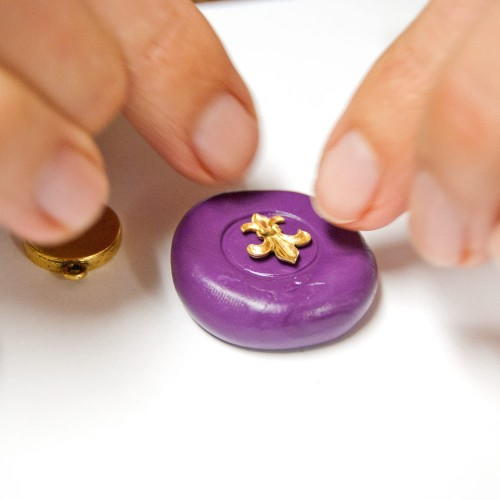
Now, let’s make an impression in our epoxy clay. Place your filled bezel over the silicone mold, using the round rim and loop for registration. I like to pick-up the mold and use my fingers to push from the top as well as the bottom to create the impressions.
-
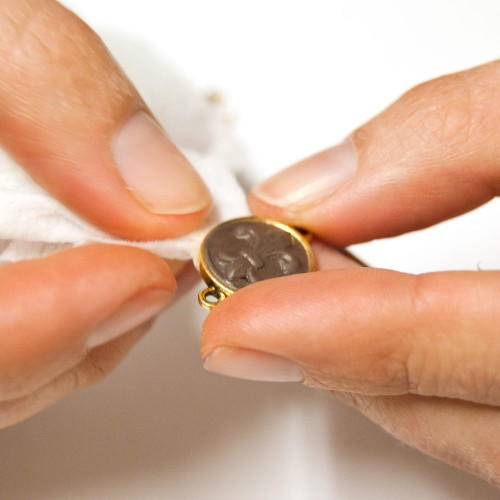
Using a wet-wipe, clean up any epoxy clay that might have gotten on the bezel. The epoxy clay hardens like cement, so cleaning it up now and being tidy as you go makes the process easier and the results so much nicer.
-
Allow the epoxy clay to dry for at least 12 hours, well that is what I (Becky Nunn) did, but the staff here at Nunn Design went straight on to pouring the colorized resin on the uncured epoxy clay. Both turned out just fine so use your best judgment!

Preparing the Colorized Resin
-
Preparing your work surface: Read the resin instructions for safety concerns regarding the Nunn Design Resin. When I work with resin, I always:
1. Place a large plastic bag over my work surface and tape it down.
2. I make sure I have ventilation in my work room.
3. I wear gloves.
4. I wear glasses (readers because I can’t see anymore. Plus it protects my eyes!).
5. I have a pile of wet wipes handy. -
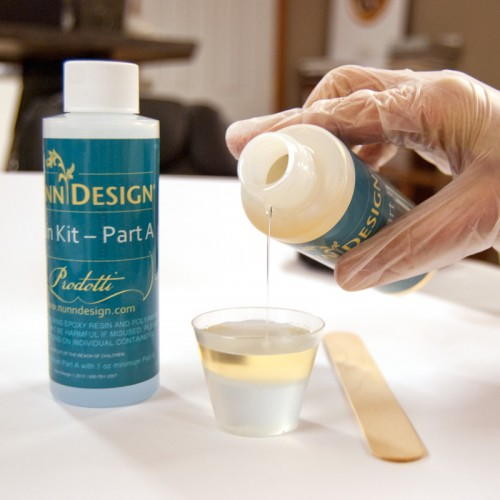
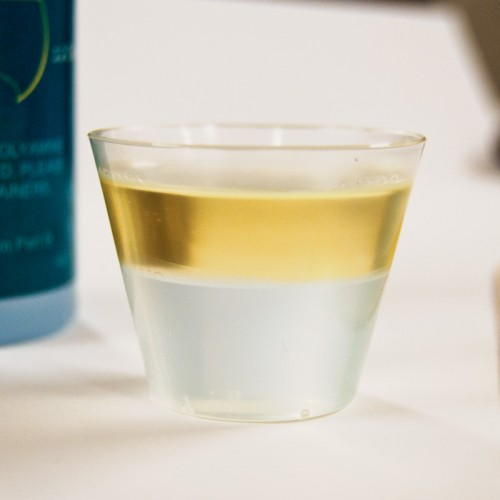
Mixing your resin: Place one cup (included in the Nunn Design Resin Kit) onto your table. For curing purposes, it is very important that the resin be an exact 1 to 1 ratio of Part A and Part B. I suggest getting your eyes level with the resin so you can see the lines on the measuring cup. Pour Part A of your resin kit up to the ½ fluid ounce mark on your measuring cup. Pour Part B of your resin kit into the same cup until it is filled to the 1 fluid ounce mark.
-
Set your timer for 2 minutes. Using the stir stick from your kit, slowly and carefully stir your resin scraping the sides as you stir. Stir for the full 2 minutes. After 2 minutes, scrape both sides of your stir stick on the edge of your resin filled cup. Set the mixture under a warm lamp for 5 minutes. This aids the air bubbles in the resin to rise to the surface and pop.
-
I tend to work in small area (typically my kitchen table), so I like to work on a surface that I can easily move around and not disturb. Place some business cards or some heavy card stock onto a cookie sheet, making it easy to transfer around the tags without getting any resin on your fingers. Lay your tags onto the business cards, keeping in mind that you will be covering them later with cups to prevent dust for getting on the surface of the uncured colorized resin.
-
After your resin has been under the lamp for 5 minutes, pour a small amount of the mixed resin into a measuring cup. Add in a couple drops of the Craftin’ Craft Opaque Pigment to give the resin color. If the resin isn’t as opaque as you would like, add in another drop of the Opaque Pigment. You can mix the full 1 fluid ounce measuring cup of resin if you want, but I transfer the resin into smaller cups because it is easier to stir and less messy to move around when less full. Tip: Be sure that the colorant does not equal more than 10% of your resin as having more than 10% could cause issues with curing!
Applying Resin onto Cured Sculpted Relief
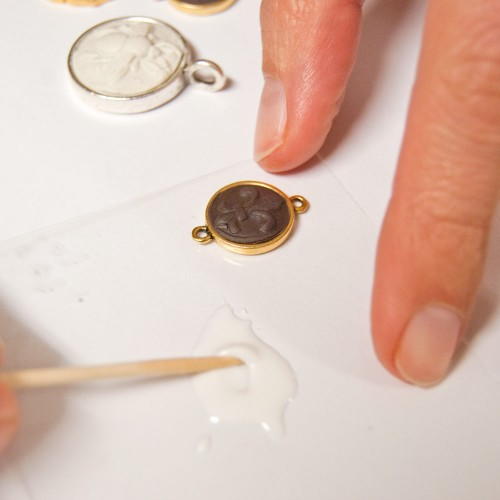
-
Pour a small amount of resin onto a small ziplock and use a toothpick to apply. The toothpick allows you to poke it down into the crevices.
-
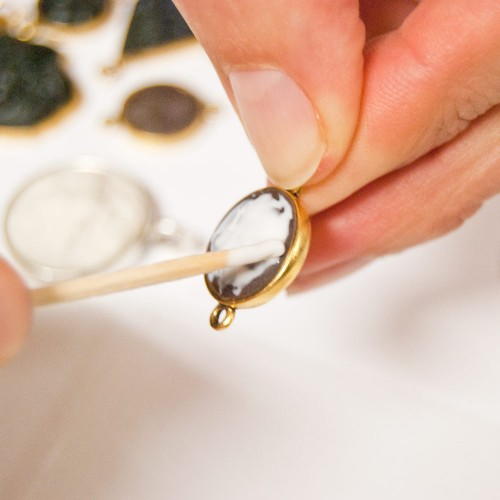
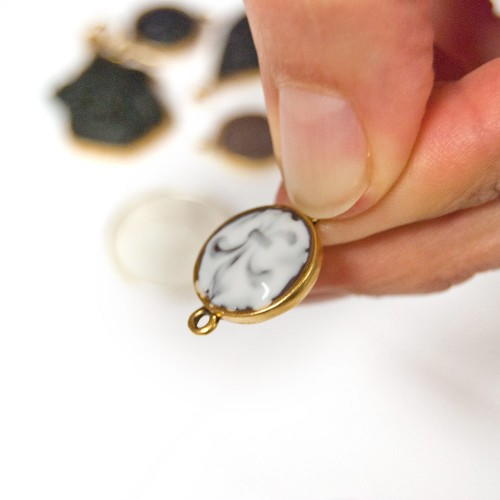
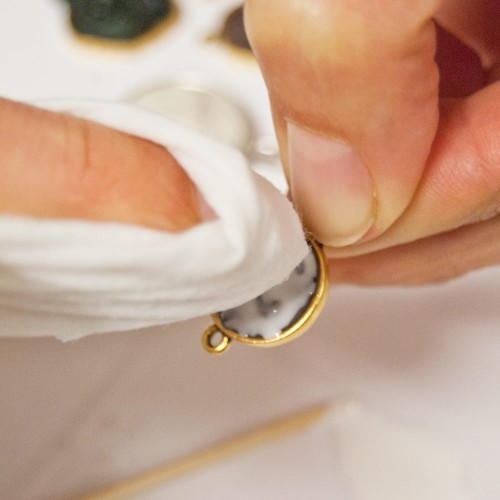
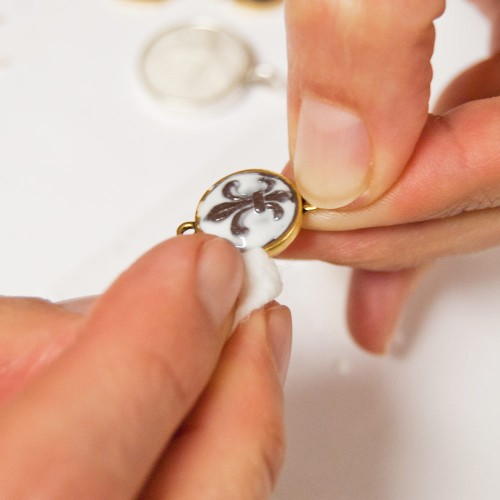
Using a wet-wipe, lightly brush off the surface of the sculpted relief. This will allow the color of the epoxy to show. Also use the wet-wipe to clean off any resin that might be on the sides of the bezel.
-
Let the resin dry for 12-14 hours. It will be dry to the touch, but resin continues to cure over the next 72 hours.
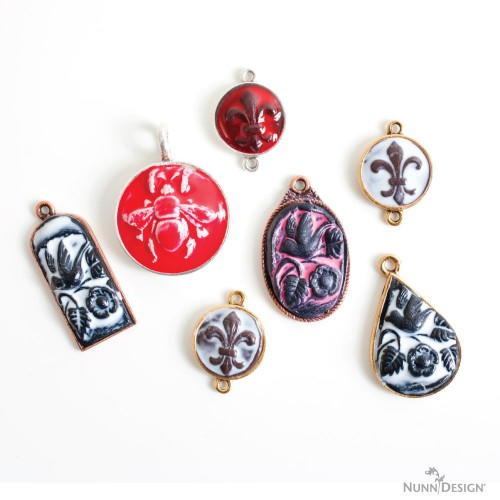
Assemble Your Jewelry!
Read NextFlora Bracelet Pattern