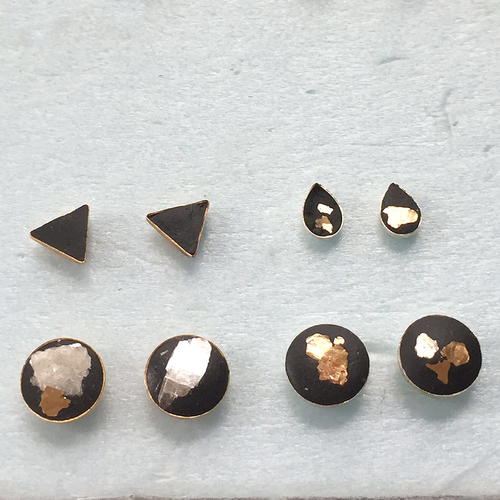
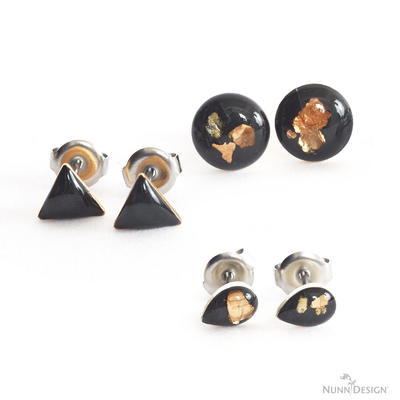
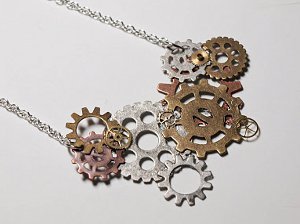
Gorgeous Gold Flake Resin Earrings

Learn how to make resin jewelry by creating these lovely and unique Gorgeous Gold Flake Resin Earrings. Resin jewelry making may seem intimidating, but with clear step-by-step photos, even jewelry makers with no resin experience can make this project. This tutorial uses oxidized bezels to create an antique look, which provides a cool contrast to the glamorous gold flake accents. The gold flake is applied over black crystal clay, which does not even have to dry before the resin is applied. If you are up for a fun jewelry making challenge, youll love this tutorial on how to make resin jewelry.
Project TypeMake a Project
Time to CompleteLonger than a weekend
Bead Project TypeEarrings

Materials List
- Nunn Design Earring Posts
- Crystal Clay - Black
- Nunn Design 2-Part Resin Kit
- Gold Flakes or Glitter Roxs
- Wet wipes
- Toothpicks
- Stir sticks
- Mixing Cups
- Business cards or glossy card stock
- Rubbing Alcohol
- Plastic bags
- Q-Tips
- Needle nose pliers
- Tweezers (optional)
Instructions
-
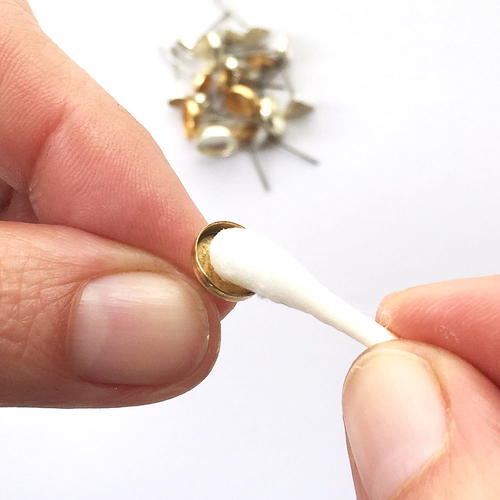
The Nunn Design Bezels are oxidized to provide the antique look to the precious metal plating. The oxidization, when it comes into contact with resin could change the color of the resin. To avoid this, clean the bezel thoroughly prior to applying the resin. Get the tip of a Q-Tip wet with rubbing alcohol and clean away any of the blackened oxidization, especially from the inside of the bezel.
-
Follow the manufacturer’s instructions for the handling and mixing of the black Crystal Clay. Crystal Clay is epoxy clay that air-dries. It sets in 2 hours and continues to cure 14-16 hours. There is no baking required, no shrinkage and in this tutorial, I don’t even let it dry before applying the resin!
-
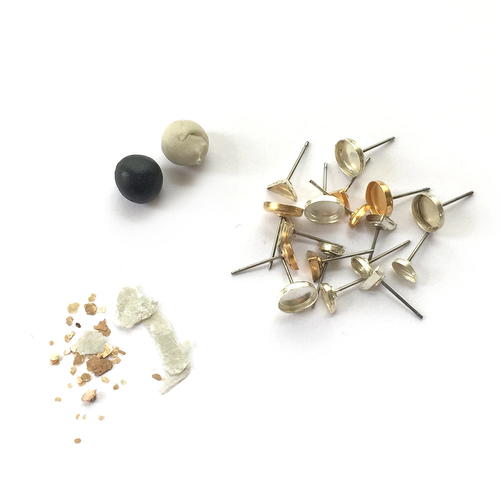
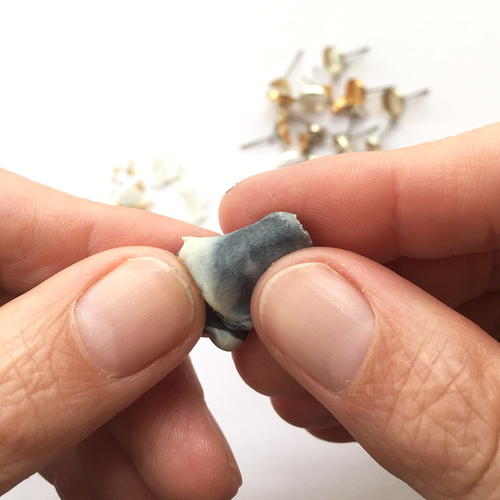
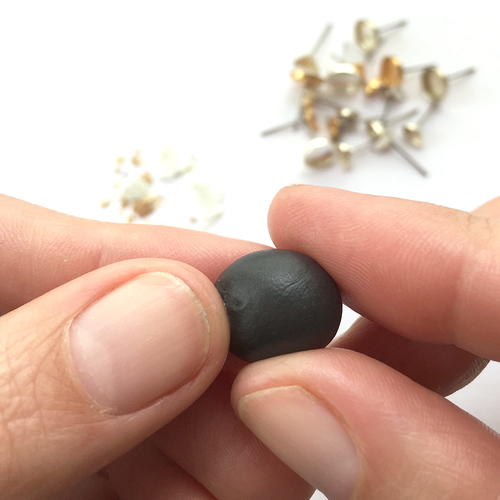
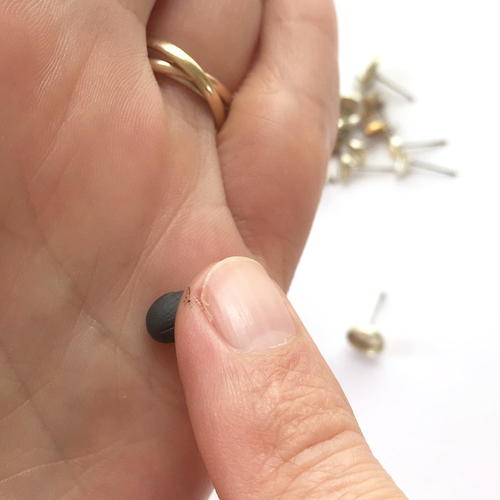
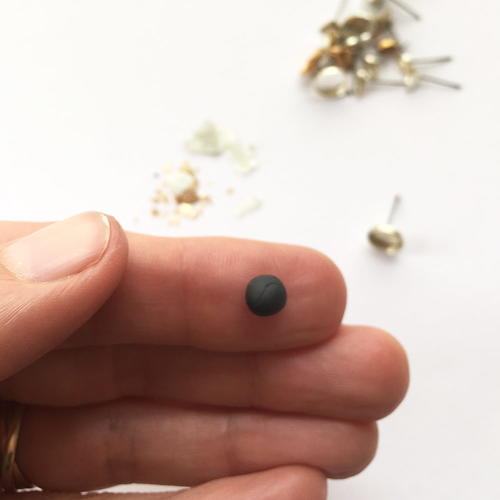
While wearing gloves, pinch off two equal sized balls of Part A and Part B and blend together fully until the clay is no longer marbled and uniform in color. You have approximately 90-120 minutes of working time before the clay starts to harden, so take your time. Once the clay is thoroughly mixed, remove your gloves to make it easier to work with the clay. For this tutorial, I mixed a small blueberry sized ball of both Part A and B of clay.
-
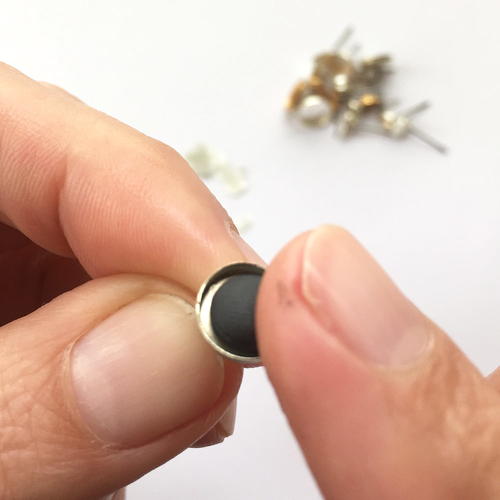
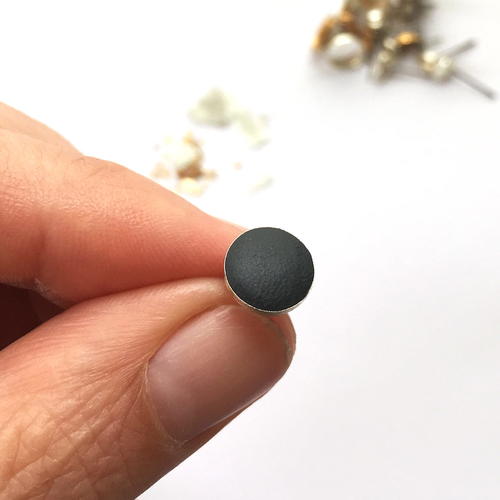
For each earring pinch off a very small ball of clay and roll it into a smooth ball in the palm of your hand. Press the ball into your bezel with your fingers to create an even flat smooth surface in the base of the earring.
-
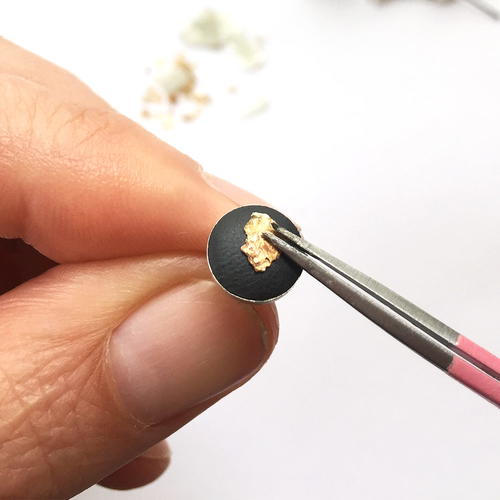
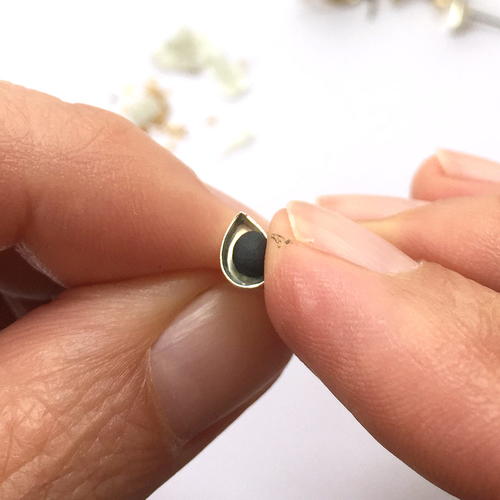
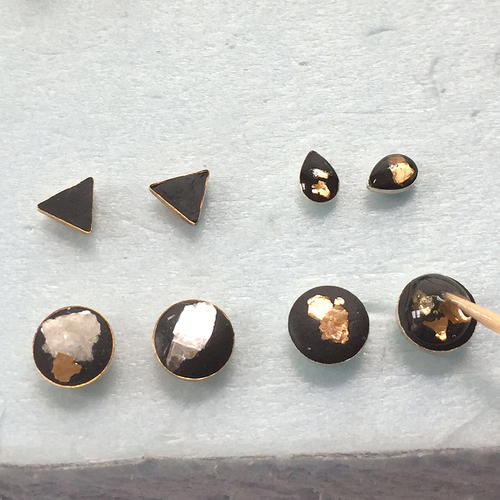
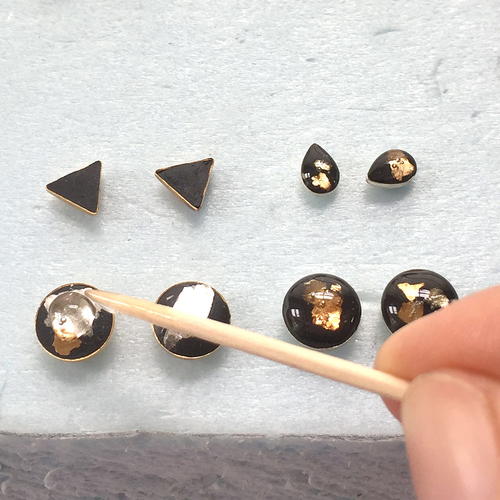
Use a toothpick or a pair of tweezers to pick up gold flakes and place them into the uncured wet Crystal Clay. Once you have the gold mica flakes in the position that you want, use your fingertips to press the flakes down into the clay.
-
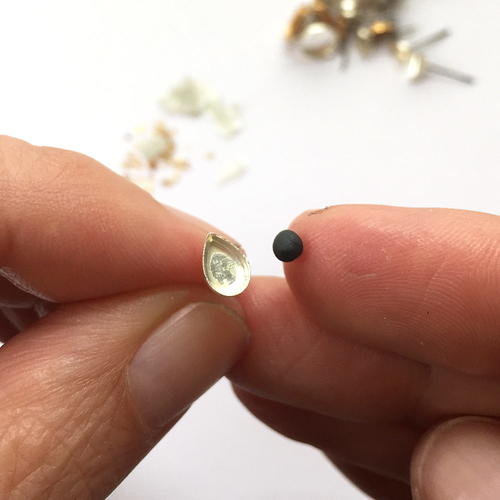
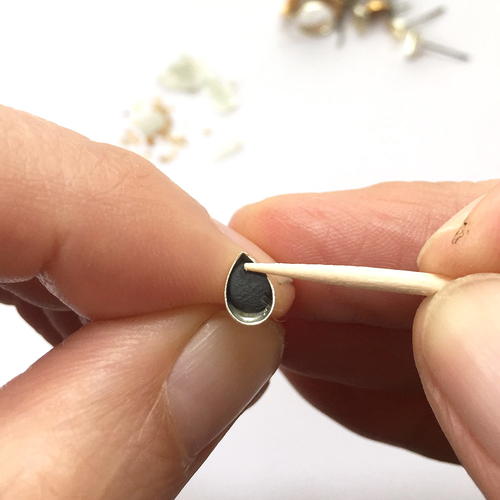
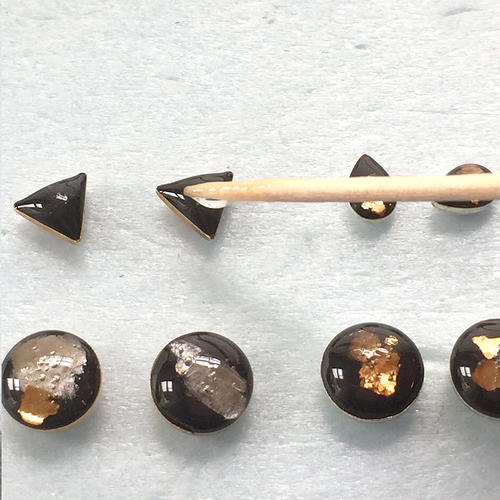
Repeat with other sizes of Bitsy Earring Posts. On the Drop and Triangle Shapes, use a toothpick to press the Crystal Clay up into the crevices.
-
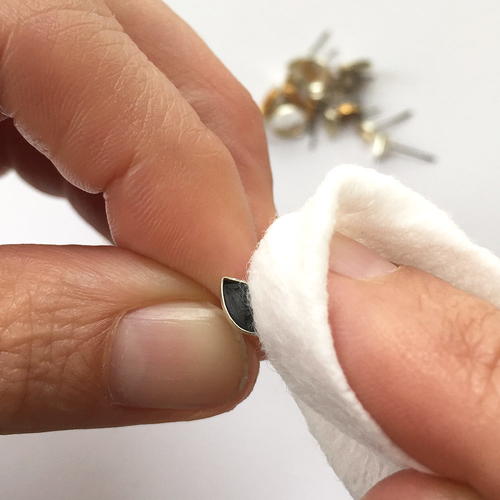
Once all the Bitsy Earring Bezels are filled and flush to the edge of the Bitsy Bezel, use a wet-wipe to clean away any excess clay from the sidewalls of the bezel.
-
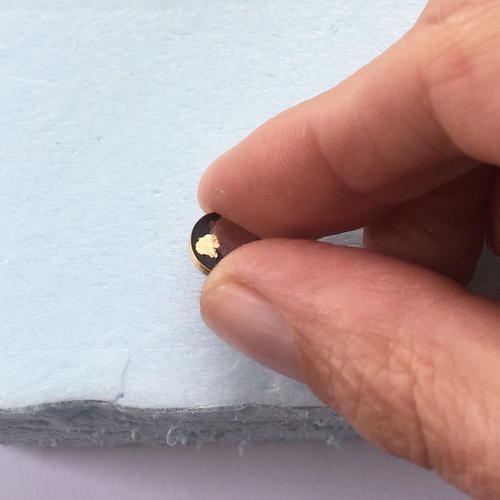
Create a flat surface where the posts of the earrings can poke through and be level. I used a piece of packaging to create this surface.
-
Read the resin instructions for safety concerns regarding the Nunn Design Resin.
When I work with resin, I always:- Place a large plastic bag over my work surface and tape it down.
- I make sure I have ventilation in my workroom.
- I wear gloves.
- I wear glasses (readers because I can’t see anymore. Plus it protects my eyes!).
- I have a pile of wet wipes handy.
- This is a great blog post that covers 20 Habits for Successfully Using Nunn Design 2-Part Epoxy Resin. Even if you are a seasoned resin mixer, this might be worth a read.
- You can also watch this great video on How to Mix Nunn Design Resin!
-
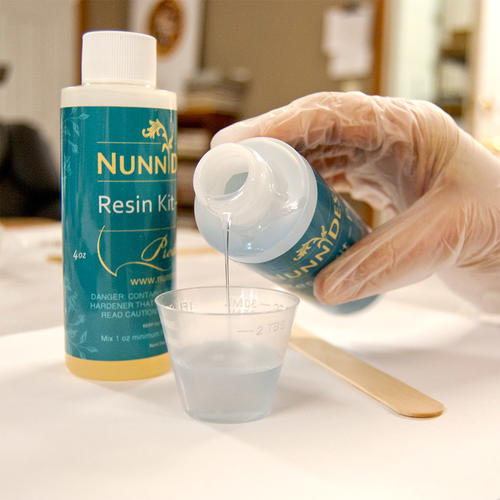
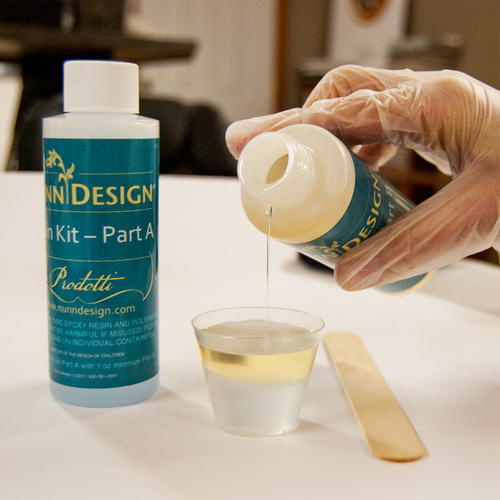
Place one cup (included in the Nunn Design Resin Kit) onto your table.
For curing purposes, it is very important that the resin be an exact 1 to 1 ratio of Part A and Part B. I suggest getting your eyes level with the resin so you can see the lines on the measuring cup.
Pour Part A of your resin kit up to the ½ fluid ounce mark on your measuring cup.
Pour Part B of your resin kit into the same cup until it is filled to the 1 fluid ounce mark. It is important to pour Part A first and then Part B. It is some chemical thing about the part A being heavier or something. -
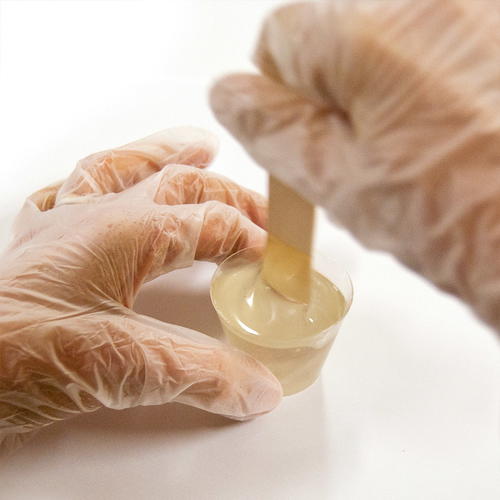
Set your timer for 2 minutes. Using the stir stick from your kit (a popsicle stick or coffee stir stick will work great too), slowly and carefully stir your resin scraping the sides as you stir. Stir for the full 2 minutes. After 2 minutes, scrape both sides of your stir stick on the edge of your resin filled cup.
-
Using a toothpick, drizzle a small amount of the mixed resin over the Crystal Clay and gold flakes until the surface is covered. To create a high dome of resin, continue to drizzle additional resin.
-
Let the resin cure for 12 hours. If you had any over pour of resin that is stuck to the sides of the bezel, use a pair of needle nose pliers to gentle remove the resin. When the resin is 12 hours into the curing process it is still not fully cured, but this soft cure state makes it really easy to remove the excess resin from the bezel.
-
Let pieces cure for the full curing cycle of up to 72 hours.
-
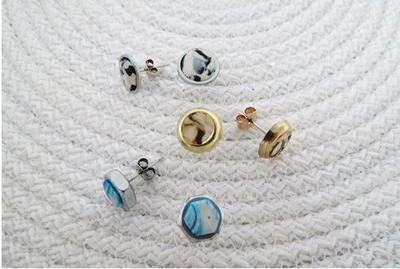
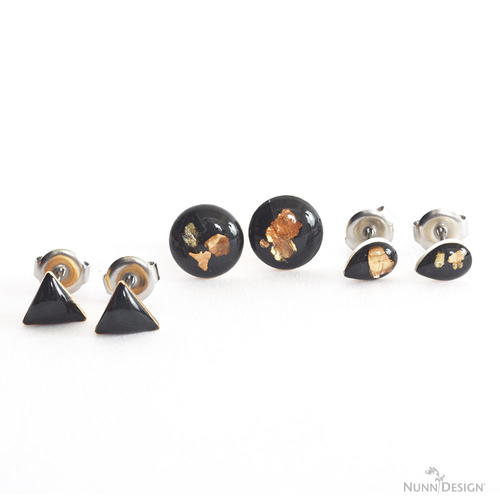
Add on butterfly clutches and have fun sporting your new Bitsy Earrings with Gold Flakes and Resin!
Read NextGold and Glass Earrings

Thanks for your comment. Don't forget to share!
mulberrygalprinces s
Jul 06, 2018
Very nice and very pretty. But in requirements to making a DIY projects, I have it down to three. Pretty, easy and inexpensive. I went through the directions and it was far from easy. It's not a project I can do with my grand daughter. Nor is it inexpensive. Thanks for posting, but I must pass.
Report Inappropriate Comment
Are you sure you would like to report this comment? It will be flagged for our moderators to take action.
Thank you for taking the time to improve the content on our site.