Colorful Bohemian DIY Pendant

Bohemian inspired jewelry pieces are a hot trend currently. You can wear this type of jewelry to music festivals or concerts and you won't be the only one giving off Bohemian vibes. This Colorful Bohemian DIY Pendant is great to slide on a necklace. This necklace is super unique because it's made out of clay. You'll have so much fun making this pendant with all sorts of different colors. After looking over the directions, you'll have the skills and techniques to complete this DIY necklace pendant. To add a little extra detail, tie some cording through the pendant doughnut loop and call it a day.
Project TypeMake a Project
Time to CompleteIn an evening
Bead Project TypeNecklace

Materials List
- premo! Sculpey® Accents Individual Bars
- Sculpey Clay Conditioning Machine
- Sculpey Super Slicer Set, w/comfort handles
- Sculpey Technique Design Blocks
- Sculpey Silicone Bakeable Mold - Cabochon
- Small piece of suede cording (about 12 inches) in green or color to match
- 2 copper eye pins
- Jewelry wire cutters
- Small needle nose pliers
- Antique copper chain in length you wish
- Clear fast-drying glue
Looking for a choker to rock with your Bohemian styled pendant? You'll find some amazing DIY choker ideas in this collection:
Instructions
-
Getting Started Polymer clay may stain. Clay may damage unprotected furniture or finished surfaces. Do not use polymer clay on unprotected surfaces. We recommend working on the Sculpey clay mat, wax paper, metal baking sheet, or disposable foil. Start with clean hands and work surface area. Knead clay until soft and smooth. For best results, clean your hands in between colors. Shape clay, pressing pieces together firmly. Bake on oven-proof glass or metal surface at 275°F for 30 minutes per ¼" thickness.
For best baking results, use an oven thermometer. Do not microwave oven. Do not exceed the above temperature or recommended baking time. Wash hands after use. Baking should be completed by an adult. Begin by preheating oven to 275 °F. Test temperature with oven thermometer for perfectly cured clay.
For best results, condition all clay by running it through the Clay Conditioning Machine for several passes on the widest setting. Fold the clay in half after each pass and insert the fold side into the rollers first. -
Make sheets of Gold, Bronze, Peacock Pearl and Bright Green Pearl clay on the Clay Conditioning Machine on the #1 setting. Set the Clay Conditioning Machine on #2 and roll the sheets through the machine. Set all sheets aside.
-
Trim a rectangle of the Gold clay to about 3”x2”. Place it on top of the Peacock layer and trim the Peacock to the same size. Add the Bright Green Pearl layer and trim and finally, the Bronze layer.
-
Roll this stack back through the Clay Conditioning Machine (still set on #2) to make a long thin layer of clay. Fold the right third of the layer towards the middle and the left third towards the middle. Flatten this new stack with your hands.
-
Press the Sculpey Texture block (or blocks if you have room!) into the stack of clay and remove them. NOTE: A light spray of water on the blocks will act as mold release.
-
Use the flexible Sculpey Super Slicer blade parallel to the work surface to shave off the top layer of the stack. You should see the fantastic layers and patterns of color and texture! Continue thinly slicing through the stack and placing the shaved slices aside on a clean sheet of paper.
-
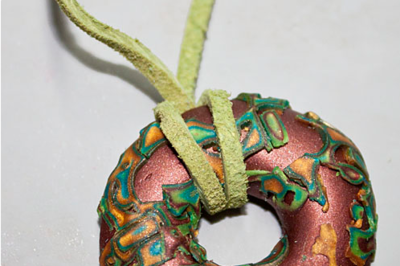
Now let’s create our “donut” pendant! Roll a small piece of the Premo! Bronze clay through on the #3 setting of the Clay Conditioning Machine. Lay this over the largest donut mold. Roll another piece of Bronze into a small “snake” of clay and place the snake into the mold where the deeper portion of the mold is
-
Carefully slide the Sculpey Super Slicer along the top of the mold to remove the excess clay and pop out the donut! (NOTE: Starting from the center and slicing to the sides helps prevent distortion from the clay pulling in the mold.)
-
Select your favorite pieces of the mokume gane and wrap them around the donut, leaving areas of the donut free. Once you have the donut covered, set it aside on a clean sheet of paper.
-
Roll the remaining Bronze clay into a long “snake” of clay about ¼ inch diameter (about the height of the donut). Curve it slightly and trim a piece about 2½ inches long.
-
Trim two eye pins to about ¼ inch in length and insert them into either end of the curved clay.
-
Bake both pieces in a pre-heated oven according to the directions above. Allow the clay to cool.
-
Fold the length of cord and thread the loop through the donut. Pass the loop over the ends of the cord and tighten.
-
Wrap the two pieces of cording around the curved piece of clay and trim in the back, gluing the ends into place.
-
Remove the eye pins in the side of the curved piece and glue them back into place and attach the chain.
What jewelry piece will you be wearing this Bohemian pendant on?
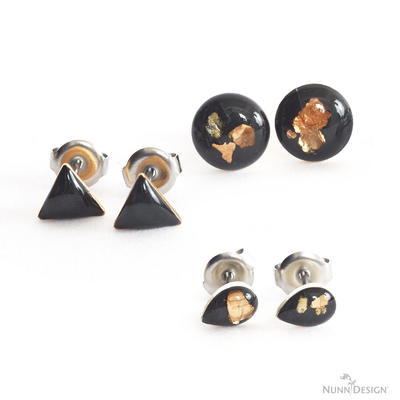
Read NextGold and Glass Earrings