Modern Pearl Necklace and Earring Set

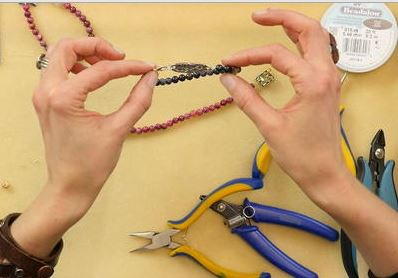
Follow these free jewelry making instructions to make your very own Modern Pearl Necklace and Earring Set. This is one beaded jewelry design that never goes out of style. With metallic gray pearls and hammered metal earring charms, this jewelry set is a contemporary update on a timeless classic. With easy-to-follow directions and an added video tutorial, you will have all the instructions you need to be able to make this gorgeous pearl jewelry set simply and quickly.
Project TypeMake a Project
Bead TypeGlass, Metal, Pearl
Time to CompleteIn an evening
Bead Technique UsedStrung
Bead Project TypeEarrings, Necklace

Materials:
- crimping pliers
- wire cutters
- 2 pairs of chain nose pliers
- 6mm glass pearls
- figure 8 clasp
- 2 crimp beads
- 2 wire guards
- beading wire
- 2 leverbacks
- 4 jump rings
- 2 headpins
Necklace Instructions:
- Thread the wire through one crimp bead and one of the wire guards.
- Loop the wire around and thread it through the other side of the wire guard.
- Thread on one of the clasps.
- Slide the crimp bead so that both the shorter wire and the main wire are going through the crimp bead; leave a small amount of space between the wire guard and the crimp bead.
- With your chain nose pliers, slightly cinch the wire guard so that the parts of it where the wire pass through are now closer together.
- Leaving a small amount of space between the crimp bead and the wire guard, place your crimp bead on the back channel of your crimping pliers and crimp down.
- Turn your newly crimped bead so the smooth part is facing you and the dented part is facing away from you. Place the crimp bead in the front channel of the crimping pliers and crimp down.
- Thread on three of the glass pearls.
- Snip the excess second (shorter) wire at this point, being careful not to clip your main wire.
- Thread on the remaining beads to make the necklace your chosen length.
- Repeat steps 1 through 7 for the other clasp.
Earring Instructions:
- Open all four of your jump rings before you begin.
- Thread a glass pearl onto the headpin and trim excess wire so you are left with half an inch of wire above the pearl.
- Using your round nose pliers, form a closed loop.
- Thread a jump ring through the hole in the leverback and close the jump ring.
- Thread a hammered circle and your pearl with the loop onto a jump ring.
- Thread the jump ring that your leverback is attached to onto this jump ring, making sure the front of the leverback is facing the side that the pearl is on, so that when you are wearing your earrings, the pearl is in front of the hammered ring.
- Close the jump ring and repeat for second earring.
- Enjoy your new creation!
Read NextRegal Hammered Hoop Bead Earrings
Your Recently Viewed Projects
Thanks for your comment. Don't forget to share!
chestjuli 9584738
Apr 08, 2014
need to see how to make the jewelry piece.
Editor LP
Apr 11, 2014
Hi all! We hope that you enjoy this tutorial. For this one, we're offering the best of both worlds - video tutorial and written instructions. It may help to print out the instructions on this page so you have them on hand while you play the video and create this jewelry. Enjoy! -Editors of AllFreeJewelryMaking
professormon 34200 38
Sep 03, 2012
It would be nice to have a printer version of these projects.
Report Inappropriate Comment
Are you sure you would like to report this comment? It will be flagged for our moderators to take action.
Thank you for taking the time to improve the content on our site.