Delicate Sorbet Shades Braided Bracelets
Make colorful wire bracelets for the warm weather seasons!

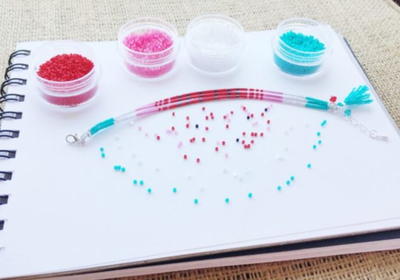
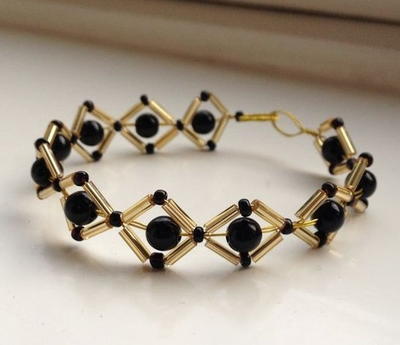
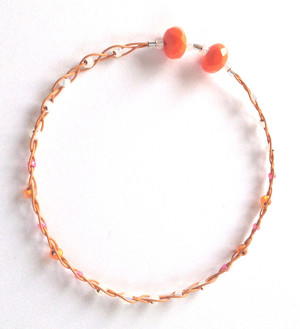
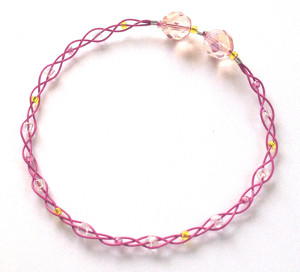
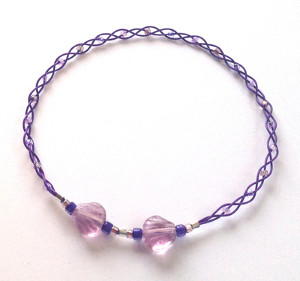
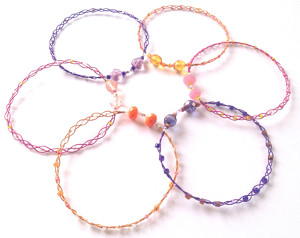
If you are looking for the perfect set of layering bracelets, look no further than these Delicate Sorbet Shades Braided Bracelets. These summery braided bangles are chic and versatile enough to be worn all-year round. The bold citrine, amethyst, and pink tourmaline hues make these sorbet-colored beauties must-haves for your accessory collection.
Learn how to braid wire with beads to create these fabulous DIY bracelets. Each homemade bracelet has its own unique look, yet they can also complement other colors. Whether you are wearing just one, or a set of these beautiful bangles, they are sure to complete any ensemble.
Project TypeMake a Project
Bead TypeGlass, Seed
Time to CompleteIn an evening
Bead Technique UsedChainmail/Wirework
Bead Project TypeBracelet

Materials List
- Citrine, Purple Amethyst, or Pink Tourmaline .019 Diameter Soft Flex Beading Wire – 36 inches
- 2mmx2mm Silver Filled Crimp Tubes - 3 crimps
- Assorted size 11° and size 8° seed beads - 20-30 seed beads
- 6-10mm Czech pressed-glass beads - 2 glass beads
- Cutters
- Crimping Pliers
- Bead Stopper
Want more wire jewelry tutorials? Check out our fabulous collection of wire jewelry projects!
Instructions
Step-by-Step Instructions
-
Cut three 12" pieces of wire.
-
Use 1 crimp tube to string all three pieces of wire. Adjust the wires so that the crimp tube is 2" from the end of one wire and right at the very ends of the other two wires. Crimp the crimp tube.
-
Use the shortest of the three long wire ends to string seed beads in the sizes, colors, and pattern of your choosing. String closer to 20 beads if using mostly size 8s; seed beads and about 30 beads if using mostly size 11°s. Place the Bead Stopper at the end of the wire.
-
Begin braiding the three long wire ends. Every time the wire with the beads lands in the middle of the braid, slide 1 bead up into the braid. Continue braiding the wires for about 6 1/2 – 7", adding beads to the strand if necessary.
-
Remove any remaining seed beads from the strand. Use two strands to string 1 crimp tube. Without disturbing the pattern of the braid, gently slide the third wire end into the crimp tube and carefully snug the crimp tube toward the end of the braid. Crimp the crimp tube. Trim the shortest wire end and one other wire end. Do not cut the third wire end.
-
Use one wire end to string 1 seed bead, 1 pressed-glass bead, 1 seed bead, and 1 crimp tube. Place the Bead Stopper on the wire end. Use the other wire end to string 1 seed bead, 1 pressed-glass bead, and 1 seed bead. Remove the Bead Stopper. Pass the wire through the crimp tube in the opposite direction. Measure the bangle against the circle template and carefully check to see if it will fit over your hand. Add seed beads if extra length is needed. Once the bangle is the right size, crimp the crimp tube and trim wire ends.
Read NextSea Urchin Memory Wire Bracelet
Your Recently Viewed Projects
Thanks for your comment. Don't forget to share!
mulberrygalprinces s
Mar 08, 2018
Here you go again, having me learn a new technique! Have pity, I am an old lady! But once again, I will have to prove you can teach an old dog new tricks. I know a ten year old young lady who will adore receiving these from her grand mother! Thank you!
Hippie Chick
Jan 23, 2018
These bracelets are so cute, but so simple. I have not worked with soft flex beading wire yet, but I really love the look of these bracelets and will strongly consider investing in a couple of rolls in different colors to give these bracelets a try. My daughter and her friends would wear them.
jaevonne53 7888846
May 23, 2015
This looks lovely! I have not worked much with wire. I want to try this, but I am not sure about using the crimp tube and getting started. It would be good to have a photo of the exact beginning and end of this project. For me, starting and finishing the project correctly is an important issue.
Editor EK
Jun 19, 2017
Hello jaevonne53, Thank you for your feedback! We will keep it in mind for future full jewelry projects that are uploaded to AFJM. - Editors of AllFreeJewelryMaking
Maxs Lady
Sep 06, 2014
What is a bead stopper?
Editor LP
Sep 08, 2014
Hi there, br /A bead stopper is a jewelry making tool that you can use to keep your beads in place while you are creating your jewelry piece. It is a piece of tightly coiled metal wire. There is usually a large loop on either end of the coil, and this loop is very often covered in a soft plastic. The soft plastic covering makes it easier to grip the bead stopper to open, close and position it on your string. The bead stopper is meant to help prevent bead spills! If you go to the top of this page where it says "Bead Store" and click on that, it will take you to our sister site, CutRateCrafts.com. If you type in bead stopper, we have this tool available for purchase. We hope this helps. Happy beading! -Editors of AllFreeJewelryMaking
mulberrygalprinces s
Jun 16, 2017
Bead stoppers are a must for me. I like to go ahead and string my beads without totally committing to the design. It keeps them from sliding off. Believe me when I say I have been frustrated to no end when a chip clip or clothes pin didn't hold the beads on the cord and I had to chase them all over before the dog ate them! If you are truly strapped for cash, try a rubber earring back. They work too. But first choice is a stopper. Some times called bead bud.
Report Inappropriate Comment
Are you sure you would like to report this comment? It will be flagged for our moderators to take action.
Thank you for taking the time to improve the content on our site.