Wire Jewelry Making Supplies: The Supreme Supply Checklist
Find out everything you need from beads to pliers when it comes to making wire wrapped jewelry.

In order to become a wire wrapping wizard, you need to have the right supplies. While some may think that wire is the only ingredient to creating this jewelry recipe, there are multiple other wire wrapping tools needed.
Just like there are a variety of fruits and veggies, there are different shapes and sizes of wire. From thick to thin, from circular to square, the list of options goes on. It can be a puzzling and stressful experience when shopping for just the right wire jewelry making supplies. You can create so many beautiful wire wrapped jewelry pieces as long as you have the correct tools. If you're striving for that Bohemian chic look this summer, you're going to want to invest in some of these utensils to make your own wire wrapped pendants, stones, jewels and so much more.
If you're a newcomer when it comes to wire wrapping projects and the necessities needed to complete a wire wrapped piece, stay tuned and you'll be an expert in no time.
Get Your Gizmos- What do I need to start?
Before you get too excited about creating your very own wire wrapped bracelet, necklace or pair of earrings, you need to make sure you have the essentials to begin your project.
According to Gloria Uhler, blogger behind domestic-diveonline.com, you should just "break down, spend the money and get the right tool for the job. Something as simple as a bur cup will make a huge difference and produce a project with a much more professional result."
Rather than purchasing every wire wrapped related tool at your local craft store and wasting your money, this supply checklist will contain answers to all of your questions related to what you need to start.
You first need to decide what you want to wire wrap. If you plan on playing with a large gemstone, you'll need very different tools compared to if you were to wrap a tiny pearl onto an earring post. So, it's now time to start searching for that perfect pendant you want around your neck, wrist or on your ears!
If your brain is going a million miles per hour and you have not a clue what to create, get some inspiration from these wire wrapped jewelry tutorials. This outta help you out!
Wire Gauge Sizes
First and foremost, you need to decide what size wire gauge to use. The gauge, also abbreviated as "ga," is a measurement of its width/diameter.
You may think gauge size is common sense, but the numbers can be a tad bit confusing if you've never worked with them. The larger the gauge, the smaller the wire's width/diameter.
So, where do these numbers come from? The various numbers tell you how many times a piece of wire had to pass through a draw plate, which is a tool used to make wire thinner, before it was done being sized. Therefore, the more times the wire traveled through the plate, the thinner the wire.
When it comes to deciding which wire size to use for your project, it varies depending on the size, shape and how heavy the stone is or what piece of jewelry you plan on creating.
-30 ga: Extremely fine and thin wire. Used for coiling, weaving, knitting and crocheting. This size easily breaks if not handled carefully.
-28 ga: Very fine and thin wire. Used for wire crocheting and knitting. Be patient when using this thin of wire because it tends to get tangled.
-26 ga: Very fine wire. Used for beads that have tiny holes, such as rosary style beads.
-24 ga: Fine wire. Used for beads that have tiny holes, such as pearls.
-22 ga: Medium-fine wire. This size is very versatile because it's thick, but most beads can fit into it. Used for ear wires, headpins and rosary style wrapped links.
-20 ga: Medium wire. Recommended for creating wire jewelry using wire jigs and other wire sculpting techniques. Used to make heavy-duty ear wires and lightweight clasps.
-18 ga: Medium-heavy wire. Used for making clasps, chokers and wire sculptures.
-16 ga: Heavy wire. Used for chokers and heavy-duty clasps.
-14 ga: Heavy wire. Used for chokers, stiff bracelets and wire rings.
-12 ga: Very thick wire. This size is hard to bend by hand. Used for chokers, stiff bracelets and rings.
-10 ga: Extremely thick wire. Used by silver smiths for welding techniques. Used for chokers, stiff bracelets and rings.
Whether you're creating a dainty pair of dangles or attaching a hefty heavy stone onto a necklace, one of these wires will surely suit your needs.

Wire Shape
Just like there are several types of body figures, there are also different shapes and sizes of wire. You may think, "who cares what the shape of the wire is, it's just wire." But, if you love little details embedded into your jewelry, then choosing which wire shape to use for your jewelry project will be a blast and a half.
The most common and least expensive wire shape is round wire. This type of wire is often used in sizes 28 ga through 14 ga. If you're looking for a wire to create visible twists in, this wire isn't for you. According to wirejewelry.com, "...because it is already round, individually twisting it will only harden the wire."
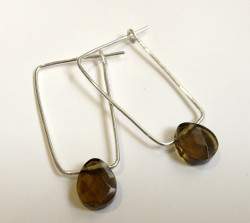
Veva Pinero, blogger behind mywhiteideadiy.com, "love[s] to use round silver wire and other materials like pearls."
If you're looking for a more defined shape, square wire is the shape to use for your jewelry project. People choose this wire because it's required for the tutorial their following or simply for appearance purposes. You will definitely notice the difference between using a square shape versus a round one.
If you're looking to connect pieces of square wire together, grab yourself some half round wire. The rounded side is exposed after placing the flat side of the half round wire against the square wires. This technique is called banding.
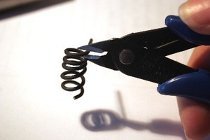
None of these shapes fancy enough for you? Well, this twisted wire will meet your expectations if you're looking for an aesthetically pleasing look. This wire shape adds texture to whatever jewelry piece you're making. You can also create your own twisted wire by using a pin vase.
BONUS: If you want to put a DIY spin on your wire, you can alter the shape of your wire using tools and techniques, such as nylon jaw pliers. If you're looking for some solid dependable pliers for jewelry, see for yourself how easy it is to transform some heavy duty wire using such simple tools.

Wire Metals
Believe it or not, there are several types of wire metals. Choosing your wire metal type all depends on the jewelry project you're making, the color you want and the strength of the actual wire.
-Solid precious metal wire: Number one choice for high-end jewelry designs.
-Silver fill and gold fill: Also known as "overlay." Use these when making high-end designs.
-Solid base metal wire: Works great for making artisan jewelry. Used to make prototypes for valuable metal designs. Examples include: copper, stainless steel, nickel silver, brass and bronze wire.
-Silver plate and gold plate wire: Prototypes for other costly metals. The plating can crack or chip if it's over manipulated. Best to use for designs that don't require a lot bending and wrapping.
-Enamel-coated wire: Gives you a rainbow of colors that won't chip.This wire includes a bright shiny look if you're looking for a wire with sheen.
-Anodized wire: Includes bright colors that are created in a chemical bath. Colors are more durable than plated colors.
-Memory wire: Offers many sizes of wire coils that stay in their circular shape. Used for beaded charms, rings, bracelets and chokers.
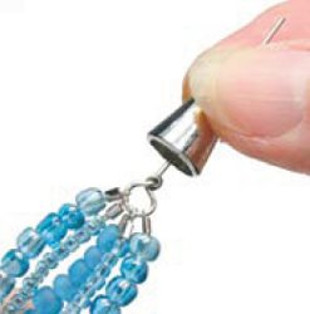
-Bullion wire: Delicate, tightly coiled wire that are used to cover the end loops of bead chord on jewelry pieces.

Dead Soft and Half Hard Wire
Dead soft and half hard wire refer to the hardness of the wire. Being able to bend the wire by hand or pliers all depends on the wire hardness. Just as you'd suspect, soft metals are easier to bend than hard metals.
Dead soft wire is often described as sterling silver or gold filled wire. This wire type hasn't been hardened at all, which makes it the most malleable. The wire type can be bent with your hands. This wire types lets you have full control of the twists and turns that you want it to make. Be creative!
Half hard wire has been hardened, but is still very malleable. It's often used with sterling silver or gold filled wire. According to fusionbeads.com, "Because it has been hardened, half-hard wire will maintain a loop, bend or shape under some stress. Half hard wire is commonly used when making wire-wrapped jewelry or simple loops."

Pliers
Pliers are a must when it comes to wire wrapping tools to have on hand when working on your DIY wire bracelet or other jewelry tutorial. There are many different types of pliers that can be used to bend and transfigure your wire design.
-Round Nose Pliers: Used to gain control of the wire as you loop it and create small loops.
-Flat Nose Pliers: Used to make loops because of its slim profile.
-Bent Nose Pliers: According to ornatia2.blogspot.com, "[these] are the secret to getting into fine corners and achieving easy wire bends and manipulation at odd angles."
-Chain Nose Pliers: Used to gain control of your work and make perfect loops.
You'll want to make sure you have atleast one pair of pliers on deck when jewelry crafting your wire masterpiece!

Pendants, Gemstones and Beads
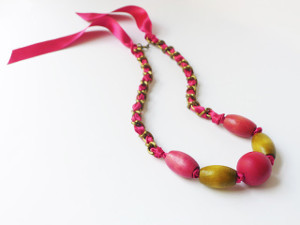
Rather than just creating a jewelry piece soley out of wire, which is totally acceptable, add some bling-bling to your necklace or bracelet using shiny stones and precious pendants. There's no such thing as a bad bead to include in your DIY jewelry project.
In terms of the shape of stone you want to use, try gravitating towards one that is somewhat disformed. These pieces are easier to maneuver wire around. Using these stone shapes will ensure that your pendant is tightly wrapped in place and won't fall out of your necklace, bracelet or earrings.
Uhler, doesn't think about the bead or stone when first beginning her projects, but rather the overall end design.
"When I’m inspired to wire wrap I don’t buy the focal bead or stone first and then think about how I could wrap it or what color wire to use," said Uhler. "The concepts for my projects usually comes as an already formed complete design idea. Sometimes the biggest challenge is finding the right bead or stone to complete that design as I saw it in my mind."
If you're using a larger and heavier gemstone, make sure you choose the right wire to wrap it with. The last thing you want is for your stone to fall out of your wire and break into little pieces!
Using beads is another way to dress up your wired creation. If you're going to string beads through your wire, you want to make sure that you're using thinner wire (refer back to wire gauge size). Another tip is to choose beautiful two hole beads with larger holes. Stay away from seed beads and other beads with microscopic holes!

What are your essential wire wrapping tools?
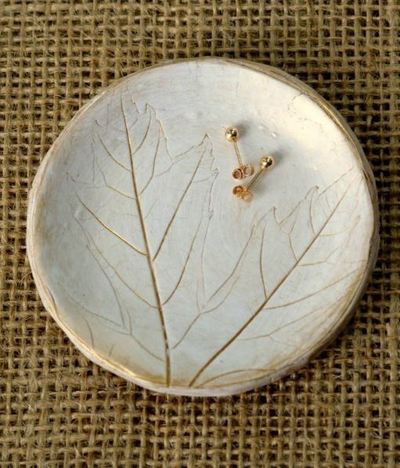
Read NextLavish Leaf Jewelry Dish