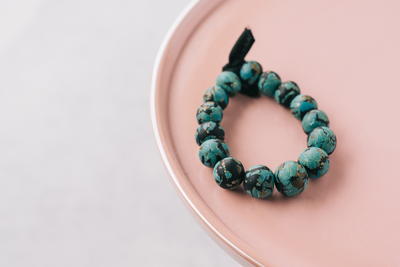
Faux Turquoise Beaded Bracelet

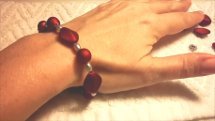
Talk about an amazing tutorial! This Faux Turquoise Beaded Bracelet shows you not only a cute bracelet pattern, but also how to make your own clay beads. The faux turquoise marbled look has been extremely popular and is undeniably gorgeous. Check out this tutorial to see how you can make these gorgeous DIY beads to form this gorgeous beaded bracelet. Plus, you can use this technique to make tons of different beaded jewelry from DIY necklaces to cute stud earrings!
Project TypeMake a Project
Time to CompleteIn an evening
Bead Project TypeBracelet

Materials List
- 1/4 of a block of Polyform Clay in turquoise
- 1/32 of a block of Polyform Clay in white
- 1/32 of a block of Polyform Clay in Wasabi
- 1/32 of a block of Polyform Clay in antique gold
- Polyform Clay in black
- One piece of gold leaf paper
- Razor
- Clay mat
If you want even more DIY bracelet inspiration try making this gorgeous and charming leather bracelet!
Faux Turquoise Beaded Bracelet
Beaded Bracelet Instructions
-
Mix your turquioise, white, and wasabi clay up into a ball with your hand. However, stop way before the clay become a new color.
-
Place the antique gold block on top of your new clay mixture, take your razor and begin randomly chopping up your clay.
-
Take your gold leaf sheet and place it over the top of your newly chopped clay pile.
-
Work the gold leaf sheet into your clay by pressing it down into all of the crevices. Remove any of the excess gold leaf sheet once you have finished tapping it in.
-
Take your polymer clay and roll it into a thin square shape. (In the video she ran it through her pasta machine one the 4th thickest setting).
-
Lay your black sheet on top over the gold leave and begin tapping that clay in a similar fashion as you did with the gold leave.
-
Using your blade cut through into your clay in a random fashion. Don't cut all of them all the way across, but instead, make some come in from the side.
-
Push it all together againa nd flatten the top.
-
Have some filler color ready to go, we used a rod of black for this tutorial.
-
Roll your rod of filler color from large to small if you would like to make different sized beads.
-
Cut your rod into different sections, and roll each section roll into a ball.
-
Horizontally slice through your slab of the turquoise mixture, taking thin slice until your beautiful turquoise is revealed.
-
Once you find a piece that you like take that and begin wrapping it around your bead.
-
Once the ball is covered with the turquoise as much as you would like, roll it in a ball to smooth out all the edges.
-
Poke a hole through your bead so that you can string it later. Poke through both sides to create an even sized hole.
Pro Tip: Be sure that the hole you are creating will accomodate the string you will be putting the bead on. -
Repeat steps 12-15 until you have made all of your beads.
-
Position your beads on a bead baking rack so that they can be held up and not get any shiny spots.
-
Once your beads are out of the oven and cooled down you can go ahead and string them up into your jewelry pattern.
Read NextRegal Hammered Hoop Bead Earrings
Your Recently Viewed Projects
Thanks for your comment. Don't forget to share!
mulberrygalprinces s
Oct 21, 2017
This is an excellent tutorial. It combines many different skills. Plus it's very easy. I love working with polymer clay. It's an In expensive, forgiving medium. Nothing is finished until you bake it. So if you make a mistake, just reroll it and start over. And just a bit of info, turquoise comes in white and green!
Eugenia
Jun 01, 2017
Turquoise is one of my favorite colors to wear for jewelry! I really like the finish of the beads and the combo of the blue, gold, and black.
Report Inappropriate Comment
Are you sure you would like to report this comment? It will be flagged for our moderators to take action.
Thank you for taking the time to improve the content on our site.