Basic Beaded Bracelet Tutorial

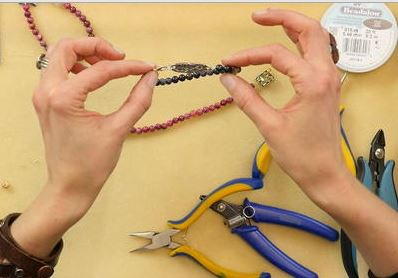
Learn one of the most basic techniques in beading by making this simple beaded bracelet with crimp beads. This Basic Beaded Bracelet Tutorial video shows you quickly and easily all the steps you need to know to make one tonight!
Project TypeMake a Project
Bead TypeMiscellaneous
Time to CompleteUnder an hour
Bead Technique UsedStrung
Bead Project TypeBracelet

Materials:
- Flat Nose Pliers
- Cutting Tool
- Measuring Tool
- Beading Thread
- Cord or Wire (recommended: beading craft wire)
- Closure (recommended: toggle or magnetic clasp)
- Beads
- Crimping Beads
Instructions:
- Measure your wrist (adding at least one half inch for comfort) and cut beading wire double the size of your measurement.
- Lay out your beads in the order that is pleasing to you (using the measurement of your wrist).
- Thread one crimp bead through the wire, then thread one half of the closure. Loop the wire back and through the crimp bead again.
- Adjust the crimp snug up against the closure with the 2 strands of wire next to each other (not stacked on top of each other).
- Using the flat nose pliers, flatten the crimp bead down on the wire to secure the closure, leaving the wire tail.
- String the beads onto the wire.
- Thread the tail from step 3 back through the beads on the wire (cut if needed).
- Thread the second crimp onto the wire, and then thread the second closure. Loop the wire back through the crimp bead and several beads.
- Adjust so that the crimp is close to the beads and the closure. Do not make your bracelet too tight. Leave a bit of "wiggle" room for your beads to move.
- Using your flat nose pliers, crimp the bead secure and cut your tail.
- Enjoy your new bracelet!
Read NextRegal Hammered Hoop Bead Earrings
Your Recently Viewed Projects
Thanks for your comment. Don't forget to share!
mulberrygalprinces s
Jun 19, 2017
Now this is just what I needed for my ladies jewelry making group. It's always so much easier to make something when you have instructions so you can follow along and read over if you hAve a problem. Maybe I won't get so many phone calls it I can find great instructions for them like this. Thank you for sharing.
Report Inappropriate Comment
Are you sure you would like to report this comment? It will be flagged for our moderators to take action.
Thank you for taking the time to improve the content on our site.