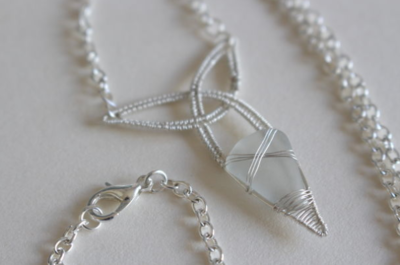
Glass Bottle Necklace

Glass Bottle Necklace
Looking to make unique recycled jewelry? Try creating this gorgeous Glass Bottle Necklace using recycled glass bottles and glass-crafting tools. This project is ideal for more experienced jewelry makers.
Project TypeMake a Project
Bead TypeGlass
Time to CompleteWeekend project
Bead Technique UsedGlass Beadmaking
Bead Project TypeNecklace

Another great project from Diamond Tech!
Materials:
- Generation Green (g2)
- Glass Bottle Thick glass bottle works best.
- Fuseworks™ Microwave Kiln
- Fuseworks™ Kiln Paper
- Bella Boho Bead collection – (4 brass rings, 1 wooden ring, 2 brass Boho beads)
- Large glass bead – 1
- Cord or hemp
Instructions:
Read and carefully following the instructions contained within the Generation Green (g2) bottle cutter manual.
- Cover the work area with craft or newspaper.
- Start 1 inch down from the lip of the bottle, measure and mark with a Sharpie™ four, 1” increments (see diagram)
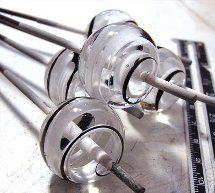
- Using the bottle cutter, score and separate where indicated to create glass rings.
- Cut a 2” X 2” piece of kiln paper. Remove the lid from the Fuseworks™ Microwave Kiln. Place the kiln paper on the kiln base.
- Place one ring in the center of the kiln paper. Carefully set the base with glass inside the microwave. Cover base and glass with kiln lid.
- Fuse at full (100%) power for 2 minutes. If using a microwave with a lower wattage, increase the time to 2 minutes and 30 seconds.
PLEASE NOTE: All microwave and kiln combinations will have different firing patterns. Be sure to take careful notes and log all fusing times for future use.
- When time has expired, open microwave and, using Hot Mitts, carefully lift the lid enough to inspect the fusing process. Glass should have nicely round edges. If need be, add additional time in 15 to 30 second increments until the desired results are achieved. Remove kiln from microwave using the Hot Mitts and place on a heat resistant surface. Cool the kiln on a heat resistant surface for at least 30 to 40 minutes with the lid on. WARNING: Removing the lid or peeking under the lid during the cooling will result in your piece cracking. Glass remains hot for a long time handle with great caution.
- Repeat this process for the 3 remaining glass bottle rings. Cool each completely between firings.
- To create the necklace, you will need two short strands, and two longer strands of cord a total of four strands for each side of the medallion.
- To measure the length needed, first wrap the cord around your neck, stopping at the desire length of the necklace. Add 2" to this measure to allow for tying off, cut two cords.
- Next, multiply this number by two; this will be the length of the longer strands. Measure and cut two cords. Example: if your necklace needed to be 14" when finished, add 2" to the 14" (allowing for tying off) for a length of 16" x 2 = 32".
- Pair a short with a long length of cord, find the center of each and fold in half.
- Secure a cord set to a glass ring with a Lark’s Head Knot. Follow this with 4 square knots. Slip one chunky brass bead over the four strands of cord. Tie 10 more square knots (amount of knots may need to be adjusted depending on neck size), secure with an over-hand knot incorporating all 4 strands. Finish by wrapping a length of brass “Fun Wire™” wrapped three times around the four strands. Tuck wire back into knot.
- Repeat the same process on the other opposite side of the glass ring.
- Create a button hole clasp on the one end of the necklace. Wrap a length of brass “Fun Wire™” close to clasp, tuck end of wire back into wrap. Tie a large glass bead on one end of the necklace.
- Embellish each side of the finished necklace by opening two large brass jump rings and inserting them through the square knots near the brass bead. Slip a glass ring onto the jump ring and close using a pliers.
- Next, using a large brass jump ring attach a wooden ring and a glass ring to the center, as shown in photographs, close using a pliers.
Read NextCeltic Knot Sea Glass Pendant