Bedazzled Glass Earrings

These Bedazzled Glass Earrings are the bees knees! They are super fun and really easy and quick to make. What else could you ask for when working with glass jewelry making? They'll leave your friends in shock saying, "You made those?!"
Project TypeMake a Project
Bead TypeGlass
Time to CompleteUnder an hour
Bead Technique UsedGlass Beadmaking
Bead Project TypeEarrings

This project was contributed by Diamond Tech.
Materials:
- Fuseworks™ Kiln
- Fuseworks™ Kiln Paper
- Fuseworks™ Glass Cutter
- Studio Pro™ Running Pliers
- Wheeled Glass Nippers
- Ruler
- Westrim™ pearl assortment
- Sterling Silver-Plated Square
- Cabochon Mini Links – Delphi 85435
- 2 hat pins
- Earring wires
- Scrap fusing glass 90 COE
- Chain-nose pliers
- Round-nose pliers
Instructions:
- Place white glass on a clean flat cutting surface with the smooth facing up.
- Start on an edge of the glass, holding the cutter firmly in one hand; push the cutter gently and evenly across the glass. Decrease pressure slightly as you reach the opposite edge of the glass; lift the cutter off the glass at the end.
- Hold the glass in one hand, with the score facing up. With the other hand, center the score line in the jaws of the running pliers about a half inch onto the glass surface. Apply pressure to the handles; until the score runs and the glass separates into two pieces.
- Cut two ½” x ½” square from the white glass.
- Next, select a desired dichroic glass color, this project uses dichroic spiral violet and dichroic green and nip 2 pieces from each color using a wheeled glass nippers. Dichroic pieces can be random in shape but two must fit on the ½” x ½” surface of the white glass with at least 1/8” between them.
- After cutting glass to the desired shape, clean and dry with a lint-free cloth. If using fusing glue to hold your glass project in place, make sure the glue is completely dry before firing.
- Cut a square of kiln paper to fit the base of the Fuseworks™ Microwave Kiln. Place paper on the kiln base.
- Arrange each ½” white square on top of kiln paper ½” apart. Place the dichroic pieces on top as desired.
- Carefully place kiln base with glass in the center of microwave oven. Place lid on top of the base. If using fusing glue to hold the dichroic pieces in place make sure the glue has dried thoroughly before placing glass in the microwave.
- To achieve a tack fuse, use a 1200 WATT microwave and set temperature at 80% power for 2 minutes, then on high for 30 seconds. PLEASE NOTE: Every microwave oven and kiln will vary. If using a microwave with a lower wattage keep the time consistent but increase the power.
- When microwave time has expired, use heat resistant gloves or mitts to carefully open the lid. Glass should be slightly rounded but still maintain it shape and integrity. If the glass is not fused to your liking, return kiln lid to the base and place in microwave for 20 second intervals until piece is fused. Never touch the glass. HOT TIP! HOT glass looks like COLD glass, BE CAREFUL!
- When desired results have been achieved, using heat resistant gloves, remove the kiln from the microwave oven. Set on a heat resistant work surface and allow to cool for 30-45 minutes. Do not leave the lid off the kiln for an extended period of time during this stage. Removing the lid may cause your glass to crack.
- Once the glass has cooled completely, remove the fiber paper from the back of the fused project by rubbing the surface with a wet paper towel or cleaning the project under warm water.
- Use E6000 glue and adhere each piece of glass to the front of a silver-plated square cabochon mini link and allow drying.
- While the glue dries, thread pearls onto a head pin. Using a chain-nose pliers, bend wire over the pliers to a 90 degree angle. Next, grasp the head pin with a round-nose pliers, pull the wire up and over the top of the round nose pliers to form a full loop. Nip the long end of the wire with a wire nipper to form a loop. Open the loop and thread one end of the Cabochon on to the loop and press to close.
- Attach the earring wires to the top of the cabochon using this same method.
- Enjoy!
Note:
- This project can be made from scrap glass.
- Do NOT use a self-lubricating style cutter with oil while cutting glass. Oil of any kind on the surface of the glass may mar your glass or cause breakage when fired.
- Always read and follow kiln safety instructions.
- Always wear safety glass when working with glass crafting tools.
- FUSING GLUE RECIPE: 1 drop of Elmer’s school glue to 3 drops water, mix thoroughly.
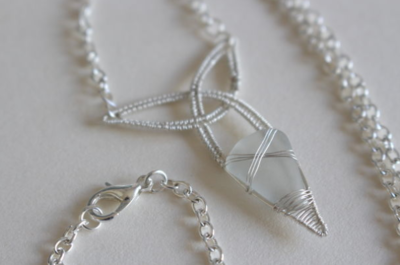
Read NextCeltic Knot Sea Glass Pendant
Your Recently Viewed Projects
Thanks for your comment. Don't forget to share!
mulberrygalprinces s
May 16, 2017
Wow, they are very pretty but way out of my monetary allotment for my crafts. So many things to buy and assemble. Maybe come my birthday and Christmas I can add these supplies to my wish list. I am saving the directions for sure though.
Report Inappropriate Comment
Are you sure you would like to report this comment? It will be flagged for our moderators to take action.
Thank you for taking the time to improve the content on our site.