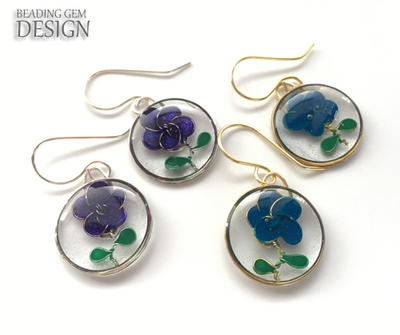
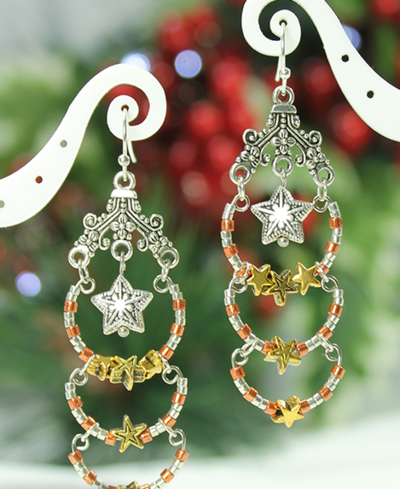
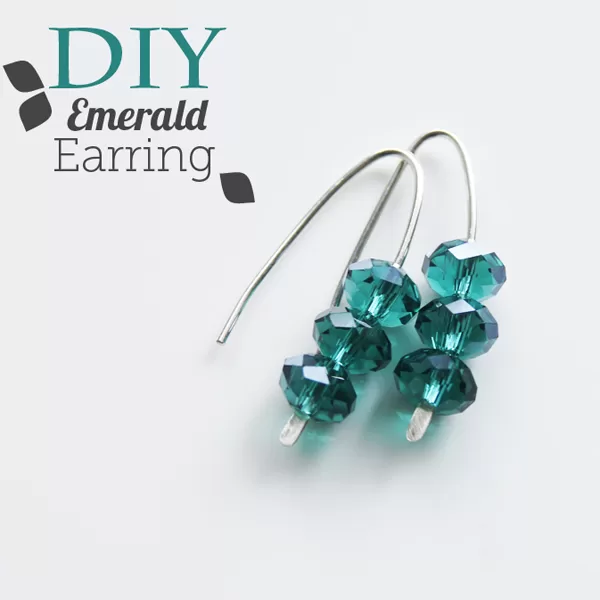
Enchanting Emerald Earrings
Emeralds are beautiful gemstones that can be turned into truly gorgeous DIY jewelry. These Enchanting Emerald Earrings are a great example of how stunning even a simple pair of earrings featuring this gemstone can be. Learn how to make homemade earrings with this step-by-step tutorial, and start adding this alluring green hue into your jewelry collection. Emerald is traditionally the birthstone for May birthdays, but this beautiful gemstone is stylish and elegant for all months of the year. Your friends will be green with envy over these gorgeous DIY earrings.
 Project Type: Make a Project
Bead Type: Gemstone
Time to complete: Under an hour
Bead Technique Used: Strung
Bead Project Type: Earrings
Difficulty Level: Easy
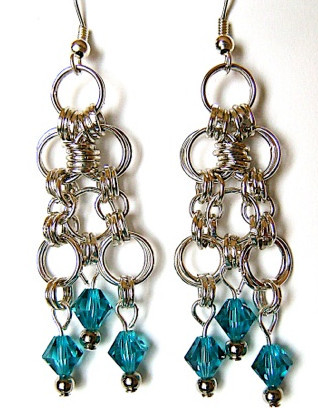
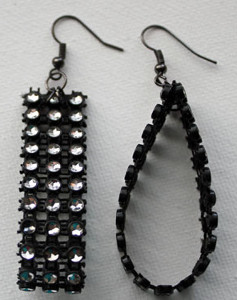
Project Type: Make a Project
Bead Type: Crystal
Time to complete: In an evening
Bead Technique Used: Chainmail/Wirework
Bead Project Type: Earrings
Difficulty Level: Easy
Read more at http://www.allfreejewelrymaking.com/Wire-Earrings/Gold-and-Aquamarine-Crystal-Earrings-from-Swarovski/ct/1#fZ6Xj4qBv8BUY1Sp.99
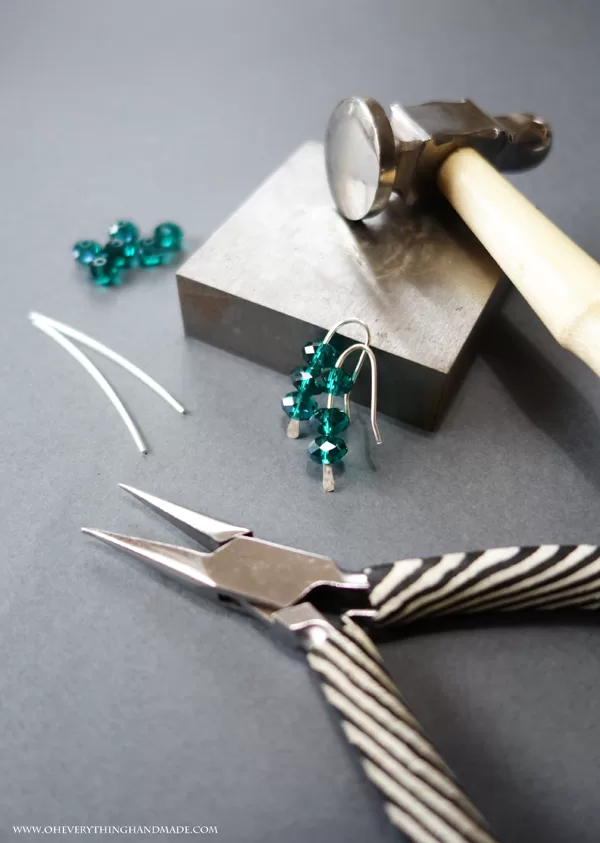
Materials:
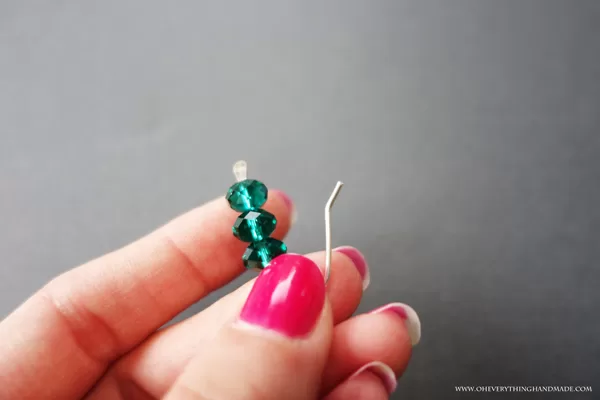
- 2x 2 1/2" 16 gauge wire
- 6 crystals 8mm rondelle
-
Nose Pliers
-
Chasing Hammer
-
Steel Bench Block
(you can use a regular hammer and pliers, the concrete floor should also work as a working surface - just make sure you have some newspaper underneath, so you don't engrave the rough texture of your concrete into your earwire while hammering...)
Instructions:
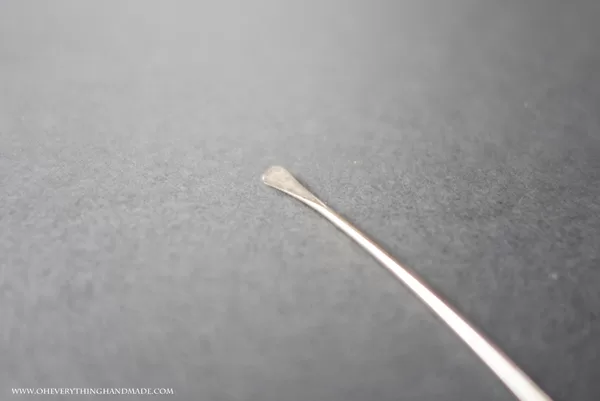
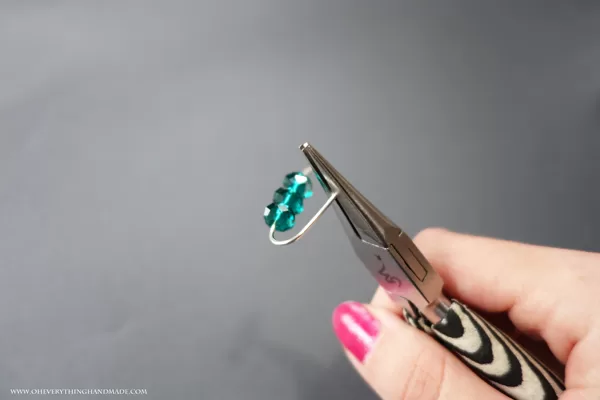
1. Hammer carefully one end of your earwire, about 8-10mm into the wire.

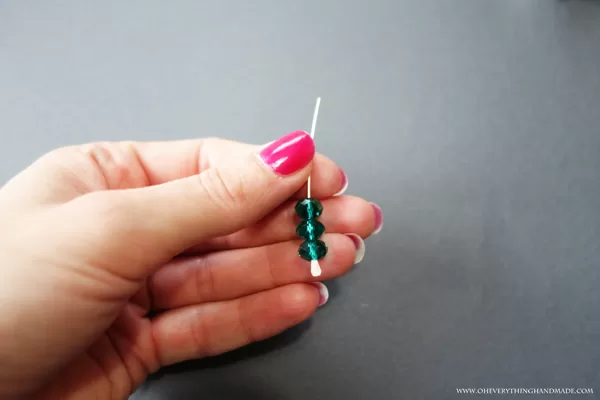
2. Add 3 crystals to your wire.
3. Use the end of your pliers to bend the ear wire, you can also use a round pen (if it has a rubber-covered area you want to use that, it will help you keep the earwire stable). The pen or pliers end shouldn't be thicker than 9-10mm.
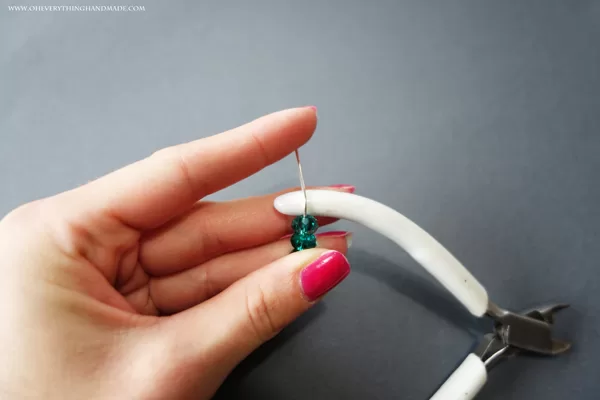
4. Bend the wire downwards until you have a U-shaped earwire.
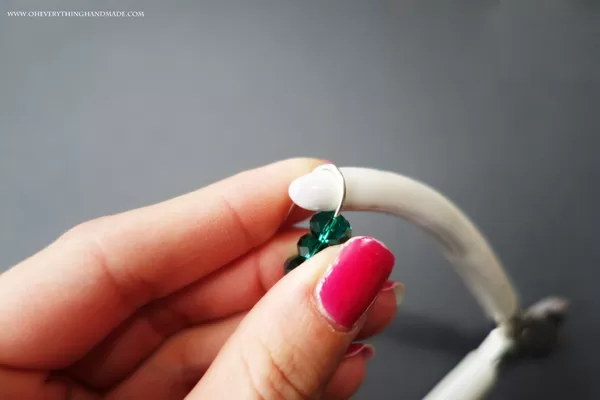
5. With your nose pliers bend 5mm from the end of your earwire outwards.
6. Now simply adjust your earwire by bending carefully toward the inside.
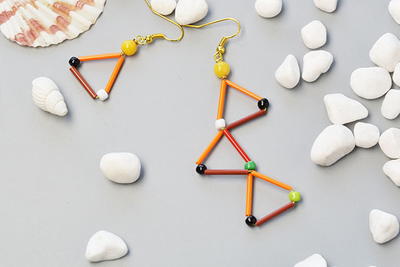
Read NextEasiest Earrings Ever
Your Recently Viewed Projects

Thanks for your comment. Don't forget to share!
Weberme
Nov 11, 2018
I wish the Micheal's or Hobby Lobby or anywhere around here sold any kind of wires besides basic so this is good for me to know how to make my own. I have seen the paddle ear wires online but never ordered them because high shipping. Where online is the best place to buy them? I love that these earrings are so easy and inexpensive to make.
mulberrygalprinces s
Mar 31, 2017
I have a better idea. They make long head pins with ends that are flat like that. They are called paddles and you can find them at Michaels or hobby lobby. Then you don't have to hammer anything. Just put the beads on, bend and you are done. Beautiful earrings that you made in five minutes. And another tip, if you are giving them to someone like me, use the stainless steel paddles so there won't be an allergic reaction to the metal.
kamwarro 3203738
Nov 23, 2013
If you want to stick a 16G wire in your ear, you must have ENORMOUS holes! 20G is thick enough to be uncomfortable for most people, and 21G is the standard for most commercial findings. The idea is good but I would seriously rethink your wire recommendations.
Report Inappropriate Comment
Are you sure you would like to report this comment? It will be flagged for our moderators to take action.
Thank you for taking the time to improve the content on our site.