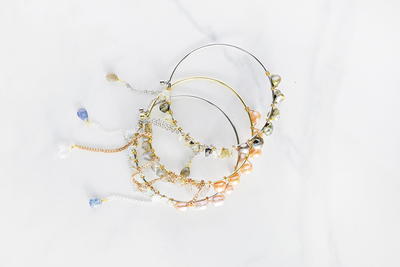
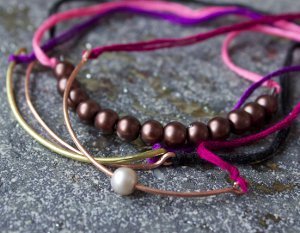
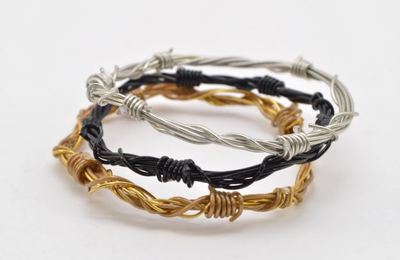
Easy Wired Bracelet

Love the look of wire jewelry? Make this Easy Wired Bracelet for yourself for a simple piece in your collection that is sophisticated enough to wear every day. It's so simple to make you can make one for all your jealous friends.
Project TypeMake a Project
Time to CompleteIn an evening
Bead Technique UsedChainmail/Wirework
Bead Project TypeBracelet

Materials:
- 21 gauge Non Tarnish Silver Plated Square wire – see formulas below*
- 21 gauge Brass Fancy Square wire – see formulas below*
- 20 gauge Non Tarnish Silver Plated half round wire – 2 feet (60.2 cm) – cut into 6 pieces, each 4 inches (10.2 cm) long
- 1 Trigger or Lobster clasp of choice
- Chain nose pliers
- Round nose pliers
- Flat nose pliers
- 6 mm diameter/round shaping item (mandrel)
- Ruler
- Marker
- Quilter or painter's tape
- Wire cutters
Formula for outer wires:
- (Wrist x 2) + 1 3/4 inch (4.5 cm)
- Straighten, measure and then cut 1 piece of 21 gauge Fancy Square Brass and 1 piece of 21 gauge Square Non Tarnish Silver.
- Example: for a 6 1/2 inch (15.5 cm) wrist, the necessary length of each wire would be 14 3/4 inches (37.3 cm).
Center construction wires formula:
- Wrist + 1 inch (2.5 cm)
- Straighten, measure and then cut: 2 pieces of 21 gauge Fancy Square Non Tarnish Silver, 1 piece of 21 gauge Fancy Square Brass and 2 pieces of 21 gauge Square Non Tarnish Silver.
- Example: For a 6 1/2 inch (15.5 cm) wrist, the center wire length is 7 1/2 inches (19 cm).
Instructions:
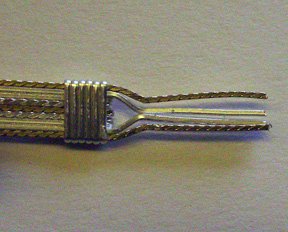
- Prepare all necessary wires as directed above. Mark the center of each longer/outer wire. Individually bend each wire, at the center mark, around a 6 mm diameter round shaping item, forming a U. (I used the smalest step on the larger Beadalon jump ring mandrel.) Fit the Silver U inside the Fancy Brass U.
- Place the bracelet bundle alongside a ruler with the uneven ends at the number 0. Measure down 1/2 inch (8 mm) and mark across the bundle. Measure the distance between the two marks, divide in two and mark the center. Place the center mark on a whole number. Measure and mark 3/4 inch (19 mm) to each side of the center. From each side-of-center mark, measure toward its respective end 1 inch (25 mm) and mark.
- Use a polishing cloth to completely remove the center mark, leaving 6 marks on the back of the bracelet bundle. Beginning on the mark at the U end, use one piece of perpared 20 gauge half-round wire, to make a series of wraps, working from the mark toward the center, 6 or 7 wraps to show. <ove the second mark and wrap from it back toward the wraps just made, 6 times to show. At the 3rd mark, wrap from it toward the second set of wraps. From the 4th mark, you will wrap away from the center, toward the open end (leaving the center clear). At the 5th mark, wrap toward the open end and at the last/6th mark, wrap back toward the center, making the same amount of wraps as you did at the very first mark.
- Remove all of the tape from the bracelet bundle. Working on the U end, hold the wraps in place using flat nose pliers while using fingers (or another tool) to bend the center wires toward the back of the bundle, 90 degrees over the edge of the flat nose pliers.
- Put down the flat nose pliers and use fingers to continue firmly pressing the end wires toward the wrapped segment that is under them. Trim these end wires so they are about 1 mm longer than the wrap wires under them.
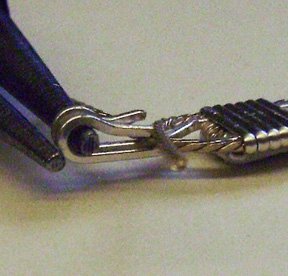
- Place chain nose pliers on the ends of these trimmed wires and give them a slight curve, heading down toward the bracelet back. Use flat nose pliers to press the curved wire ends over the wrapped segment. This completes the 'eye'. On the opposite end of the bracelet, on each side, slightly separate the outer two wires from the center 5 wires and repeat the procedure with the center 5 wires.
- Turn the bracelet so the front side is facing you. On the end with remaining wires, use fingers to criss-cross each pair of wires.
- Use flat nose pliers to bend each criss-cross wire straight up, from the bends made.
- Once again, criss-cross the fancy brass wires, on the top of the straightened silver wires.

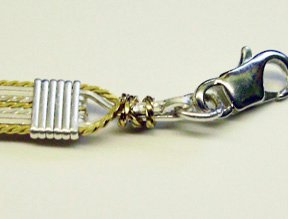
- Measure the silver wires from the wrap out, and trim them to 1/2 inch (13 mm) long. On these silver wires, use round nose pliers to form a loop, rolling toward the front of the bracelet, so the ends of the loop meet the criss-crossed brass wires.
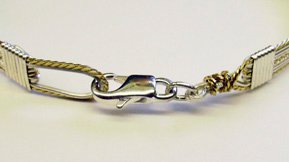
- Insert the jump ring of your chosen clasp into the loop made. Use the criss-crossed brass wires to wrap the loop closed, trim and tuck their ends.
- Use a found item to give the bracelet its initial shape and finish by hand. Clean off any residual marks from the back.
Read NextSea Urchin Memory Wire Bracelet
Your Recently Viewed Projects
Thanks for your comment. Don't forget to share!
countrybella22 650 2394
Jul 19, 2013
Hi; step 4 says to remove the tape, but I cannot find where to add the tape and what kind. I know its to secure the wires while measuring and wraping, but cannot find the details. Thanks, country bella
Report Inappropriate Comment
Are you sure you would like to report this comment? It will be flagged for our moderators to take action.
Thank you for taking the time to improve the content on our site.