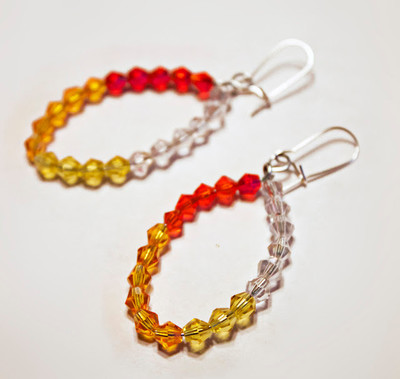
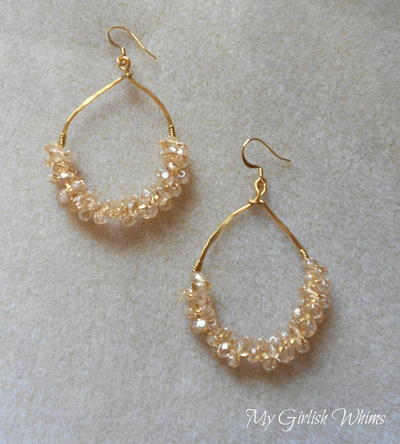
Enchanted Forest Earrings

Like golden sunlight filtered through a lush green tree canopy, these Enchanted Forest Earrings will glint and glisten as you wear them. The combination of crystals and pearls used in these DIY earrings provides both smooth and faceted surfaces for a mix of shimmer and shine. Yet even though these earrings incorporate an array of beads, they are still light and airy as a branch-rustling breeze. Learn how to make earrings that combine beading and exposed wire for an enchanting effect with this free pattern.
Project TypeMake a Project
Bead TypeCrystal, Pearl
Time to CompleteUnder an hour
Bead Technique UsedStrung
Bead Project TypeEarrings

Materials List
- #2949715- 26pc 3mm Round Bead- 14k Gold Plate
- #2949706- 50pc 2mm 14k Gold Plate Crimp Bead
- #2949727- 8pc 13mm Ball Hook Earwire- 14k Gold Plate
- #2949737- 10pc 35mm 14k Gold Plate Head Pin
- #7722128- 18pc 6mm Crystazzi Bicone- K Champagne
- #7722224- 12pc 8mm Crystazzi Bicone- Indicolite
- #7120207- 50pc 8mm Round Pearl Strand- Gold
- #3202001- 40' .3mm 7-Strand Bead Wire- Gold

Want to switch up your DIY jewelry routine? Then you will love these 40+ Braided Jewelry Patterns: How to Kumihimo, Fishtail Braid, Box Braid and More
Instructions
-
Cut the head off of a head pin and form a loop to make an eye pin. For more instructions on how to create and eye pin loop, check out this video tutorial.
-
Make a champagne bicone link with a wrapped loop. Attach the loop of the link to an earring wire. For step-by-step instructions take a look at this how to make ear wires video tutorial.
-
Make an indicolite drop with a wrapped loop.
-
Cut a 6-inch length of beading wire.
-
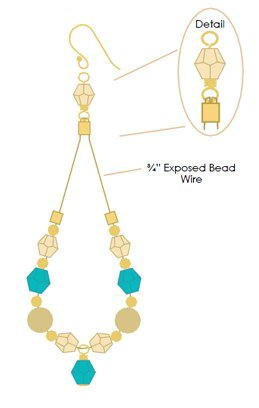
Start beading the center groups for each strand. See how to place bead groups on the beading wire by following the diagram. Start from the center point (the indicolite drop) and work your way out evenly on the sides.
-
Crimp a crimp bead onto each side of the bead group.
-
Use a crimp to attach the ends of the wires to the bottom of each crystal link. Keep in mind to pull the tails through until the amount of wire left is even on both sides and the amount visible is similar to that in the photo (¾-inch).
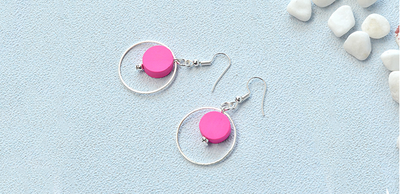
Read NextPink Loop Earrings
Your Recently Viewed Projects
Thanks for your comment. Don't forget to share!
sommerbreeze2003 8 369452
Jun 17, 2019
Pretty! I love the shape of tear drop earrings. They go best with my face shape. Love the color combo you have here!
mulberrygalprinces s
Apr 30, 2017
I must say I have made hundreds of pairs of earrings but not one Osiris with the wire exposed. This will be a first for me. But these are very pretty and I just have to give them a shot. I even have the same beads that were used in thus project. Thank you for offering this. You may have taught an old dog a new trick!
Weberme
Dec 23, 2016
Cute Cute Cute. This is a little bit more complicated than I have ever done in beading but they are so cute that I am going to try and make these for my mom. I love the way they hang and love the colors together. This is a lot more complicated than I have attempted but I think these earrings are worth it. I wish also that there was a video to go with this. These earring would be stunning to wear either casual or dressy. Anyone try this yet?
vicki72 5087692
Sep 19, 2016
I love these earrings but as a beginner the instructions are not very clear to me. Pictures would make this easier to follow.
jsnewlife28 257849 4
Apr 21, 2016
What is an indicolite drop and how do you make it?
EditorLP
Nov 08, 2016
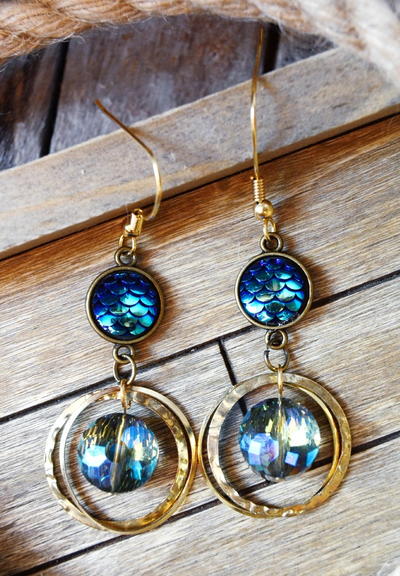
Hello! I know you asked a few months ago, but I believe the indicolite drop is referring to the blue-green bicone crystal drop in the center of the earring's loop. To make it, I would recommend stringing the bicone onto a headpin and make a loop above the bicone, wrapping the headpin wire above the bicone 2 or 3 times before snipping off the excess wire. I hope that helps!
donnajones 7493982
Dec 06, 2014
I spent an evening making these in various colour combinations for christmas presents. Easy to make and a stunning end result!! )
elrdy 8646784
Nov 27, 2013
could anyone please help me. After I have put the crimp bead on how do I attach it to the jump ring as it looks like there is something coming from the top of the crimp bead. I'd love to make these earrings but just can not figure out what to do with the two end of the wires with the crimp bead.
Tracy Creedy
Jun 29, 2013
Where do your wire ends go? Do you add glue in the last crimp and then crop the wires to the crimp edge?
Report Inappropriate Comment
Are you sure you would like to report this comment? It will be flagged for our moderators to take action.
Thank you for taking the time to improve the content on our site.