Broken Ladder Friendship Bracelet Pattern
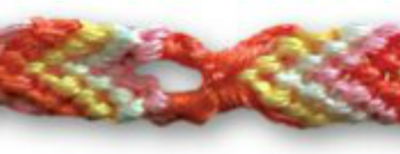
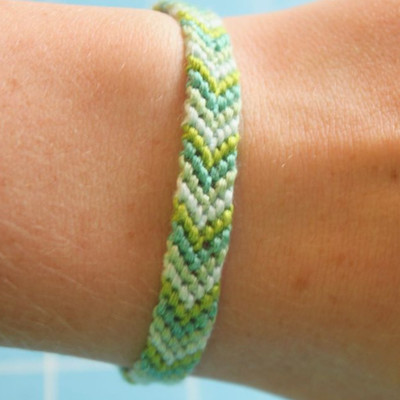
Tired of the same old macrame bracelet patterns? Try this Broken Ladder Friendship Bracelet design! It's like the chevron pattern but with an extra twist. Your friends will all be begging you to teach them how to make this one!
Project TypeMake a Project
Time to CompleteIn an evening
Bead Project TypeBracelet

Notes:
- Before you begin making your friendship bracelet, you should know how to make a Right Hand Double Knot and Left Hand Double Knot. You will also need to know how to make the Arrow Pattern for part of this bracelet.
- These instructions teach you how to complete the pattern using My Friendship Bracelet Maker. However, the pattern can be completed without the loom as well.
Instructions:
- Pick four different color threads for this pattern. (The example uses orange, white, pink, and yellow.)
- Align string, fold in half, and tie knot 1/2 inch from fold, forming a loop.
- Attach your 1/2-inch loop to MYFBM under the butterfly clip.
- Separate strings by placing one string per slot. Note: Use the same color in slots 2 and 9 (orange), 3 and 8 (white), 4 and 7 (pink), and 5 and 6 (yellow). This will align the colors of your bracelet pattern.
- To start, you will need to make four single Arrows (see Arrow Pattern for instructions), one with each of your four colors.
- Once your arrows are complete, take string #2 (orange) in your right hand and strings #3 (white), #4 (pink), and #5 (yellow) in your left hand. Take string #2 (orange) and make 10 single right hand knots over your three combined strings. Place your string #2 (orange) in slot 5 once compete. Slot 2 will now be white, slot 3 pink, and slot 4 yellow.
- Now you will do the same steps on the other side. Take sting #9 (orange) in your left hand and strings # 8 (white), #7 (pink), and #6 (yellow) in your right hand. Use string #9 (orange) and make 10 single left hand knots over your three combined strings. Place string #9 (orange) in slot 6. Slot 9 will now be white, slot 8 pink, and slot 7 yellow.
- Your pattern will now start all over with your new strings. Make an arrow with each of your four colors in order (white, pink, yellow, and orange). Orange should be your fourth arrow this time. Once your arrows are complete, take string #2 (white) in your right hand and strings #3 (pink), #4 (yellow), and #5 (orange) in your left hand. Take string #2 (white) and make 10 single right hand knots over your three combined strings. Place your string #2 (white) in slot 5 once compete. Slot 2 will now be pink, slot 3 yellow, and slot 4 orange.
- Now you will do the same steps on the other side. Take string #9 (white) in your left hand and strings # 8 (pink), #7 (yellow), and #6 (orange) in your right hand. Use string #9 (white) and make 10 single left hand knots over your three combined strings. Place string #9 (white) in slot 6. Slot 9 will now be pink, slot 8 yellow, and slot 7 orange.
- Continue to follow steps 8 and 9 with each new set of strings (the order of colors will change from those listed in the example) until you think your bracelet is long enough to fit your wrist.
- Once your bracelet is long enough to fit your wrist, take the three strings from slots 2-4 in your left hand and the three stings from slots 7-9 in your right hand and braid with the remaining two center strings.
- Take the braided strings and tie two basic knots at the end of your friendship bracelet. Learn how to finish your friendship bracelet with knots or beads by visitng myfbm.com.
- Unclip your friendship bracelet from the butterfly clip and cut off the excess braided section. Your bracelet is ready to wear or share!

