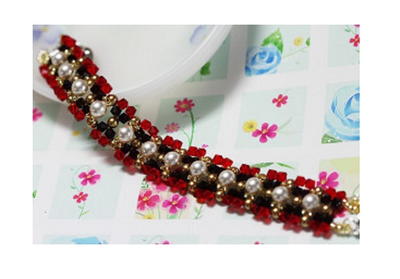
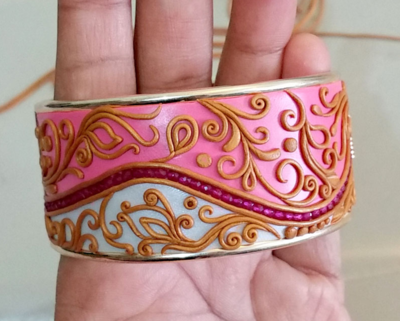
Golden Accented DIY Bracelet

Who knew a clay bracelet could look so luxurious and chic? It's time to bring out some colorful clay to create this Golden Accented DIY Bracelet. The bracelet design incorporated into this jewelry piece is simply stunning. Hidden within the clay detailing is a paisley/floral pattern. It's also extremely colorful, so it's perfect for those summer months when you want to wear bright and bold colors. This DIY clay bracelet will have people fooled into thinking it's an expensive one of a king designer bangle. Follow this tutorial if you're interested in creating this beautiful bangle!
Project TypeMake a Project
Time to CompleteIn an evening

Materials List
- premo! Sculpey® Individual Bars
- premo! Sculpey® Accents Individual Bars
- Sculpey Clay Conditioning Machine
- Sculpey Super Slicer Set, w/comfort handles
- Exacto blade
- Extruder of your choice
- Channel bracelet blank
Interested in learning more bracelet designs for a potential friendship bracelet or gift? Give this eBook a read:"Easy DIY Bracelet Designs: 14 Ways to Make Bracelets" eBook
Instructions
-
Getting Started Polymer clay may stain. Clay may damage unprotected furniture or finished surfaces. Do not use polymer clay on unprotected surfaces. We recommend working on the Sculpey clay mat, wax paper, metal baking sheet, or disposable foil. Start with clean hands and work surface area. Knead clay until soft and smooth.
For best results, clean your hands in between colors. Shape clay, pressing pieces together firmly. Bake on oven-proof glass or metal surface at 275°F for 30 minutes per ¼" thickness.
For best baking results, use an oven thermometer. Do not use microwave oven. Do not esceed the above temperature or recommended baking time. Wash hands after use. Baking should be completed by an adult. Begin by preheating oven to 275 °F. Test temperature with oven thermometer for perfectly cured clay. For best results, condition all clay by running it through the Clay Conditioning Machine for several passes on the widest setting. Fold the clay in half after each pass and insert the fold side into the rollers first. -
Roll out Premo Blush clay, a little bigger in size than the dimensions of the “workable” area of the cuff bracelet.
-
Using a thin paper, cut out a strip which is equal to the cuff bracelet area. Draw out a rough swirl pattern on the paper, dividing the whole area into two halves. Cut the rolled out clay using the cutout as a template.
-
Trace out the central vein, using a needle tool, on to the blush clay.
-
Using a sharp knife, cut along the traced central imprint.
-
Lay out the two halves in two different halves of the bracelet as opposing halves.
[Bracelet-005]
-
Repeat the same steps with Pearl clay while polymer clay, thereby creating complementary pieces.
-
Add complementary pieces of while against the pink pieces, filling the cuff completely with a clear white-pink demarcation. Smooth the joint lines by passing your finger over the joint and pressing gently.
-
Start setting the ruby string (with its thread still in) over the white-pink clay joint. Repeat till the joint on both the cuff panels is completely covered.
-
Gently withdraw the string from the rubies and reposition loose rubies (if any) caused by pulling the thread out.
-
Outline the row of rubies with extruded golden polymer clay carefully.
-
The outline needs a bit of careful handling. There is occasional smoothing required to remove the kinks caused by the stones. Repeat the outlining step on the other side of the rubies.
-
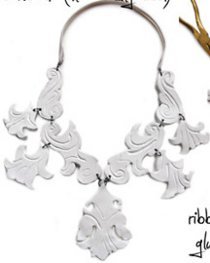
With extruded golden polymer clay, draw free-hand patterns. For symmetric patterns, however, careful measurements need to be taken, similar to the filigree work done in the earrings/necklace of this set.
-
With extruded golden polymer clay, draw free-hand patterns. For symmetric patterns, however, careful measurements need to be taken, similar to the filigree work done in the earrings/necklace of this set.
-
Gradually fill in the spaces with the golden filigree
-
Accent the gold swirls by dusting with Aztec Gold Pearl-Ex pigments.
-
Bake according to the directions above. After the piece has baked and cooled, apply glaze all over with a synthetic hair flat brush.
-
And the cuff is ready!
What other DIY clay jewelry have you created?
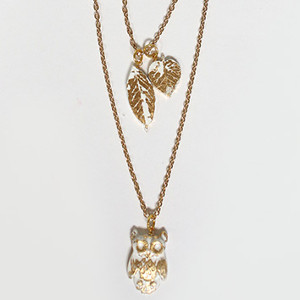
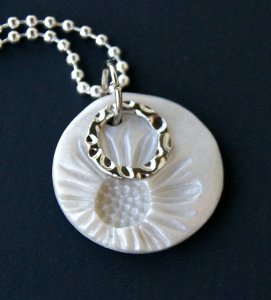
Read NextGolden Clay Charm Necklace
Your Recently Viewed Projects
Thanks for your comment. Don't forget to share!
mulberrygalprinces s
Jun 14, 2017
I love to make clay jewelry and Premo is all I ever use. I love this design. These colors are gorgeous and just think of all the other color combinations you can come up with! Purple is my favorite color but think about this is black and white with ying yang symbols around it. Thank you for a wonderful idea.
Report Inappropriate Comment
Are you sure you would like to report this comment? It will be flagged for our moderators to take action.
Thank you for taking the time to improve the content on our site.