


This project was submitted by one of our readers, just like you.
Teardrop Tree Of Life Pendant

Teardrop Tree Of Life Pendant
"In this tutorial we are making a stunning Tree of Life pendant, using a gemstone teardrop cabochon and wire. Making this style of pendant using a teardrop cabochon is a little different, so we hope you enjoy this tutorial! This project doesn't require any special tools, just standard cutters and flat nose pliers. The stone is quite small, at 25mm, so the finished pendant is lovely and delicate. We call this a beginners project, but it is a little fiddly! Time to complete is approximately one to two hours. "
Project TypeLearn a Technique
Bead TypeGemstone, Wire
Time to CompleteIn an evening
Bead Technique UsedChainmail/Wirework
Bead Project TypeOther

Materials List
- Gemstone Cabochon 25mm
- 18ga Artistic wire
- 26ga artistic wire
Instructions
-
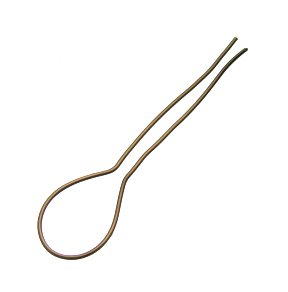
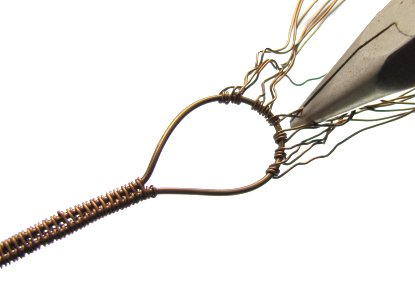
Take 14cm of 18ga wire, and make a teardrop-shape that is smaller than the cabochon. Then, use flat nose pliers to angle the tail ends off as per the photo.
-
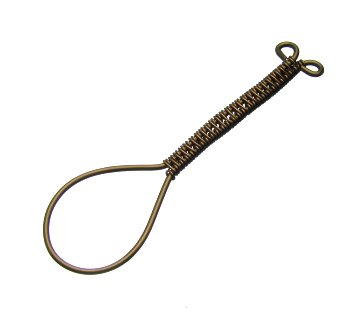
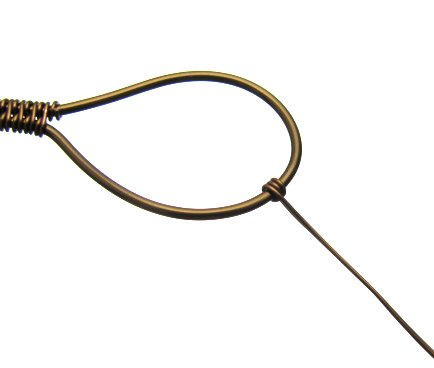
Using 26ga wire, make a weave (any weave will do, use your favourite!). Then, using round nose pliers make two small loops at the end of the 18ga wire.
-
Take 8pcs of 20cm 26ga wire and fold each in half. Attach each piece of wire to the frame at the middle of the 26ga wire (at the bend) with two loops onto the 18ga wire.
-
Optional: After attaching all 8pcs of wire, use flat nose pliers to kink the wires to make them look more like natural tree roots.
-
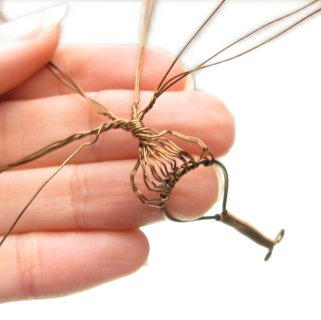
Bring all the wires together, and twist as one to make the tree trunk. Use your stone as a guide to get the shape right. Roughly shape five branches by twisting multiple wires together.
-
Using flat nose pliers, take the individual wires and kink them to look more natural. Put your stone in place to check the shape is working well.
-
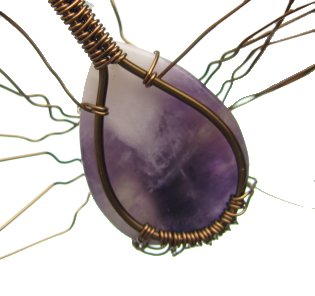
One by one, take each individual wire at attach it to the back frame with two wraps. It is easiest if you do the top two first as this will help hold the stone in place.
-
After attaching all the wires, trim using flush cutters then carefully tuck the cut ends under the frame wire.
-
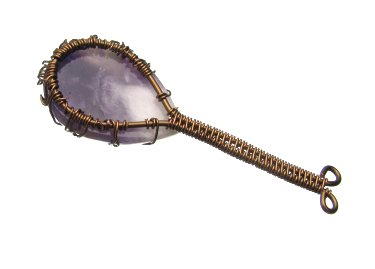
Using either just your fingers or a pair of bail making pliers, shape the bail over so that the two loops are flush against the back of the stone.
-
That's it! You may wish to shape the tree a little more, or kink the wires some more using flat nose pliers. Try to push the tree and all its roots and branches as close to the stone as possible.