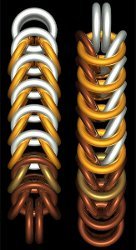
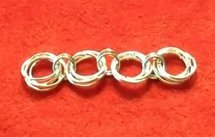
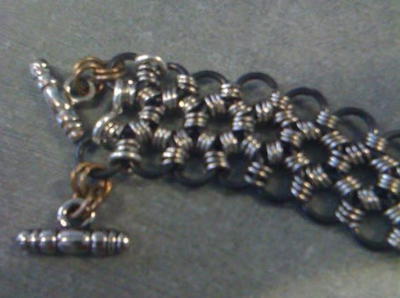
European 4-in-1 Diamond Chainmail Pendant

Every girl should have a diamond piece in her jewelry collection, but if you can't afford one, make the next best thing with this European 4-in-1 Diamond Chainmail Pendant pattern. If sparkly stones aren't your thing, then this diamond chainmail pattern should suit your style. Sleek and edgy, this pendant design edges a silver center in black jump rings for a cool two-tone look. Learn how to make chain maille pendants with these detailed instructions, and dress up all your plain necklace chains with a bit of jump ring bling.
Project TypeMake a Project
Time to CompleteIn an evening
Bead Technique UsedChainmail/Wirework
Bead Project TypeOther

Materials:
- 81 Silver Plated Beadalon™ Artistic Wire® Chain Maille Jump Rings size 18g 9/64”
- 40 Black Beadalon™ Artistic Wire® Chain Maille Jump Rings size 18g 9/64”
- 1 Beadalon™ Pendant Bail
- 1 Paper Clip
- 1 Set Artistic Wire® Chain Maille Tool Set – One Pair Bent Nose Pliers & One Pair Chain Nose Pliers
Preliminary Steps:
Close 16 silver plated jump rings and open the remaining 65 silver plated jump rings. Close 4 black jump rings and open the remaining 36 black jump rings.
Instructions:
-
With 1 open black jump ring, scoop up the paper clip; before closing add 2 pre-closed black jump rings. Close the black jump ring.
-
With the 2 pre-closed black jump rings added in step 1, make mouse ears by flipping one jump ring to the left and one jump ring to the right. Notice that the open black jump ring from step 1 looks like the mouse’s forehead. If you do not see the forehead, the weave is facing the wrong way; flip it over.
-
With an open silver jump ring, go down through the front of the right ear, around the back of the forehead, and back up through the back of the left ear. Before closing the silver jump ring, add 2 pre-closed silver jump rings. Close the silver jump ring.
-
With the 2 pre-closed silver jump rings added in step 3, make mouse ears by flipping one jump ring to the left and one jump ring to the right. Again, notice that the open silver jump ring from step 3 looks like the mouse’s forehead.
-
With an open silver jump ring, go down through the front of the right ear, around the back of the forehead, and back up through the back of the left ear. Before closing the silver jump ring, add 2 pre-closed silver jump rings. Close the silver jump ring.
-
Repeat steps 4 and 5 an additional 6 times.
-
Make mouse ears. With an open silver jump ring, go down through the front of the right ear, around the back of the forehead, and back up through the back of the left ear. Before closing the silver jump ring, add 2 pre-closed black jump rings. Close the silver jump ring.
-
Make mouse ears. With an open black jump ring, scoop up the two closed black jump rings added in step 7. Close the black jump ring.
-
With an open black jump ring and entering from the back of the jump rings, scoop up first the silver jump ring and black jump ring. Close the black jump ring.
-
With an open silver jump ring and entering from the back of the jump rings, scoop up the next “free” silver jump ring and only the silver jump ring picked up in step 9. Close the silver jump ring.
-
Continue marching down the right side of the weave in this manner (repeat step 10 six more times) until you get to the last jump ring to be added. The last jump ring to be added to this row will be a black jump ring.
-
Beginning at the bottom of the weave, with an open black jump ring and entering from the front of the jump rings, scoop up the black ring from step 11 and the silver jump ring immediately behind it. Close the silver jump ring.
-
March up the right side of the weave by adding 6 silver jump rings and one black jump ring.
-
Continue the pattern by:
•Marching down with 1 black, 5 silver, & 1 black.
•Marching up with 1 black, 4 silver, & 1 black.
•Marching down with 1 black, 3 silver, & 1 black.
•Marching up with 1 black, 2 silver & 1 black.
•Marching down with 1 black, 1 silver, & 1 black.
•Marching up with 2 black.
•Marching down with 1 black.
-
Flip the weave over and repeat the pattern by:
•Marching up with 1 black, 7 silver, & 1 black.
•Marching down with 1 black, 6 silver, & 1 black.
•Marching up with 1 black, 5 silver, & 1 black.
•Marching down with 1 black, 4 silver, & 1 black.
•Marching up with 1 black, 3 silver, & 1 black.
•Marching down with 1 black, 2 silver, & 1 black.
•Marching up with 1 black, 1 silver, & 1 black.
•Marching up with 2 black.
•Marching down with 1 black; before closing add bail.
Read NextJapanese 12-in-2 Bracelet and Ring
Your Recently Viewed Projects
Thanks for your comment. Don't forget to share!
Jim Moriarty
Oct 19, 2016
This may sound silly, but this is a perfect piece to add to my outfit for the Renaissance Faire. Gotta have that medieval bling, amirite?
Tracy47
Jan 21, 2015
I am a visual learner and was wondering if you had a video for this and the body chain
LookinUp2
Jul 03, 2013
Once I got a rhythm going it seemed to work up pretty fast! Mine wasn't as impressive as the picture.... One Question to any chain mailed pros....How do you keep it from being so 'floppy'??? Or is it supposed to be floppy and loose?
Report Inappropriate Comment
Are you sure you would like to report this comment? It will be flagged for our moderators to take action.
Thank you for taking the time to improve the content on our site.