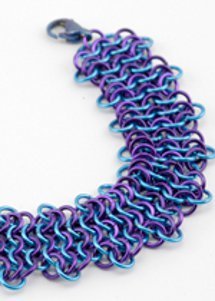
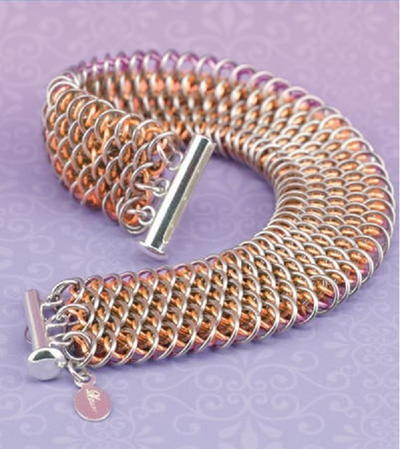
Baby Pink Dragon Scale Bracelet
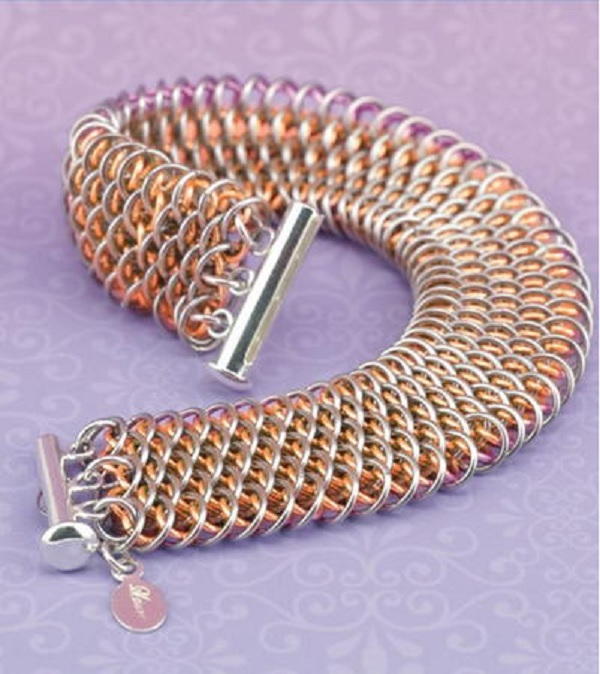
How pretty is this Baby Pink Dragon Scale Bracelet? Incorporating pink jump rings into chain mail jewelry designs give the hard metal a softer touch. Either way, the dragon scale weave is such a pretty design on its own. Read along with this tutorial and find helpful hints and tips about everything from which size rings to connect and how to add a clasp to this stunning DIY bracelet. If you want to know how to make a chainmaille bracelet, this tutorial is a good place to start.
Project TypeMake a Project
Time to CompleteWeekend project
Bead Technique UsedChainmail/Wirework
Bead Project TypeBracelet

Materials List
- 20 gauge Stainless Steel wire cut into 260 3/16” (4.76mm) ID jump rings (Large Rings)
- 20 gauge Pink (12b) Artistic Wire® cut into 260 1/8” (3.18mm) ID jump rings (Small Rings)
- 20 gauge Stainless Steel wire cut into 6 7/64” ID jump rings (Tiny Rings)
- 1 Three-Strand slide clasp 355B-013
Instructions
-
Make a chain of one large ring, one small ring, one large ring, one small ring, & one large ring. This will be the width of your bracelet, 5 rows wide.
-
Add 3 large rings. With an open large ring “trap” two closed large rings by positioning one large closed ring around each of the two small rings added in step 1. Start with the middle large ring. Take and open large ring, go through one small ring “trapping one closed large ring, encircle the small ring in the middle and go through the other small, “trapping” the second large closed ring. To complete the row, add a large ring to each of the outer small rings. These two large rings will hang loose. NOTE: Large rings only go through small rings and small rings only go through large rings.
-
You have just added 3 large rings. Now you will add 3 small rings. The 3 small rings are not added to the 3 open large rings you added in step 2, but will be added to the 2 closed large rings “trapped” in step 2. The first small ring connects the 2 large “trapped” rings in the middle. Take an open small ring and pick up the right large “trapped” ring and pick up the left large “trapped” ring. The second small ring attaches to the right large “trapped” ring and hangs loose. The third small ring is attached to the left large “trapped” ring and hangs loose. VERY IMPORTANT: Every time you add a row of small rings, turn the weave to the side, you will see the small rings sitting on top of the large rings. Make sure you tuck those small rings into the large rings before your proceed. If you do not tuck the small rings into the large rings, your weave will lock up. Also, every time you add a row of small rings they will be added behind the last row of large rings you just added.
-
You just added a row of 3 small rings, now you need to add a row of 2 large rings. These 3 small rings will be poking up through the 3 large rings added in step 2. Take a large open ring and pick up the right small ring you added in step 3, go around the small ring (added in step 1) and pick up the small ring you added in the middle in step 3. Take an open small ring and pick up the middle small ring added in step 3 and pick up the left small ring added in step 3.
-
You just added a row of 2 large rings, now you will add a row of 2 small rings to the 3 large rings you added in step 2. With an open ring pick up the right large ring added in step 2 and the middle large ring added in step 2. Take another open small ring and pick up the middle large ring added in step 2 and the left large ring added in step 2. Be sure to tuck these two small rings into the large rings.
-
You just added 2 small rings, now you will add a row of 3 large rings. Take an open large ring and pick up the right small ring added in step 5, encircle the small ring added in step 3 and pick up the left small ring added in step 5. Take an open large ring and add it to the right small ring added in step 5, it will hang loose. Take an open large ring and add it to the left small ring added in step 5, it will hang loose.
Adding The Clasp
-
Attach one half of the clasp to the three small rings you ended with in step 7 using 3 tiny rings.
-
For the other end; the end you started with, you will need to add 3 small rings to the 2 “trapped” large rings you added in step 2. To add these 3 small rings, follow step 7.
-
Attach the other half of the clasp to the three small rings you added in step 9 using 3 tiny rings.
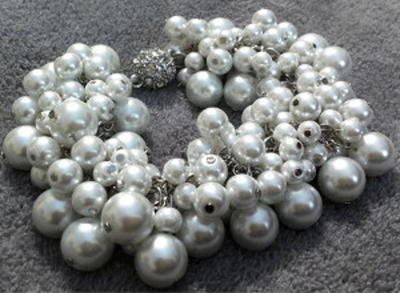
Read NextChanel-Inspired Pearl Bracelet
Your Recently Viewed Projects
Thanks for your comment. Don't forget to share!
mulberrygalprinces s
Sep 23, 2017
I have to agree with the previous poster. In chain mail you need to have pictures or at least a diagram. It's not easy to follow written directions. Like learning to swim in your living room. Something is missing. Maybe after I make a few from other designers I will better understand this.
shirley 7529837
Mar 23, 2017
Text only doesn't work at all for chainmaille. Pics are essential. Waste of time getting here.
Editor EK
Apr 05, 2017
Hello Shirley, Thank you for your feedback. We will keep your comment in mind for future chainmaille tutorials and videos. We appreciate that you took the time to give your feedback. Best, Editor, AllFreeJewelryMaking.com
cbarkerafwc 614156 9
Jun 05, 2016
This is the worst and most confusing tutorial I have ever seen. I have been doing chain mail and wirework bracelets, necklaces and rings for years and have never seen one this bad.
AllFreeJewelryMaki ng Editor
Jun 06, 2016
Hi! We appreciate your feedback, and your comments will be taken into consideration when posting chainmaille tutorials in the future and when planning video content for AllFreeJewelryMaking.com. Again, we appreciate the time it took you to share your thoughts. Best regards, Editor, AllFreeJewelryMaking.com
LissyMac
Jan 22, 2014
I am a different type of learner. (I'm not alone) I would like pictures so I can "see" what the instructions are talking about. I need both.
oblueone 6342282
Jan 30, 2013
Looks gorgeous, but perhaps images of each finished step would help. I've been doing chainmaille for awhile now, but written only instructions for any pattern are difficult for me to follow.
Peanut101
Aug 14, 2013
same for me... this website helped me a lot. http://cgmaille.com/tutorials/dragonscale.shtml hope that helps!
Report Inappropriate Comment
Are you sure you would like to report this comment? It will be flagged for our moderators to take action.
Thank you for taking the time to improve the content on our site.