Retro Friendly Plastic Earrings

Retro Friendly Plastic Earrings
Need more free jewelry making projects? Try out this fun technique and make these Retro Friendly Plastic Earrings. Friendly plastic is easy to cut and easy to melt, making it a great tool for creating some unique handcrafted jewelry!
Project TypeMake a Project
Bead TypeMiscellaneous
Time to CompleteIn an evening
Bead Project TypeEarrings

Materials:
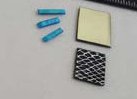
- Friendly Plastic sticks – Metallic Solid Gold, Metallic Print Turquoise/Blue and Cobra Silver (or 3 colours of your choice)
- Aluminium foil (I like to use aluminium foil because it can be easily peeled away from the cooled Friendly Plastic piece)
- Electric frypan (griddle) or frypan on a stove top (I have also successfully used a sandwich press)
- Scissors
- Tweezers (optional)
- 2 earring hooks
- Assorted beads
- 4 jump rings
- 2 eye pins
Instructions:
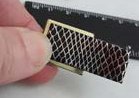
- Cut a 2cm strip from the gold Friendly Plastic.
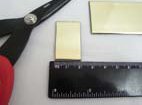
- Cut this strip into 2 equal pieces.
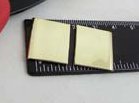
- Place the cobra silver patterned strip of Friendly Plastic on top of one of the gold pieces.
- Use this as a guide to where you should cut. You will need to leave a small border of approximately 2mm all the way around. Cut the strip off the end.
- Place the cut strip on top of one of the two gold pieces as a guide to where to make the last cut.
- You now have two gold strips and three cobra silver strips. Set aside the small offcut for another project.
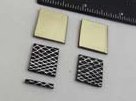
- The blue is the next colour to be cut. Cut 2 thin slivers from the stick, approximately 2 or 3mm wide.
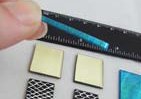
- Cut each of the slivers into 3 pieces. You should now have one gold, one cobra silver and 3 thin pieces of blue for each earring.
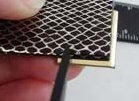
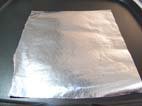
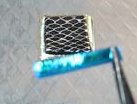
- Now that all the Friendly Plastic is cut to size you are ready to begin melting the plastic. I use a flat griddle on my stovetop, but you can use an electric frypan and I have also successfully used a sandwich press. Tear off a sheet of foil and use your fingers to flatten it out as the Friendly Plastic will take on any ripples or wrinkles that are in the foil. If you prefer not to have the diamond pattern from the foil, then press your fingers firmly across the surface of the foil until the pattern disappears.
- Place the foil in the pan making sure it is lying flat. Set the temperature to about half way on your hotplate.
- Place one of the pieces of pre cut gold friendly Plastic on the foil. It will begin to distort a little and then settle back into a flat piece.
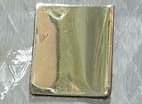
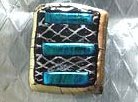
- At this point the foil surface will have a slightly crazed look. As soon as the gold piece has a crazed surface, place the cobra piece on top. Take care in placing it because as soon as it touches the gold surface it will stick to it.
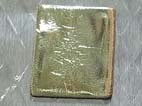
- Allow the cobra piece to melt as the gold did. Once the crazed look has been reached, place one of the blue strips in place. Again, be careful as you place it because you won’t be able to move it once it is on the surface without damaging your base.
- Place the second and third strips in place.
- Allow the three strips to melt into the cobra strip and then remove the foil from the pan. Set aside to cool making sure that it is lying flat. It will only take 5 to 10 minutes but if you are in a hurry, you can place the whole piece of foil in a sink of cool water and it will set even faster.
- Repeat the process to create the second earring component.
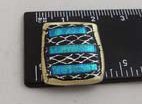
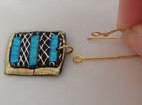
- Once the Friendly Plastic has cooled, gently peel it away from the foil. It should come away quite easily.
- Find the centre of your earring. Drill a hole about 2-3mm from the edge of the Friendly Plastic using a craft drill. The one I use is called a Her Embossing Tool.
- Open a jump ring using two pairs of flat nosed pliers. Push the opened jump ring through the hole in the Friendly Plastic.
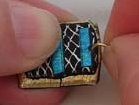
- Close the jump ring again with flat nosed pliers.
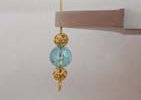
- Lay the eye pin in line with the jump ring in the Friendly Plastic and the earring hook so that you can work out which way you need to turn the loop in the eye pin.
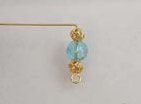
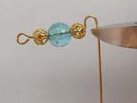
- Thread the eye pin with your choice of beads and then grip the eye pin with the flat nosed pliers just above the top bead.
- Bend the eye pin at a 90° angle.
- Switch to round nosed pliers and turn a loop.
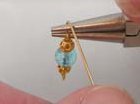
- Trim away the excess with flush cutters and finish turning the loop.
- Hook the component on the jump ring.

- Open the loop of the eye pin and hook on the earring hook.
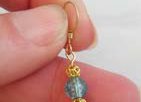
- Close the loop again. Assemble the second earring in the same way.
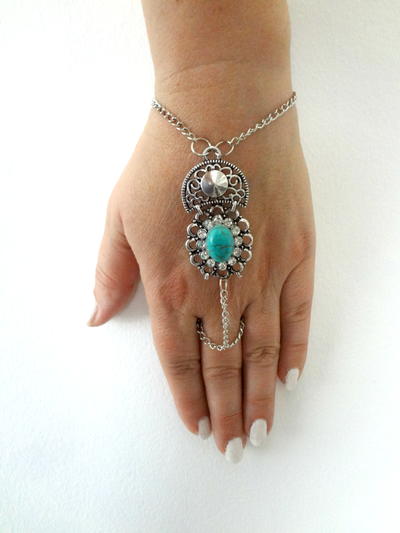
Read NextBohemian Chain Hand Bracelet