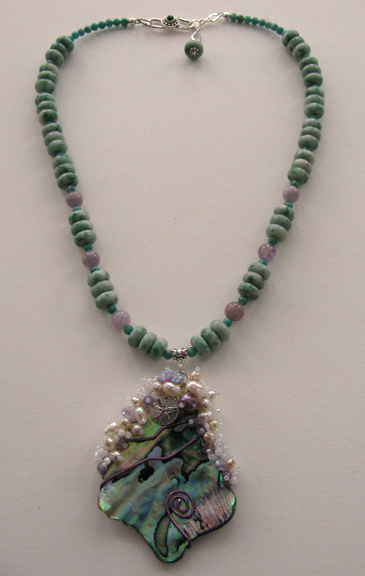
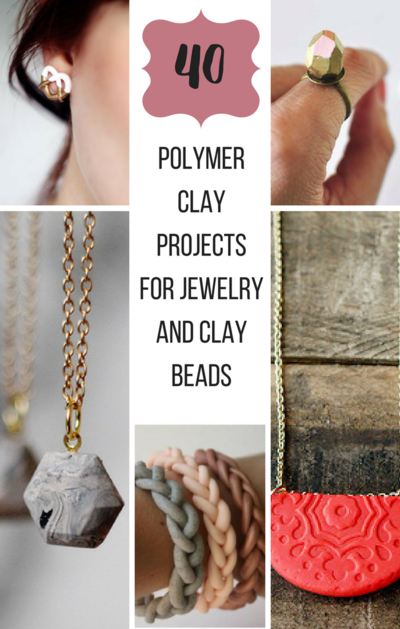
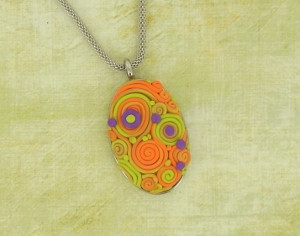
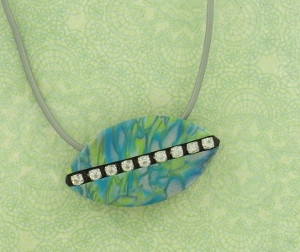
Faux Dichroic Glass Pendant

Display an array of brilliant colors with this Faux Dichroic Glass Pendant! This polymer clay tutorial achieves the look and effect of dichroic glass but is much more accessible and easier to work with. The beauty of dichroic glass is that it reflects a different color than it transmits for a stunning spectrum of hues. This polymer clay technique lets you do just that!
Project TypeMake a Project
Time to CompleteIn an evening
Bead Project TypeNecklace

Getting Started:
Do not use unbaked clay on unprotected furniture or finished surfaces. Start with clean hands and work surface area. Good work surfaces include wax paper, metal baking sheet, or disposable foil. Knead clay until soft and smooth. Bake on oven-proof glass or metal surface at 275 °F (130 °C) for 30 minutes per 1/4” (6 mm) thickness. For best baking results, use an oven thermometer. DO NOT USE MICROWAVE OVEN. DO NOT EXCEED THE ABOVE TEMPERATURE OR RECOMMENDED BAKING TIME. Wash hands after use. Baking should be completed by an adult.
Begin by preheating oven to 275 °F (130 °C). Test temperature with oven thermometer for perfectly cured clay. For best results, condition all clay by running it through the clay dedicated pasta machine several passes on the widest setting. Fold the clay in half after each pass and insert the fold side into the rollers first.
Materials:
Clays:
- Premo! Sculpey®: Black - 2 oz (1 block)
Tools:
- Clay Conditioning Machine
- Sculpey® Super Slicer
Accessories:
- premo! Sculpey® Round Jewelry Findings-Silver
- Sculpey® Bake & Bond
Additional Supplies:
- Alcohol
- Paintbrush, fine
- Adirondack® Alcohol Inks- Wild Plum, Cool Stream, Citrus
- Silver leaf
- ICE Resin®
- Black cord
- Paint palette
- Toothpicks
- Towel
- Plastic mixing cup
- Wooden craft stick
- Craft knife
-
Ruler
Instructions:
-
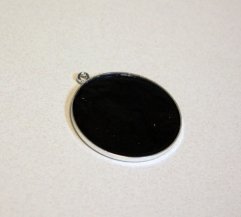
Making the base of the pendant:
Using the Clay Conditioning Machine on #7 setting, make a sheet of Black clay. Using the round pendant finding, make an impression in the Black sheet of clay. Using the toothpick, spread a small amount of the Bake and Bond adhesive onto the round pendant finding. Using the craft knife, cut out the circle pattern and glue into the round pendant finding.
-
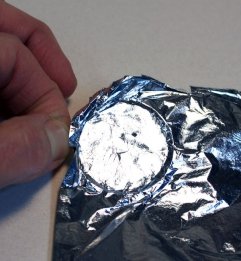
Adding silver leaf:
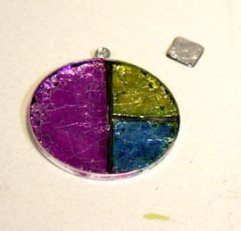
Carefully open the silver leaf package and lift a leaf out. Place the leaf onto the black clay and press lightly; it should adhere to the clay when you press. Tear away the leaf, leaving it only on the clay circle. If some of it comes off, take a small piece of leaf and replace it.
-
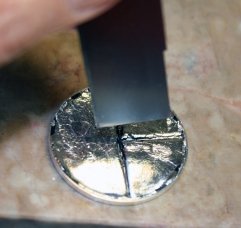
Adding design elements:
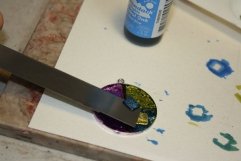
Using the Super Slicer blade, make an indentation in the circle, just off center. Make the indentation deep but not all the way to the bottom of the bezel. Make another indentation in the half circle.
-
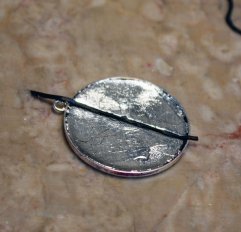
Filling in the design element:
The indentations will now be filled in with small strips of the black clay. This will give the pendant a dichroic look and will also prevent your ink from running together. Using the clay machine, roll out a sheet of Black clay. Using the Super Slicer, cut a thin strip. Lay it across the indentations you made in the pendant and cut to size. Do this for both the indentations you made in step 3.
-
Painting your piece:
Alcohol inks dry out in the paint palette pretty quickly, so you’ll have to replenish your ink supply as you go. It’s important to have a fine brush so that you don’t leave streaks in the ink and the leaf. (Note: alcohol inks will stain the pendant finding. Be careful to keep the pendant finding clean.) Using the Wild Plum ink, paint the large section of your pendant. After you have covered the entire section, let it dry for about two minutes. Clean your brush with the alcohol and towel. Wet the towel with alcohol and clean the brush with the damp cloth. Using the Citrus ink, paint the upper right section of the pendant; let it dry for about two minutes. Clean your brush with the alcohol and towel. Using the Cool Stream ink, paint the lower right section of the pendant; let it dry for about two minutes. Clean your brush with the alcohol and towel.
After all sections are dry, paint them again. Be careful not to let the inks bleed into another section; don’t load the brush too heavily with ink. Wipe any excess ink off the sides of the bezel with your alcohol and towel.
-
Making the square detail pieces:
Using the Clay Conditioning Machine on #7 setting, make a sheet of Black clay. Using the Super Slicer, cut a 1-inch square; place a piece of silver leaf onto the clay. If you have a 1/4-inch square cutter, you can use this to cut out your squares. If not, use the Super Slicer and ruler to cut out your squares. As in step 5, paint your squares, one Cool Stream and one Citrus.
Let them dry for two minutes and then place them onto the pendant with a small dab of the Bake and Bond. Bake the pendant for 30 minutes at 275 °F (130 °C).
-
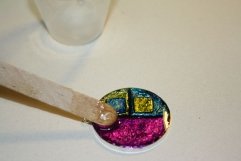
Applying the resin:
Place the pendant on a piece of wax paper in case of spills. Make sure you’re working in a well ventilated area. Use about ¼ of an inch of the resin in the applicator tube. To mix the resin, use a wooden stir stick and a disposable plastic cup. Following the directions on the resin package, mix and stir the resin; let it rest for five minutes before pouring onto the pendant. Slowly pour the resin onto the pendant and spread with the wooden stir stick. Let dry completely.
-
Assembling the necklace:
Using the jump ring provided with the finding set, attach the pendant to the cord.
Your Recently Viewed Projects
Thanks for your comment. Don't forget to share!
mulberrygalprinces s
Apr 30, 2017
This is very pretty but very complicated and time consuming. Not to mention the cost. The ink alone , in my area is five dollars a bottle. The leaf is double that. By the time you get done you could have purchased two of these online. I know it's gratifying making your own but I am on a limited income and this is out of my reach.
Report Inappropriate Comment
Are you sure you would like to report this comment? It will be flagged for our moderators to take action.
Thank you for taking the time to improve the content on our site.