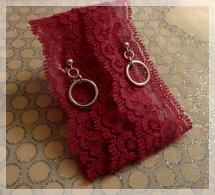
DIY Fabric Trim Earrings and Choker

Have some pretty fabric trim laying around that you're not sure what to do with? This DIY Fabric Trim Earrings and Choker set is a super cute beaded jewelry idea that may give you some inspiration. Watch the video to see how easy it is!
Project TypeMake a Project
Bead TypeMetal
Time to CompleteUnder an hour
Bead Project TypeNecklace, Earrings

Materials:
- Fabric trim
- Needle
- Thread
- Scissors
- Ear wires
- Clear nail polish or jewelry glue (optional)
- Measuring tape
- Scissors
- Ribbon clasp closure
- Jump rings
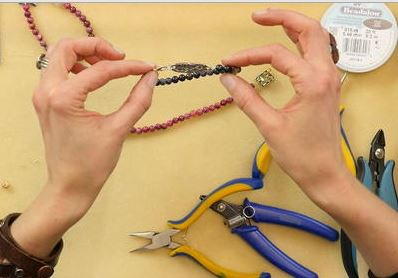
- Jewelry pliers
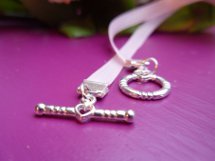
- Necklace closure (suggested use: lobster claw, toggle, or hook)
Instructions:
Earrings:
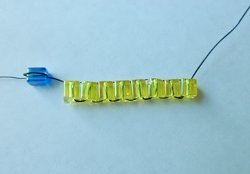
- Clip the beads and dangles from the trim and organize in the order you wish to have for your earring.
- Thread your needle and knot the end (may use a bit of glue or nail polish to seal the knot).
- Starting with a bead towards the middle, thread the beads onto the needle and thread. Thread through the loop on the earwire and then loop back through the beads again in the opposite direction. Pull on the thread gently, adjusting the beads so that they are close to the earwire and the knot is buried in the bead.
- Continue to thread the remaining bead(s) and charm. Loop around charm and thread back up through the beads, past the bead containing the earlier knot.
- With the needle, pass between the 2 threads in the space between 2 beads and then knotting (by passing the needle through the loop) and gently tug the thread until a tiny knot is created on the thread between the beads. Clip the thread very close to the knot and either dab with jewelry glue/clear nail polish or tuck inside the bead using the needle.
Necklace:
- Using the measuring tape, measure your neck for the correct measurement for your choker (or longer necklace/bracelet) and cut the trim to that measurement.
- Take the ribbon clasp closure and clamp to both ends of the trim (can use pliers to clamp firmly).
- Open jump ring gently (either with fingers or pliers) and attach along with one side of your closure (toggle, hook or lobster clasp) to one end and close the jump ring.
- Open another jump ring and attach to other end (for lobster clasp closure, only the jump ring is needed. If using another closure, attach the other end of closure to the jump ring). Close jump ring securely.
Note: Use the same process for making a bracelet, using the toggle or hook closures.
Your Recently Viewed Projects
Thanks for your comment. Don't forget to share!
EditorLP
Jul 05, 2018
Hi kristinagrindle 69 68486, our apologies for the inconvenience. We've updated the article and the video now appears to be working properly. You may need to make sure Flash is enabled on your browser to watch the video. We hope this makes this project easier to understand! - Editors of AllFreeJewelryMaking
kristinagrindle 69 68486
Jul 02, 2018
Where is the video that I can watch? I want to make this but do not understand what the directions are telling me.
reginampartain 739 2801
Aug 26, 2013
Very nice. I am looking forward to making one. http://www.regina-atthelake.blogspot.com
Report Inappropriate Comment
Are you sure you would like to report this comment? It will be flagged for our moderators to take action.
Thank you for taking the time to improve the content on our site.