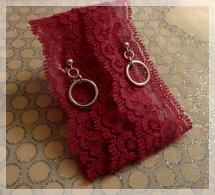
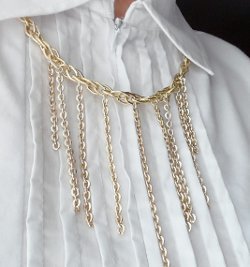
Crystal Chandelier Earrings Tutorial

Need a pair of earring to make your outfit stand out? This Crystal Chandelier Earrings Tutorial will teach you how to make just that! This is one of our party perfect free bead earring patterns.
Project TypeMake a Project
Bead TypeCrystal
Time to CompleteIn an evening
Bead Technique UsedChainmail/Wirework
Bead Project TypeEarrings

Materials:
- (52) 4mm faceted round bead
- (8) 4mm round beads
- (8) 8mm faceted round beads
- (2) 10mm faceted round beads
- (8) eye pins
- (10) head pins
- (2) 5mm jump rings
- (2) ear wires
- Memory wire
- Heavy duty wire cutters
- Round-nose pliers
Instructions:
- String an 8mm faceted bead onto a head pin. Form a loop at the top. Repeat 3 more times.
- String a 10mm faceted bead onto a head pin. Form a loop at the top.
- String a 4mm round bead onto an eye pin. Form a loop at the top. Repeat 3 more times.
- Take one of your 4mm round beads on an eye pin and open one of the loops. Attach another 4mm round bead on an eye pin and close the loop. Take the 10mm faceted bead on a head pin and attach it to the bottom loop of the 4mm bead chain.
- Take one of your 4mm round beads on an eye pin and open one of the loops. Attach an 8mm bead on a head pin and close the loop. Repeat once more.
- Take your memory wire and cut a little less than one loop. Form a loop at one end of your cut wire.
- String eleven 4mm faceted beads onto the memory wire. String an 8mm bead on a head pin onto the memory wire. String on a 4mm faceted bead. String on the 4mm and 8mm bead chain. String on a 4mm faceted bead. String on the two 4mm and 10mm bead chain. String on a 4mm faceted bead. String on the 4mm and 8mm bead chain. String on a 4mm faceted bead. String on the 8mm bead head pin. String eleven more 4mm faceted beads.
- Form a loop at the end of the memory wire. Bring both end loops together and attach a jump ring. Open the loop of one of the ear wires and attach the jumpring. Close the loop.
- Repeat steps 1-8 for other earring.
Your Recently Viewed Projects
Thanks for your comment. Don't forget to share!
Weberme
Jun 30, 2016
I have got to make some of these for my mom she will love them.Growing up I remember her wearing hoop earrings all the time but these give it that added bonus of the beautiful beads around hoop and dangle beads. This will be one of her Christmas gifts. I am so thrilled to learn how to make these hoops which this video shows you how. How many people remember your mother wearing these growing up?
Bliss777
Feb 17, 2013
Love the look & the easy to follow tutorial. Can't wait to make them tonight!!!
Ladyraink
Jan 06, 2013
A little tedious but very awesome. Mine turned out wonderful even though it was only my second attempt at making anything like this!
Report Inappropriate Comment
Are you sure you would like to report this comment? It will be flagged for our moderators to take action.
Thank you for taking the time to improve the content on our site.