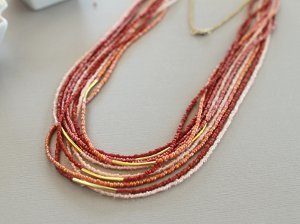
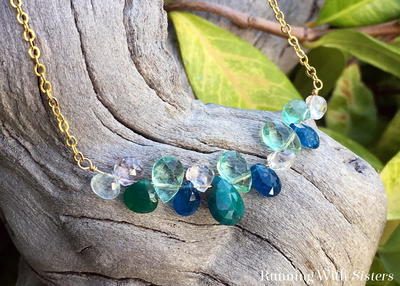
Fairy Circle Necklace

Prepare to be enchanted by this pretty necklace pattern. The Fairy Circle Necklace finishes off any outfit to perfection--just like magic! The translucent wire used in this DIY necklace from Beadalon gives the effect of floating beads, almost as if a spell has been cast upon them. This necklace design is as light and airy as its nymph-like namesake. You'll hardly notice this piece around your neck, but everyone else sure will! Get started today crafting this enchanting piece of DIY jewelry and prepare to dazzle those around you!
Project TypeMake a Project
Bead TypeGlass, Miscellaneous
Time to CompleteIn an evening
Bead Technique UsedStrung
Bead Project TypeNecklace

Materials List
- (12) 10mm blue topaz faceted Czech glass rounds
- (16) 6x9mm blue, white, green swirled Czech rondelles
- (17) 4x7mm lavender Czech glass rondelles
- (12) textured silver plated closed rings (314B-144)
- (1) silver-plated 2-strand clasp (355B-010)
- (4) size 3 silver-plated crimp tubes (JFCT3S)
- (2) 20-inch segments .018 19 strand purple Beadalon Clear Colors wire (JW15PU)
- (2) 20-inch segments .018 19 strand green Beadalon Clear Colors wire (JW15GR)
- (24) 3x4mm oval silver-plated jump rings (314B-109)
- Designer Ergo Round Nose Pliers (201E-030)
- (2) pairs Designer Ergo Chain Nose Pliers (201E-020)
- Designer Ergo Cutter (218H-030)
- Bead mat (202E-002)
Instructions
-
Remove two 20-inch sections of each color wire.
-
Create six lavender rondelle coiled dangles.
-
Create six swirled rondelle coiled dangles.
-
Attach wires to one end of the clasp, one of each color on each loop of the clasp with purple to the outside, using two crimp tubes. Use chain nose pliers to pull the two wires through the crimp, leaving room for play between crimp tube and clasp.
-
Uncross wires inside of tubes and crimp. Clip off excess wire tails flush to the bottom of crimp tube, leaving longer strands for making the necklace.
-
Slide 10mm round on two center green wires.
-
Slide inner and outer wire on one side through a lavender rondelle.
-
Slide inner and outer wire on opposite side through a swirled rondelle.
-
Place inner wires (should be green) through another blue round.
-
Continue weaving wires in and out of beads, alternating placement of lavender and swirled rondelles each time.
-
The key to these designs is tension--not too taut but not too loose. As you work, continue to slide the beads down the wire and create tension.
-
When you reach the final blue round, work your way back through the wires to adjust the tension. The choker should be fairly flexible but also have a definitive form. The spaces between the beads should be equal to support this form.
-
Attach wires to opposite end of the clasp as before. Keep the design rounded to maintain form as you crimp. Make sure wires are crimped evenly.
-
Attach textured circles to the bottom of the choker using two pairs of chain nose pliers to open jump rings. Place the circles after the first large bead in the pattern and after each large bead as you continue along the choker.
-
Attach the pre-made coiled dangles, starting with lavender and alternating between lavender and swirled rondelles hanging from the bottom of the textured circles using jump rings.
-
Check back through design to ensure all jump rings are properly closed.
Up Next:
Your Recently Viewed Projects

Thanks for your comment. Don't forget to share!
Hippie Chick
Jan 17, 2018
I noticed that the picture for this posting was provided by Beadalon. So I paid their site a visit in hopes of seeing more pictures or feedback about this project. They do have a section of projects with downloadable PDFs and a section of ideas. I put fairy circle in their search bar, but got nothing.
sandi b
Jun 15, 2013
I love the necklace and would like to print it but there doesn't' seem yo be any option to do so. How can I do so? Sandi B
lleeahs
Jun 15, 2013
Hold your mouse pointer over the options for pinterest, facebook, email, etc. and a menu that includes print should pop up.
lleeahs
Jun 15, 2013
should have added that you hover over the last option (blue P) to get the sub-menu.
Report Inappropriate Comment
Are you sure you would like to report this comment? It will be flagged for our moderators to take action.
Thank you for taking the time to improve the content on our site.