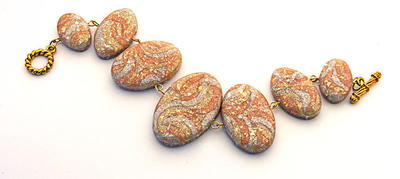
Golden Opal Ovals Bracelet

Perfect for the autumn and winter seasons, or anytime you want a little golden shimmer, this Golden Opal Ovals Bracelet is absolutely stunning. Follow this jewelry making tutorial and craft a gorgeous DIY bracelet that will have your friends and family saying "I can't believe it's clay!". This DIY jewelry design is fabulous for October birthdays and holiday gifts; just don't forget to make a bracelet for yourself! This mosaic laminate is so fun that you won’t want to stop making DIY clay jewelry once you make this fabulous homemade bracelet. Yes, even with the sanding and the glazing, you are still going to have a blast making this jewelry project.
Project TypeMake a Project
Bead TypeMiscellaneous
Time to CompleteWeekend project
Bead Project TypeBracelet


Find this project and many more in our new eBook, 7 DIY Christmas Gifts: Handmade Gift Ideas You'll Love. Filled with lots of great DIY gift-giving ideas, this new printable collection will help you tackle your gift list in no time! Download your own free copy today!
Materials:
Clays
- Premo! Accents Opal – 2 blocks
- Premo! Accents White Gold, Yellow Gold, Rose Gold – 1/2 block each
Sculpey Tools
- Clay Conditioning Machine
- Super Slicer
- Graduated Circle Cutters
- Graduated Oval Cutters
- Acrylic roller
- Etch n’ Pearl
- Gloss Glaze
- Wet/Dry Sandpaper Variety Pak
Have on Hand
- Deli/Candy paper
- 10-12 gold eye pins
- Wire cutters
- Instant glue
- Soft t-shirt or flannel rag (small piece)
- Clasp for bracelet closure
Instructions:
- Getting Started: Polymer clay may stain. CLAY MAY DAMAGE UNPROTECTED FURNITURE OR FINISHED SURFACES. DO NOT USE polymer clay on unprotected surfaces. We recommend working on the Sculpey clay mat, wax paper, metal baking sheet, or disposable foil. Start with clean hands and work surface area. Knead clay until soft and smooth. For best results, clean your hands in between colors. Shape clay, pressing pieces together firmly. Bake on oven-proof glass or metal surface at 275°F (130 °C) for 30 minutes per ¼" (6 mm) thickness. For best baking results, use an oven thermometer. DO NOT USE MICROWAVE OVEN. DO NOT EXCEED THE ABOVE TEMPERATURE OR RECOMMENDED BAKING TIME. Wash hands after use. Baking should be completed by an adult. Begin by preheating oven to 275 °F (130 °C). Test temperature with oven thermometer for perfectly cured clay. For best results, condition all clay by running it through the Clay Conditioning Machine for several passes on the widest setting. Fold the clay in half after each pass and insert the fold side into the rollers first.
- Roll out 1/3 of the Opal clay and ½ of the White Gold clay on the #1 (widest) setting on the Clay Conditioning Machine. Use the 1” cutter (next to smallest) to cut out 2 circles of Opal and 1 circle of Gold. This 2:1 mix is what is used for all the colors. Mix the colors together until they look like this bottom sheet. Roll the mixed sheet out on a #5 (thin) setting and set aside. Repeat with the other two colors of gold clays.

- Roll out ½ of the Opal clay on the largest setting to be the base of your mosaic. Use the smallest circle cutter to cut a half moon shape out of one of the blended sheets of clay and place on the center of the Opal sheet.

- Continue to add half moons of the three colors and build your mosaic pattern. Try not to have any space between the pieces.

- Change directions of your half moons frequently. You may need to cut out small ovals to fill spaces between direction changes. NOTE: The circle cutter from the Sculpey Mini Cutter Basics set can be used to help cut these little pieces.

- Once you have a large section of the mosaic complete (you should be able to set your oval cutters lightly on top to see if you have at least 3 ovals you can cut), place a sheet of the deli/candy paper on top and rub the surface with the acrylic roller. You aren’t rolling with this roller, but rubbing in circles. Start with a gentle pressure and gradually increase the amount of pressure, making sure that you are doing the edges as well.

- Periodically peel the deli/candy paper up to check on your progress (that paper makes it look like it’s all smooth and ready to go when there is still work to be done.)

- Once you are satisfied with the smoothness of the mosaic laminate (or just sick of rubbing with the roller!). Remove the paper completely and mount the laminate on another sheet of Opal (or scrap Opal/Glitter Gold mix), sheeted on the widest setting.

- Place the sheet of deli/candy paper on top, stretching it to smooth is out as you place it. Position your oval cutter and press firmly through the paper and clay and wiggle slightly to make sure that the cut is all the way through. NOTE: I set a block of wood on top and press on the wood so I don’t bruise my hand on the cutter! Try to cut as many size ovals as you can from each sheet of laminate.

- Repeat the steps above to create the ovals for your bracelet.

- Use the Etch n’ Pearl tool to smooth the back and side edges of each oval.

- Use small sharp scissors or even nail clippers to trim off any opal flakes protruding from the edge of each oval. (Sanding can’t remove some of these).

- Trim the eye pins to about ¼ inch length and insert one in the center of each side of the ovals.

- Place the ovals on a clean sheet of paper and bake as directed above.
- Once the pieces have baked and cooled, it’s time to sand. I spray a 500 grit piece of sandpaper with water, dip the oval in a small bowl of water and gently rub the top surface of the oval in a circular pattern. Rinse the oval in the bowl of water and hold the oval so that you can sand the sides to smooth them. You can remove the eye pins to do this step!

- I hate brush strokes in a glaze and I don’t like thick layers of glaze, so I use the same technique I use as the finish layer on furniture. I paint a layer of glaze onto the opaline oval and then I quickly rub it lightly with a small piece of soft t-shirt or flannel (I’m using a piece of an old flannel bedsheet) to remove the glaze. I repeat these two steps about 4 times (you don’t need to wait for anything to dry because the flannel removes most of it.) You will create a soft shine with no brush strokes. I lightly brush a little glaze on the edges, taking care not to seal my holes for the eye pins.

- Glue the eye pins into place, making sure that they are positioned 90 degrees to each other. (Look at the eye pin position in the sanding photo – see how one is flat and the other is sideways to the camera?)
- Once the rubbed glaze is completely dry and the eye pins are glued and dry, you can assemble your Golden Opal Oval bracelet! Now get started on the matching pendant!


 ENTER TO WIN!
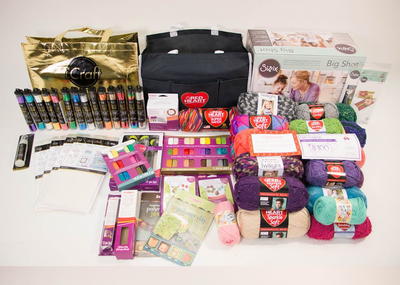
We're giving away a Spectacular Christmas Giveaway to help celebrate the launch of our new eBook, 7 DIY Christmas Gifts. With more than $500 in prizes, this is any craft lover's dream come true! But you better hurry! This giveaway ends November 22nd! Enter today!
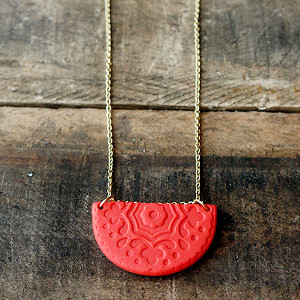
Read NextCreative Coral Pendant
Your Recently Viewed Projects
Thanks for your comment. Don't forget to share!
mulberrygalprinces s
Apr 30, 2017
I love this project. I have made a few beads with sanding and glossing but this seems a little different and I am always open to new ideas. It will make a gorgeous gift if I also add a pair of earrings. This jewelry is light weight yet durable and the colors are only limited by your imagination.
Report Inappropriate Comment
Are you sure you would like to report this comment? It will be flagged for our moderators to take action.
Thank you for taking the time to improve the content on our site.