Hollow Lentil Bead

Hollow Lentil Bead
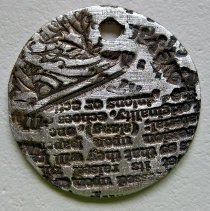
Become a true jewelry artist with this tutorial on making a Hollow Lentil Bead. Learn how to make clay beads to add an earthy sophistication to your jewelry designs. These beautiful beads will take your jewelry designs to the next level.
Project TypeLearn a Technique
Bead TypeMetal
Time to CompleteWeekend project

Materials:
- 20 gm Art Clay Silver 650
- 5 gm Art Clay Silver syringe
- Green nozzle
- Low relief texture plates or stamps
- Standard sized straw
- Non-stick work surface
- Regular light bulb or ornament x 2
- Roller
- Slats 1mm
- Dehydrator or hair dryer
- Olive oil
- Flat end paintbrush
- Files
- 600 and 1200 grit sandpaper
- 2” round cookie cutter
- Liver of Sulfur
- Hot water
- Cold water
- Scrap wire for hanging
- Bamboo skewer
- 2 small bathroom cups
- 1 tbsp. baking soda
- Programmable kiln or Butane Torch & Fire Brick
- Fire blanket
- Agate burnisher
Instructions:
-
Roll half of the clay into a ball. Flatten on the work surface, place your slats on either side of the Teflex, and roll into a circle about 2 inches in diameter.
-
Transfer the circle onto your textured surface and roll into the texture you created, keeping the circle as round as possible.
-
Flip the stamp over and allow the clay to fall off into your hand. Place the clay circle back onto the work surface. Use the 2-inch cookie cutter to cut out a perfect circle. Place a wet paper towel over the cut circle. Repeat steps 2-4.
-
Lay the circles on top of each other gently. With the straw, cut half a circle out of the edge of the two clay circles. Go to the other side of the circle and do the same. When the sides are put together, this will be the opening for the chain or cord.
-
Place the ornaments or light bulbs on top of the two bathroom cups. Oil the bulbs or ornaments lightly.
-
Gently separate the clay circles and transfer them to the surface of the oiled light bulb or ornament near the end where it is roundest. Ease the edges of the circle down so they are flat against the bulb or ornament. Dry thoroughly.
-
After the clay has dried, gently remove it from the bulb and continue to dry for several more minutes until no more moisture remains.
-
To prepare to attach the two sides together, take a flat file and flatten the inside edge all the way around the bead half. Brush all of the filings onto the table but do not discard. Repeat with the other half.
-
Before attaching the two halves, put them together dry, lining up the holes so they are opposite each other. Check the seams to make sure they meet properly all the way around.
-
Separate the two halves again and, with the green nozzle on the Art Clay Syringe type, lay down a thick bead of syringe clay on the flat edge of the bead. While still wet, add the other side, making sure the holes line up. Apply a small amount of pressure to make sure the seams meet firmly. Smooth any syringe that squeezes through the seam with a damp paintbrush. Fill any seam cracks with additional syringe clay. Allow to dry.
-
Use files, the 600-grit sandpaper, and the 1200-grit sandpaper to smooth the seams without disturbing the texture. Repair any exposed seams as needed. Dry thoroughly.
-
Fire the bead on the fiber blanket at 1,600 F for 10 minutes or with a butane torch for 3-4 minutes. Allow to cool.
-
Brush the bead using the stainless steel brush. Burnish the design’s highlights with the agate burnisher until shiny. Alternatively, tumble the bead with 2 pound stainless steel shot, water, and dish liquid or burnishing liquid for at least 1½ hours. Rinse thoroughly.
-
Mix a thumbnail-sized chunk of liver of sulfur (or a tablespoon of LOS Gel) into a cup of steaming hot water. Stir well with the bamboo skewer. Fill the second cup with clean, cold water. Fashion the length of scrap wire into a hook and hang the bead through the holes.
-
Dip the bead very quickly into the hot water and then into the cold rinse water. Check the colors. You will first get gold, then amber, then magenta, then blue, then black, depending on how long you dip and how quickly you rinse. Continue to use the Liver of Sulfur until you get the colors you want. You can also take the entire bead to black, then use a polishing cloth to remove the patina from the high spots. Make a paste of the baking soda and water, and gently rub the piece. Then rinse thoroughly under cold water and pat dry. Dispose of the liver of sulfur down the drain while running hot water for one minute.
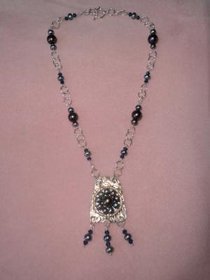
- Complete your piece with the chain or cord of your choice. Your one-of-a-kind bead is now complete!
Read NextPMC Diamond Ring