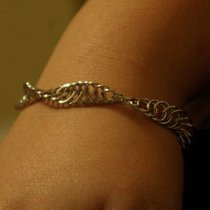
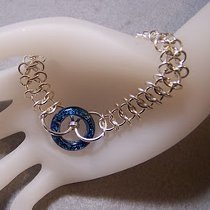
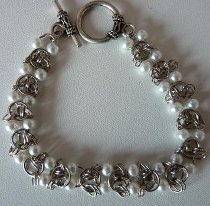
2 in 2 Chain Maille and Bead Bracelet Part 2

If you've finished part 1, get started on finishing your bracelet. In this part, you'll learn the real basics of chain maille and make a bracelet that will leave your friends' jaws on the ground when you tell them you made it yourself. You will soon be able to incorporate your double ended double wire loop bead units with basic chainmaille links to create a fabulous DIY bracelet. Sparking, shiny, and easy-to-make, you cannot ask much more of a homemade bracelet.
Project TypeMake a Project
Bead TypeCrystal
Time to CompleteIn an evening
Bead Technique UsedChainmail/Wirework
Bead Project TypeBracelet

The instructions for this bead chain maille bracelet were graciously written by Wanda Epps.
Jewelry Making Supplies:
- sixty four 18 gauge 6mm OD (outside diameter) 3.5mm ID (inside diameter) unsoldered jump rings
- four 2 1/4 inch (5.7 cm) lengths of 20 gauge round wire
- four 8mm cosmojet Swarovski® crystals
- one toggle clasp
Jewelry Making Tools:
- wire cutters
- round nose pliers
- chain nose pliers, two pair
Instructions:
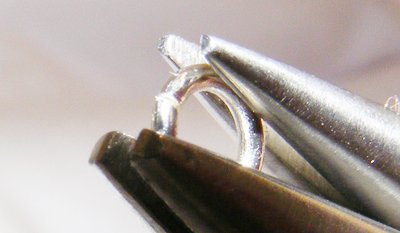
- To open a jump ring, grasp the jump ring on both sides of the opening in the jump ring with the jaws of two pair of chain nose pliers parallel to the opening. Rotate one of the chain nose pliers forward (towards you) and one of the chain nose pliers backward (away from you).
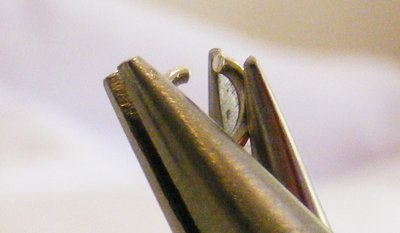
- To close a jump ring, move the pliers in the opposite direction until the ends of the jump ring meet. Leave no opening in the jump ring. In the end, well closed jump rings make neater and better looking finished jewelry.
- Lie two closed jump rings atop one another onto your work surface. Open one jump ring.
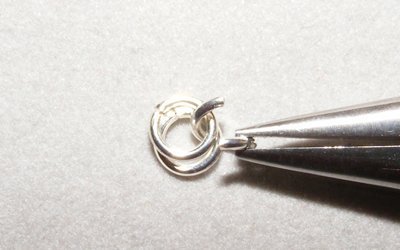
- Using the chain nose pliers (or your fingers), slide the two closed jump rings onto the open jump ring. Close the open jump ring.
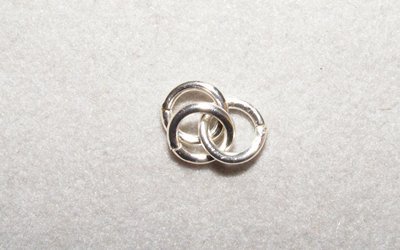
- Open one jump ring. Using the chain nose pliers (or your fingers), slide the two originally closed jump rings onto the open jump ring.Close the open jump ring. You now have two pair of interconnected jump rings, hence the name 2-in-2 chain weave.
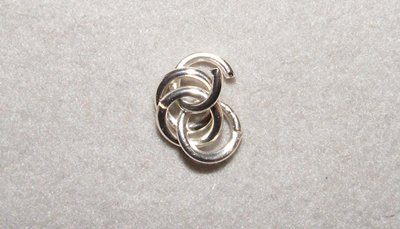
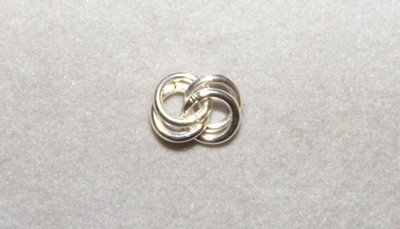
- Repeat Steps 15 - 17, connecting two open jump rings to the last two closed jump rings on the emerging chain until you have six (6) pairs of interconnected jump rings.
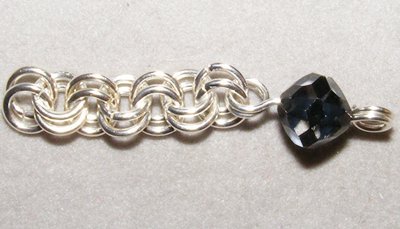
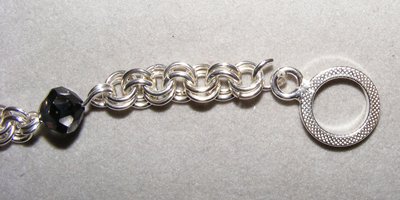
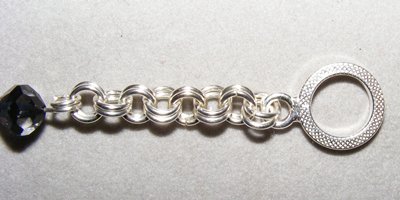
- Open one jump ring and slide it into the sixth pair of jump rings and one of the double wire loops of a bead unit. Close the jump ring.

- Open another jump ring and slide it into the sixth pair of jump rings and the same double wire loop of the bead unit. Close the jump ring.
- Open two jump rings. Slide them one at a time into the second double wire loop of the bead unit. Close each jump ring as you go.
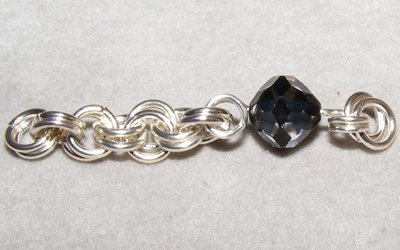
- Open, connect and close four more pairs of jump rings. double wire loop of another bead unit.
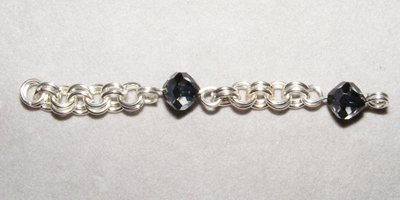
- Repeat Steps 9 and 10 with twice more. On the second double wire loop of the last bead unit connect seven pairs of jump rings.
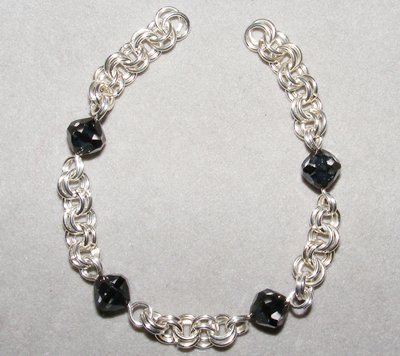
- Place the unfinished bracelet around your wrist determine if you need to add any more pairs of jump rings. The bracelet should be within 3/4 inches (1.9 cm), the length of the clasp, of your desired length.
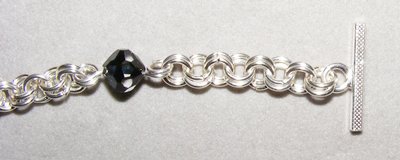
- On my bracelet I added one pair of jump rings, for a total of eight pairs, to each side of the chain before I attached the clasp. Open two jump rings. Slide them one at a time into the last pair of jump rings and the ring of one half of the toggle clasp. If you need to remove any pairs of jump rings, open the last pair of jump rings on one end of the chain and remove them. Remove however many pairs you need to from each side of the chain until you get a good fit.
- If you do not need to add any pairs of jump rings to your bracelet, open the last pair of jump rings and slide them into the ring of one half of the toggle clasp. Close each jump ring as you go.
- Repeat for the second side of the bracelet using the second half of the toggle clasp.
- You're done.Your 2-in-2 chain maille bead bracelet is complete!
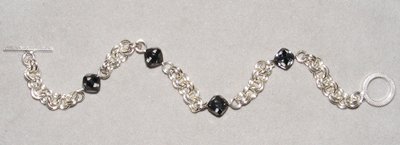
Approximately 8 inches (20.3 cm)
If you missed the first half, go back to part 1.
Read NextBeginner's Infinity DIY Bracelet
Your Recently Viewed Projects
Thanks for your comment. Don't forget to share!
Report Inappropriate Comment
Are you sure you would like to report this comment? It will be flagged for our moderators to take action.
Thank you for taking the time to improve the content on our site.