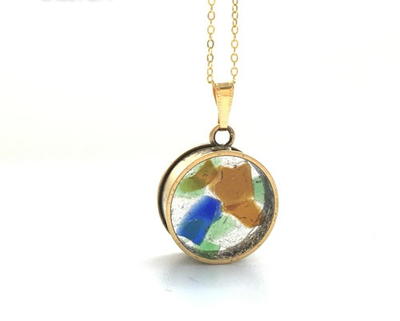
Glass Photo Pendant

Glass Photo Pendant
Looking for some more complex jewelry making projects? Try making this Glass Photo Pendant. No, it's not just gluing a picture to the back of a glass tile. Use fuse-able glass to make this awesome pendant last forever!
Project TypeMake a Project
Bead TypeGlass
Time to CompleteIn an evening
Bead Technique UsedGlass Beadmaking
Bead Project TypeNecklace

This project was contributed by Diamond Tech.
Materials:
- Fuseworks™ Microwave Kiln
- Fuseworks™ Kiln Paper
- Fuseworks™ Fusible Shapes – one each white and blue
- Fuseworks™ Milliefiori – small 1/16” optional
- Fuseworks™ Image Art Photo Paper
- Fuseworks™ Small Gold Bale
- E6000® or other glass glue
- High iron oxide laser jet printer
- Photo manipulating program
- Photograph
Instructions:
-
Follow the manufacturer’s instructions. Select size and print the desired photo for your pendant on Image Art Paper.
-
Clean glass using paper towel moistened with water. Completely dry the surface of the glass with a lint free cloth.
-
Cut the desired decal to fit the surface of the white Fusible Shape. Place Image Art photo decal in water (preferably distilled) for approximately 30 seconds. Position the backing-paper against the fusible shape. The decal should slide off backing-paper easily. Use a delicate touch when handling the Image Art photo decals as they are fragile. Gently pat the moisture from the decal and glass with a clean, dry paper towel. Allow the decal to dry completely. This may take several hours depending on your climate. Any moisture left under the Image Art will cause it to adhere poorly when fired.
-
Cut a 2” X 2” piece of kiln paper. Remove the lid from the Fuseworks™ Kiln. Place the 2” X 2” piece of kiln paper on the kiln base.
-
Place the blue Fusible Shape in the center of the kiln paper. Cover with the white Fusible Shape, so the image faces up. OPTIONAL: For an added accent, adorn with a 1/16” thin piece of Milliefiori on top of the Image Art Decal.
-
Carefully set the base with glass inside the microwave. Cover base and glass with kiln lid.
-
If using a 1200-watt microwave, fuse at 50% power for 2 minutes. Then increase the power to 80% for an additional 2 minutes. If using a microwave with a lower wattage, increase the time to 2 minutes and 30 seconds. PLEASE NOTE: All microwave and kiln combinations will have different firing patterns. Be sure to take careful notes and log all fusing times for future use.
-
When time has expired, open microwave and, using Hot Mitts, carefully lift the lid enough to inspect the fusing process. Glass should have nicely round edges. If need be, add additional time in 15 to 30 second increments until the desired results are achieved. Remove kiln from microwave using the Hot Mitts and place on a heat resistant surface.
-
Cool the kiln on a heat resistant surface for at least 30 to 40 minutes with the lid on. WARNING: Removing the lid or peeking under the lid during the cooling will result in your piece cracking. Glass remains hot for a long time; handle with great caution.
-
Cool the glass completely. Remove the kiln paper under running water. Dry the glass with a soft cloth.
- Glue a small gold bale to the top of the Fusible Shape.
If you like this pendant tutorial, you'll love all the other patterns in our Mother's Day Jewelry Gifts: 8 Free Jewelry Making Tutorials eBook!
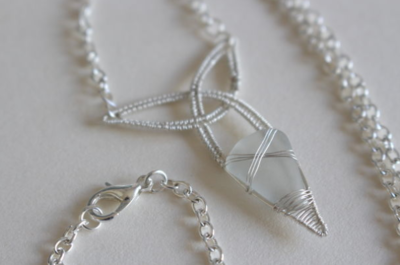
Read NextCeltic Knot Sea Glass Pendant