Spring Ribbon and Bead Necklace

Spring Ribbon and Bead Necklace
What a great way to start getting ready for the trees to start blossoming than by making a bright and fun Spring Ribbon and Bead Necklace? This is one of our favorite free jewelry patterns for Spring!
Project TypeMake a Project
Bead TypeMiscellaneous
Time to CompleteUnder an hour
Bead Technique UsedStrung
Bead Project TypeNecklace

Materials:
- Some beads: about 15-20 depending on the size
- About 2 yards of satin or sheer organza ribbon
- Plastic thread
- Some Tulle scraps (optional)
Instructions:
- Mark 15 inches from one end of ribbon. This is where you will start adding beads to the ribbon.
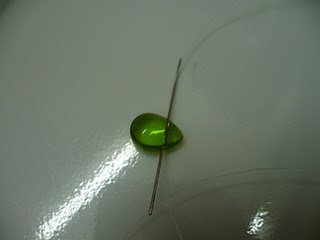
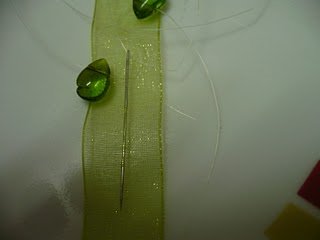
- Thread a needle with the plastic thread and tie a knot at the end. Now thread one bead with this thread.
- Once the needle is out of the bead, wrap it around and thread the same bead one more time. What we're doing here is trying to use the bead as a knot. For more stability loop your thread once through the loop over the bead as well.
- Now make a 3/4 inch long running stitch on the ribbon starting at the 10 inches mark you marked earlier.
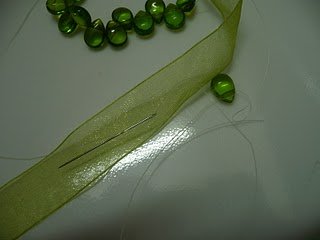
- When the needle comes out at the end of this running stitch thread another bead, make another running stitch about the same length as earlier, thread another bead, make another running stitch.
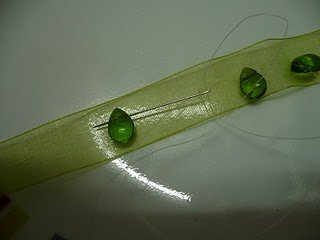
- What the above step will do is to get your ribbon to bunch up between your beads.
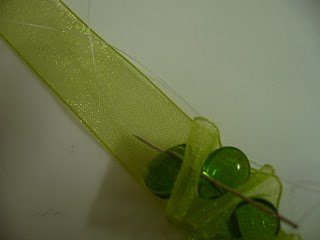
- Repeat this cycle and thread about 10 beads. At this point pull your thread and gently bunch up the ribbon and beads as close as possible.Now check the whole thing against your neck to see if you are happy with this size or you want more. If you need more keep adding the beads and making running stitches as shown earlier.
- Repeat this cycle and thread about 10 beads. At this point pull your thread and gently bunch up the ribbon and beads as close as possible.Now check the whole thing against your neck to see if you are happy with this size or you want more. If you need more keep adding the beads and making running stitches as shown earlier.
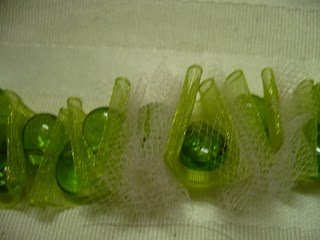
- Snip off any extra thread. Now tie the whole thing in your neck with a bow in the back. Snip off any extra length of ribbon. If you had used tear drop beads they will arrange themselves in a fashion where one bead is up and next bead is down and the next bead is up again. If you notice a couple of stray beads just arrange them with your hand, because this is the most natural position for the beads to settle they stay in this position.
Optional Steps:
- After threading every bead make 2 running stitches instead of one. If the ribbon is pretty it will show more this way.
- Cut some small tulle strips ( about 3 inches long and about the same width as the ribbon). Now thread the bead, make a running stitch on the ribbon and fold your tulle strip in an accordian fold and thread the needle through it. Make another running stitch on the ribbon. If you have matching tulle this will soften the look and give the necklace a more romantic touch.