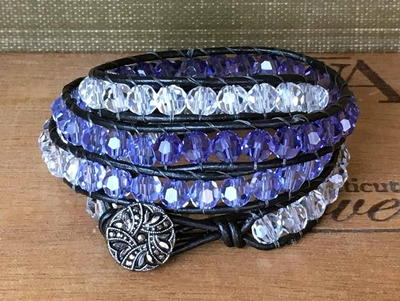
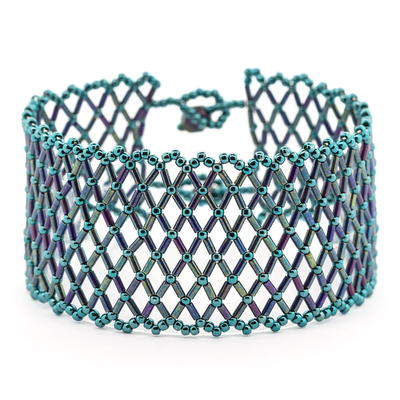
Mermaid Magic DIY Bracelet

Dive right in and learn how to make a bracelet that is seriously enchanting. This Mermaid Magic DIY Bracelet uses a netting stitch bead weaving technique to create a true blue beauty. Not all DIY jewelry has the shimmering iridescence of mermaid scales, and even fewer can capture the gorgeous scale pattern with just seed beads and beading thread. Like sunlight on the water, this dazzling DIY cuff is a magical sight to behold. Make your own with these step-by-step instructions from Fusion Beads.
Project TypeMake a Project
Bead TypeGlass, Seed
Time to CompleteIn an evening
Bead Technique UsedStitched
Bead Project TypeBracelet

Materials List
- 5 grams - Size 11 Higher Metallic Teal Hematite Round Japanese Seed Beads by Toho – 519 (SB5848)
- 5 grams - 3mm Metallic Midnight Purple Bugle Japanese Seed Beads (SB0692)
- 2 - 6mm Black Currant Polychrome Fire Polished Round Glass Beads (FP3720)
- 1 - Smoke Gray FireLine Braided Bead Thread .008 diameter - 6 lb/Size D (SM1001)
- Size 12 Pony 2 1/8 inch Long Beading Needles (TL2391)
- Xuron Thread and Fiber Scissors (TL3000)
- Thread Heaven (TL1027)
Instructions
-
Thread a needle with 5 feet of beading thread, leaving a 1-foot tail. Condition the thread with Thread Heaven.
-
String the following, forming the first row of netting stitch:
1 – seed bead
1 – bugle bead
1– seed bead
1 – bugle bead
1 – seed bead
1 – bugle bead
1 – seed bead
1 – bugle bead
1 – seed bead
1 – bugle bead
1 – seed bead
1 – bugle bead
1 – seed bead
1 – bugle bead
1 – seed bead -
String 4 seed beads (these beads form the turning beads at the end of the row) and 1 bugle bead, and pass through the seed bead before the last bugle bead strung in the previous row.
-
String 1 bugle bead, 1 seed bead and 1 bugle bead. Skip one seed bead after the one passed through in the previous step and pass through the next seed bead. Continue this pattern until you pass through the last seed bead in the row.
-
Repeat Steps 3-4 until the beadwork is 6.5 inches long (or desired length).
-
Exit from the second seed bead from one edge on the last row. String 19 seed beads, and pass through the first four seed beads strung, forming a loop for one side of the clasp. Reinforce the loop. Weave the thread to the opposite side of the bracelet on the last row, exiting from the second seed bead from the end. Repeat the loop made at the beginning of this step and reinforce. Weave the thread through the beadwork, trim the thread, and burn the thread end with a Perfect End Thread Burner.
-
Thread a needle onto the tail thread left behind in Step 1. Weave the thread to the seed bead in the first row corresponding to the one where one loop is attached on the opposite end. String five seed beads, one firepolished bead, and one seed bead. Pass back through the fire-polished bead and first five seed beads strung. Reinforce the attachment. Weave the thread to the opposite side of the bracelet on the first row. Repeat the button attachment made at the beginning of this step and reinforce. Weave the thread through the beadwork, trim the thread, and burn the thread end.
Up Next:
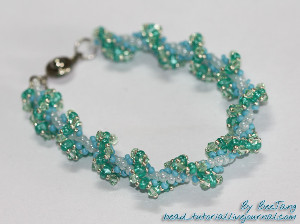
Read NextTwin Wave Bracelet
Your Recently Viewed Projects
Thanks for your comment. Don't forget to share!
Hippie Chick
Jan 17, 2018
I see that on this posting, the click to get pattern button has been replaced with a click to download pdf button. It is the first time I have seen or noticed it on this site before. Is this a new feature or have I just not noticed this before? I would actually prefer to have this on all of the patterns.
bustedinnc 0512678
Mar 01, 2017
Finally, a use for all of the seed beads in my stash. I love the "netted" look. They always look so complicated, but stringing or weaving them, really isn't as hard as it looks. A picture would be helpful. The wording is a bit confusing. But, I'm sure a go at it will clear that up fine.
margiekins22
Jul 18, 2016
This is absolutely gorgeous!! I do wish there were some pictures to follow along in the tutorial, but still stunning nonetheless!
Report Inappropriate Comment
Are you sure you would like to report this comment? It will be flagged for our moderators to take action.
Thank you for taking the time to improve the content on our site.