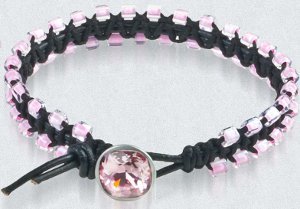
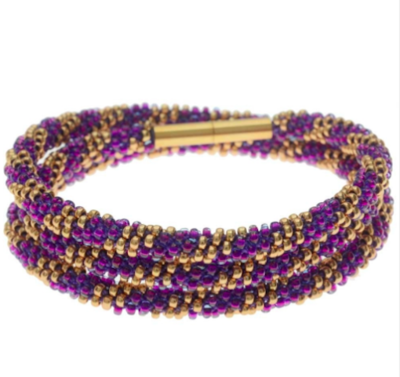
Briella Pink Kumihimo Necklace

The Briella Pink Kumihimo Necklace is the essential accessory for any jewelry-loving girly girl. This kumihimo tutorial shows you how to incorporate faceted beads into your kumihimo braiding for a glitzy necklace design that catches the light from every angle. If you're looking for new, interesting necklace patterns to try, this project should fit the bill. This is no ordinary necklace pattern, after all. Learn how to kumihimo braid a beautiful necklace that would make the perfect birthday gift for any October baby.
Project TypeMake a Project
Bead TypeCrystal, Miscellaneous
Time to CompleteIn an evening
Bead Project TypeNecklace

Materials:
- #34745019- 19.7yd 1mm Rayon Cord- Metallic Silver
- #34745006- 6mm 300pc Acrylic Faceted Rondelle- Black
- (2) #34713049- 52pc 6mm 18-Faceted Black
- #34713046- 52pc 6mm 18-Facet Crystal-AB
- #34712127- 2 Sets Large Toggle Pack- Silver
- #34712135- 200pc 6mm Open Jump Ring- Silver
- (2) #34699199- 1pc 10x14mm Trinkette Rhinestone- October
- #34712124- Fold Over Ribbon Pack
- #34745033- 5 3/8 1pc Round Disk
- #34745035- 1pc 2in Eye Needle
- 22279001- 1oz E6000 Glue
- Briella Necklace Project Sheet
- Needle Nose Pliers w/ Cutter
Instructions:
-
Cut two 7-1/4-inch lengths of chain.
-
Using 6mm jump rings, attach a toggle end to one end of each chain.
-
Attach 6mm jump rings to the other end of each chain.
-
Cut four 50-inch lengths of cord.
-
Bring the cord ends together and fold the cord in half. Bring the fold down through the center of the round disc.
-
Cut a scrap piece of cord (4+ inches) and tie it onto the center fold from step 2.
-
Align the cords as explained in the “Beaded Kumihimo” instruction booklet that came with the round disc.
-
Using the big eye beading needle, thread 24 pink beads onto the top two and bottom two strands, 24 black beads onto the left two strands, and 24 AB beads onto the right two strands.
-
Tie a small knot at the end of each cord to stop the beads from sliding off.
-
Follow the beaded instructions that came with the disc. Braid the cord 3/4 inches before adding the beads.
*This section will have a trinkette bead on it and a cord end attached to it.
-
Continue braiding with beads until all beads have been woven into the braid.
-
Braid a 3/4-inch tail after all of the beads have been braided in. Remove the cords from the disc and tie them into a tight single knot.
-
Thread a trinkette bead onto the tail, sliding the bead over the knot. Apply glue to the small knot and attach a fold over cord end.
-
At the 3/4-inch braided tail, remove the scrap thread and thread on a trinkette bead. Then apply a dot of glue and attach a fold over cord end.
*Allow the glue to dry according to manufacturer instructions (2+ hours).
-
Attach the fold over cord ends to the jump rings from step 3.
Your Recently Viewed Projects
Thanks for your comment. Don't forget to share!
mulberrygalprinces s
Nov 14, 2017
When you first look at the list of materials, you may think it's too much and skip on by. Please don't! Check your bead stash and read thru the directions and I am sure you can substitute a few things here and there. It's not a hard project and it's very pretty!
Report Inappropriate Comment
Are you sure you would like to report this comment? It will be flagged for our moderators to take action.
Thank you for taking the time to improve the content on our site.