How to Master Making Wire Jewelry

Learning how to wire wrap jewelry can be very difficult; and it can be frustrating to find a beautiful wire jewelry project with minimal instructions on how to wire wrap jewelry. Plus, incorporating wire into your DIY jewelry design can take your piece from pretty to extrodinary when done correctly.
Instead of staying frustrated at these gorgeous projects that you don't believe you can make, master your wire jewelry skills. By just learning a few extremely easy techniques and taking in a few extremely helpful tips, you can be better than all of your friends when it comes to crafting some wire wrapped jewelry.
This amazing wire jewelry guide can take you through how to make a simple loop to how to create a gorgeous spiral jewelry pieces and everything in between. Whether you are still working on mastering your beginner jewelry tutorials or you have moved to creating some advanced jewelry projects, you can benefit from this very helpful and amazing guide. You can learn how to master wire jewelry or how to perfect it, but you will love this guide no matter what!
How to Make Wire Jewelry
Wire Jewelry Guide
-
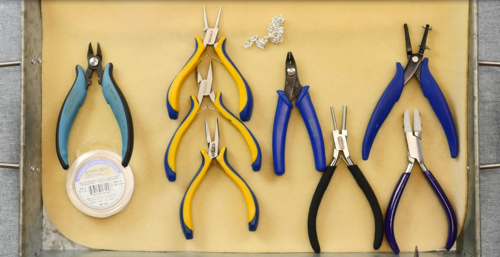
Supplies Supplies Supplies: One of the most important parts about jewelry making is having the correct supplies. For a better guide on the different types of jewelry making tools you can use check out this extremely helpful jewelry supplies video.
For working and creating wire jewelry you will want round nose pliers, needle nose pliers, curved nose pliers, wire cutters, and, obviously, wire. If you are just starting to work with wire jewelry it is highly recommended that you start with copper wire because it is much cheaper and easier to start off working with.
Also, take a peak at our jewelry supplies page for more information on different jewelry making tools you can use! -
Looping: Creating loops is the first and most basic wire jewelry technique you willw ant to master. While this is also the most simple, it is the foundation for all other wire designs you could want to make.
When making your loop you will want to grasp your wire in your round nose pliers. Starting pushing your wire away from you using your fingers. To really practice creating different loops look at these wire winged pearl earrings.
However, loops can also be used to create space between beads. This Funky and Fun Earrings tutorial is the perfect example of why loops are very important when it comes to beaded wire jewelry. -
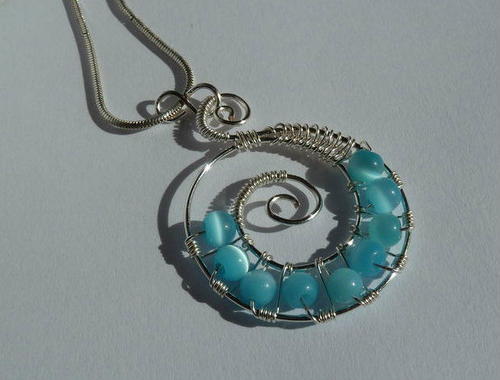
Beads: Speaking of beads, incorporating some wire wrapping techniques can really add some elegance to beaded jewelry. This Ocean Swirls Wire Pendant incorporates beads, wire, and wire wrapping all into one beautiful pendant that youc an easily make at home!
To add beads to wire jewelry, you wiill want to slide the bead onto your wire to begin. Once your bead is securly on your wire, pinch the wire between the appropriate flat nose pliers and using your finger bend the wire away from you at 90 degrees.
However if you wish to loop it, be sure to use your round nose pliers, create your loop and wrap wire around your loop to secure the bead in place. Projects like this Adorable Wire Wrapped Elephant Pendant, will definitely help you learn to incorporate beading and wire wrapping! -
Cutting Wire: If you are working with wire, at some point you are more than likely going to need to trip the wire or cut the wire.
It is crucial for you to appropriately cut your wire so you are not getting poked, prodded, or worse scrapped and cut. When using your wire cutters there will be a flat side and a pointed or sharper side.
You will want to cut your jewelry with the flat side facing whatever piece you will be working with. This way it will cut that side flat so it does not end up coming to a point. When you cut you will also want to hold both sides as you cut so the piece you are not holding does not go flying. -
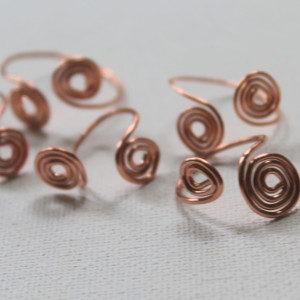
Spiral: This specific technique can be seen as the hardest technique to master when it comes to wire wrapping. While these designs may look intricate, you can master them easily.
When it comes to makeing a spiral make a loop with your round nose pliers like you typically would. You then want to grab your flat nose pliers after your loop is completed.
Place your single loop in between your flat nose pliers just enough so that the end of the loop is sticking out and begin slowly wrapping the wire using your fingers. A great tutorial to start learning wire wrapping is this Amazingly Adjustable Wire Rings tutorial.
Be sure to not keep too tight of a grip on your flat nose pliers as to keep from scratching the wire. Also, go in small movements with constant rotation rather than try and spiral one long piece at once. Once you've completely mastered your spiral wrapping technique try out this DIY Tree of Life Wire Pendant. -
HAVE FUN: Finally, no matter how many times you practice or how many DIY jewelry pieces you make, be sure to have fun while you're doing it. Don't stress about having the perfect spiral or the cleanest cut wire.
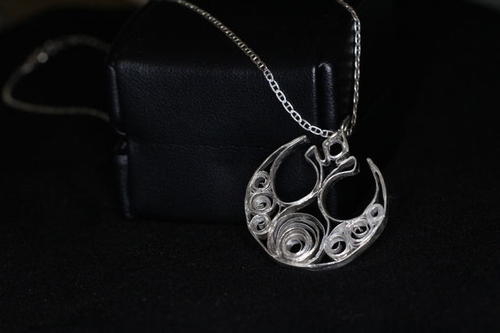
Make projects like this Star Wars Inspired Rebel Alliance Pendant for fun or this Go for the Gold DIY Bracelet and don't worry about having them turn out perfect! If you had a good time and it didn't turn out perfect you can always have a good time and try again tomorrow!

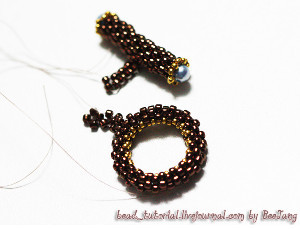
Read NextBar and Ring Toggle